Lasko AC4150PCA User Manual - Page 4
Directions For Use
 |
View all Lasko AC4150PCA manuals
Add to My Manuals
Save this manual to your list of manuals |
Page 4 highlights
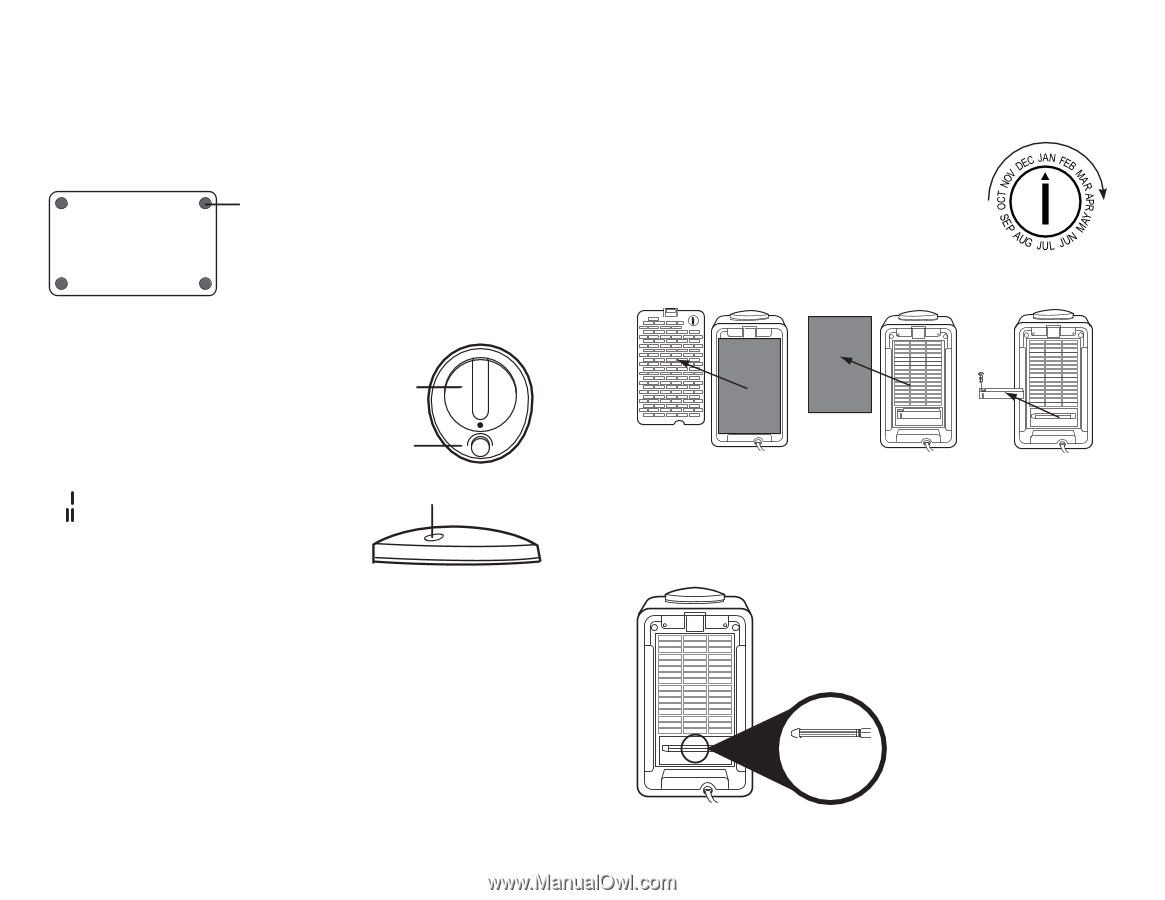
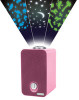
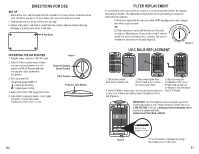
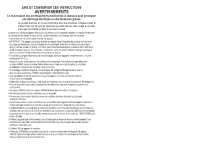
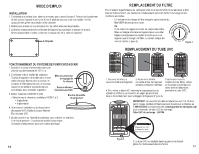
DIRECTIONS FOR USE SET UP 1. Select a firm, level and flat location for the air purifier. For proper air flow, locate the unit at least 1 foot from any wall or furniture. Make sure none of the grills are blocked. 2. Carefully remove your air purifier from box and bag. 3. Adhere 4 felt pads to unit base to protect table top surface. Remove adhesive backing and apply one pad to each corner of unit base. 4 Felt Pads OPERATING THE AIR PURIFIER 1. Plug the power cord into a 120V AC outlet. Figure 1 2. Select 1 of the 3 project lenses. Rotate lens cap counter clockwise to unlock position and lift off. Replace with new lens cap and rotate clockwise to lock position. 3. Turn unit power ON. • Select fan speed MODE 1-3 = lowest speed setting = highest speed setting Power & Variable Speed Control UV-C Control I II UV Projector Lens Button 4. Select UV-C ON or OFF using UV-C button. 5. Push button on projector lens to control lights. One push - 3 colors auto-rotate Continue to push for specific color E-6 III OCT NOV M AY FILTER REPLACEMENT To maintain the performance of the air cleaner, it is recommended that the filter be replaced about every 6 months. The replacement requirements will vary depending on usage and environmental conditions. 1. It's time to replace the filter when the white HEPA cartridge portion has changed from white to grey or black. OR 2. A filter date wheel is also built into the rear of the unit to track your filter changes. Simply set the wheel 6 months ahead from when it is replaced as a reminder. The wheel is marked with the months of the year (Figure 3). Figure 3 UV-C BULB REPLACEMENT DEC JAN FEB AUG JUL JUN MAR APR SE P 1. Lift and remove the Rear Cover from the unit. 2. After removing the Rear Cover from the unit, remove the Combination Filter. 4.The UV-C Bulb is removed by carefully grasping the bulb with a clean cloth or tissue and pulling the bulb straight out of the unit (Figure 4). 3. After removing the Combination Filter, use a Philips head screwdriver to remove screw and detach the UV-C Shield. IMPORTANT: The UV-C Bulb should be replaced every 10-12 months depending on use. Please contact Customer Service at 1.866.603.5900 or visit us at www.guardiantechnologies.com to purchase a replacement bulb. Replacement UV-C Bulb: LB4100. Figure 4 Pull UV-C Bulb straight out of unit. 5.The UV-C Bulb is reinstalled by sliding it, horizontally, back into the slots. E-7
-
 1
1 -
 2
2 -
 3
3 -
 4
4 -
 5
5 -
 6
6 -
 7
7 -
 8
8 -
 9
9 -
 10
10 -
11
-
12
-
13
-
14
-
15
 |
 |