Lenovo 6073ADU User Manual - Page 46
Problem, determination
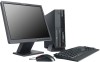 |
View all Lenovo 6073ADU manuals
Add to My Manuals
Save this manual to your list of manuals |
Page 46 highlights
3. Verify that the power cord is properly connected to an AC power outlet. 4. Verify that you are using a good AC power outlet. Plug another device into the outlet or contact the power company or supplier to verify that the outlet is working correctly . 5. Check the power cord continuity. 6. Replace the AC/DC power adapter. 7. Verify that the power cord from the AC/DC power adapter to the computer is properly connected. See "Connectors on the rear of the computer" on page 81. 8. Open the cover. See "Opening the cover" on page 84. 9. Check the Power switch/LED assembly connector on the system board. See "System board locations" on page 83. Reseat the cable from the Power switch/LED assembly to the system board. 10. Replace the power switch/LED assembly. 11. Replace the system board. See "Replacing the system board" on page 89. Problem determination tips Due to the variety of hardware and software combinations that can be encountered, use the following information to assist you in problem determination. If possible, have this information available when requesting assistance from Service Support and Engineering functions. v Machine type and model v Processor or hard disk upgrades v Failure symptom - Do diagnostics indicate a failure? - What, when, where, single, or multiple systems? - Is the failure repeatable? - Has this configuration ever worked? - If it has been working, what changes were made prior to it failing? - Is this the original reported failure? v Diagnostics version - Type and version level v Hardware configuration - Print (print screen) configuration currently in use - BIOS level v Operating system software - Type and version level Note: To eliminate confusion, identical systems are considered identical only if they: 1. Are the exact machine type and models 2. Have the same BIOS level 3. Have the same adapters/attachments in the same locations 4. Have the same address jumpers/terminators/cabling 5. Have the same software versions and levels 6. Have the same Diagnostic Diskettes (version) 7. Have the same configuration options set in the system 8. Have the same setup for the operating system control files 40 Hardware Maintenance Manual
-
 1
1 -
2
-
3
-
4
-
5
-
6
-
7
-
8
-
9
-
10
-
11
-
12
-
13
-
14
-
15
-
16
-
17
-
18
-
19
-
20
-
21
-
22
-
23
-
24
-
25
-
26
-
27
-
28
-
29
-
30
-
31
-
32
-
33
-
34
-
35
-
36
-
37
-
38
-
39
-
40
-
 41
41 -
 42
42 -
 43
43 -
 44
44 -
 45
45 -
 46
46 -
 47
47 -
 48
48 -
 49
49 -
 50
50 -
 51
51 -
52
-
53
-
54
-
55
-
56
-
57
-
58
-
59
-
60
-
61
-
62
-
63
-
64
-
65
-
66
-
67
-
68
-
69
-
70
-
71
-
72
-
73
-
74
-
75
-
76
-
77
-
78
-
79
-
80
-
81
-
82
-
83
-
84
-
85
-
86
-
87
-
88
-
89
-
90
-
91
-
92
-
93
-
94
-
95
-
96
-
97
-
98
-
99
-
100
-
101
-
102
-
103
-
104
-
105
-
106
-
107
-
108
-
109
-
110
-
111
-
112
-
113
-
114
-
115
-
116
-
117
-
118
-
119
-
120
-
121
-
122
-
123
-
124
-
125
-
126
-
127
-
128
-
129
-
130
-
131
-
132
-
133
-
134
-
135
-
136
-
137
-
138
-
139
-
140
-
141
-
142
-
143
-
144
-
145
-
146
-
147
-
148
-
149
-
150
-
151
-
152
-
153
-
154
-
155
-
156
-
157
-
158
-
159
-
160
-
161
-
162
-
163
-
164
-
165
-
166
-
167
-
168
-
169
-
170
-
171
-
172
-
173
-
174
 |
 |
