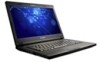
Lenovo E49 Laptop Hardware Maintenance Manual - Lenovo E49
Lenovo E49 Laptop Manual
 |
View all Lenovo E49 Laptop manuals
Add to My Manuals
Save this manual to your list of manuals |
Lenovo E49 Laptop manual content summary:
- Lenovo E49 Laptop | Hardware Maintenance Manual - Lenovo E49 - Page 1
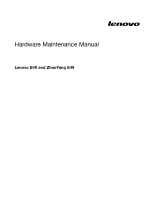
Hardware Maintenance Manual Lenovo E49 and ZhaoYang E49 - Lenovo E49 Laptop | Hardware Maintenance Manual - Lenovo E49 - Page 2
and the product it supports, be sure to read the general information under Appendix A "Notices" on page 91. Fourth Edition (May 2013) © Copyright Lenovo 2012, 2013. LIMITED AND RESTRICTED RIGHTS NOTICE: If data or software is delivered pursuant a General Services Administration "GSA" contract, use - Lenovo E49 Laptop | Hardware Maintenance Manual - Lenovo E49 - Page 3
the battery pack 31 Chapter 4. Related service information 33 Recovering the computer settings 33 Passwords 33 Power-on password 34 Supervisor password 34 Power management 34 Screen blank mode 34 Sleep mode 34 Hibernation mode 35 Chapter 5. Lenovo E49 and ZhaoYang E49 37 Specifications - Lenovo E49 Laptop | Hardware Maintenance Manual - Lenovo E49 - Page 4
ii Hardware Maintenance Manual - Lenovo E49 Laptop | Hardware Maintenance Manual - Lenovo E49 - Page 5
product-specific sections include service, reference, and product-specific parts information. Important: • This manual is intended only for trained service technicians who are familiar with Lenovo products. Use this manual to troubleshoot problems effectively. • Before servicing a Lenovo product - Lenovo E49 Laptop | Hardware Maintenance Manual - Lenovo E49 - Page 6
iv Hardware Maintenance Manual - Lenovo E49 Laptop | Hardware Maintenance Manual - Lenovo E49 - Page 7
be familiar with before you service a Lenovo Notebook. • "General safety" on page 1 • "Electrical safety" on page 2 • "Safety inspection guide" on page 3 • correctly before returning the machine to the customer. • Fan louvers on the machine help to prevent overheating of internal components. Do not - Lenovo E49 Laptop | Hardware Maintenance Manual - Lenovo E49 - Page 8
you work with very high voltages; Instructions for these precautions are in the safety cause personal injury and machine damage. • Do not service the following parts with the power on when they are - Power supply units - Pumps - Blowers and fans - Motor generators - Similar units to listed above This - Lenovo E49 Laptop | Hardware Maintenance Manual - Lenovo E49 - Page 9
service technicians from injury. This guide addresses only those items. You should use good judgment to identify potential safety hazards due to attachment of non-Lenovo features or options not covered by this inspection guide -specific ESD procedures when they exceed the requirements noted here. Chapter - Lenovo E49 Laptop | Hardware Maintenance Manual - Lenovo E49 - Page 10
people. • Wear a grounded wrist strap against your skin to eliminate static on your body. • Prevent the free work surface. The mat is especially useful when handling ESD-sensitive devices. • Select a grounding system, such as those listed below, to provide protection that meets the specific service - Lenovo E49 Laptop | Hardware Maintenance Manual - Lenovo E49 - Page 11
DANGER DANGER DANGER DANGER DANGER Chapter 1. Safety information 5 - Lenovo E49 Laptop | Hardware Maintenance Manual - Lenovo E49 - Page 12
DANGER 6 Hardware Maintenance Manual - Lenovo E49 Laptop | Hardware Maintenance Manual - Lenovo E49 - Page 13
Chapter 1. Safety information 7 - Lenovo E49 Laptop | Hardware Maintenance Manual - Lenovo E49 - Page 14
PERIGO PERIGO PERIGO PERIGO PERIGO PERIGO 8 Hardware Maintenance Manual - Lenovo E49 Laptop | Hardware Maintenance Manual - Lenovo E49 - Page 15
PERIGO PERIGO DANGER DANGER DANGER Chapter 1. Safety information 9 - Lenovo E49 Laptop | Hardware Maintenance Manual - Lenovo E49 - Page 16
DANGER DANGER DANGER DANGER DANGER VORSICHT 10 Hardware Maintenance Manual - Lenovo E49 Laptop | Hardware Maintenance Manual - Lenovo E49 - Page 17
VORSICHT VORSICHT VORSICHT VORSICHT Chapter 1. Safety information 11 - Lenovo E49 Laptop | Hardware Maintenance Manual - Lenovo E49 - Page 18
VORSICHT VORSICHT VORSICHT 12 Hardware Maintenance Manual - Lenovo E49 Laptop | Hardware Maintenance Manual - Lenovo E49 - Page 19
Chapter 1. Safety information 13 - Lenovo E49 Laptop | Hardware Maintenance Manual - Lenovo E49 - Page 20
14 Hardware Maintenance Manual - Lenovo E49 Laptop | Hardware Maintenance Manual - Lenovo E49 - Page 21
Chapter 1. Safety information 15 - Lenovo E49 Laptop | Hardware Maintenance Manual - Lenovo E49 - Page 22
16 Hardware Maintenance Manual - Lenovo E49 Laptop | Hardware Maintenance Manual - Lenovo E49 - Page 23
Chapter 1. Safety information 17 - Lenovo E49 Laptop | Hardware Maintenance Manual - Lenovo E49 - Page 24
18 Hardware Maintenance Manual - Lenovo E49 Laptop | Hardware Maintenance Manual - Lenovo E49 - Page 25
Laser compliance statement (multilingual translations) The laser compliance statements in this section are provided in the following languages: • English • Arabic • Brazilian Portuguese • French • German • Hebrew • Japanese • Korean • Spanish • Traditional Chinese Chapter 1. Safety information 19 - Lenovo E49 Laptop | Hardware Maintenance Manual - Lenovo E49 - Page 26
20 Hardware Maintenance Manual - Lenovo E49 Laptop | Hardware Maintenance Manual - Lenovo E49 - Page 27
Chapter 1. Safety information 21 - Lenovo E49 Laptop | Hardware Maintenance Manual - Lenovo E49 - Page 28
22 Hardware Maintenance Manual - Lenovo E49 Laptop | Hardware Maintenance Manual - Lenovo E49 - Page 29
Chapter 1. Safety information 23 - Lenovo E49 Laptop | Hardware Maintenance Manual - Lenovo E49 - Page 30
24 Hardware Maintenance Manual - Lenovo E49 Laptop | Hardware Maintenance Manual - Lenovo E49 - Page 31
Chapter 1. Safety information 25 - Lenovo E49 Laptop | Hardware Maintenance Manual - Lenovo E49 - Page 32
26 Hardware Maintenance Manual - Lenovo E49 Laptop | Hardware Maintenance Manual - Lenovo E49 - Page 33
in this manual. After a system board is replaced, ensure that the latest BIOS is installed to the system board before completing the service action. To download software fixes, drivers, and BIOS, do the following: 1. Go to http://www.lenovo.com/support. 2. Click Download Drivers & Software. The - Lenovo E49 Laptop | Hardware Maintenance Manual - Lenovo E49 - Page 34
the cause of the error. Before replacing the adapter or device, remove the sequence in the computer you are servicing may have been changed. Be must be implemented on Lenovo products placed on Manual or direct substitutions can be used. • Compliant FRUs identified in Hardware Maintenance Manual - Lenovo E49 Laptop | Hardware Maintenance Manual - Lenovo E49 - Page 35
guide, be sure to read the following important notes. Important notes: • Only certified trained personnel should service errors. Consider replacing a FRU only when a problem recurs. If you suspect that a FRU is defective, clear the error log and run the test again. If the error Lenovo 2012, 2013 29 - Lenovo E49 Laptop | Hardware Maintenance Manual - Lenovo E49 - Page 36
computer unusable) • Sticky keys caused by spilling a liquid onto the keyboard • Use of an incorrect ac power adapter on laptop products The following symptoms might indicate damage caused by nonwarranted activities: • Missing parts might be a symptom of unauthorized service or modification. • If - Lenovo E49 Laptop | Hardware Maintenance Manual - Lenovo E49 - Page 37
• If the problem persists, go to Chapter 5 "Lenovo E49 and ZhaoYang E49" on page 37. Note: Noise from the ac power adapter does not always indicate a defect. Checking operational charging To check whether the battery charges properly during operation, use a discharged battery pack or a battery pack - Lenovo E49 Laptop | Hardware Maintenance Manual - Lenovo E49 - Page 38
32 Hardware Maintenance Manual - Lenovo E49 Laptop | Hardware Maintenance Manual - Lenovo E49 - Page 39
Configuring the advanced startup options The advanced startup options enable you to do the following: - Changing the startup settings of the Windows operating system - Restoring the Windows Lenovo notebook computer: the power-on password and the supervisor password. © Copyright Lenovo 2012, 2013 33 - Lenovo E49 Laptop | Hardware Maintenance Manual - Lenovo E49 - Page 40
can be booted. Supervisor password A supervisor password (SVP) protects the system information stored in the BIOS. The user must enter the SVP in order to get access to the BIOS and change the system configuration. Attention: If the SVP has been forgotten and cannot be made available to the service - Lenovo E49 Laptop | Hardware Maintenance Manual - Lenovo E49 - Page 41
hibernation mode, the following occurs: • The system status, RAM, VRAM, and setup data are stored on the hard and if the user does not do any operation with the keyboard, the hard disk drive, the parallel connector, or the hibernation file in the boot record on the hard disk drive is read, and - Lenovo E49 Laptop | Hardware Maintenance Manual - Lenovo E49 - Page 42
36 Hardware Maintenance Manual - Lenovo E49 Laptop | Hardware Maintenance Manual - Lenovo E49 - Page 43
the following product-specific service references and parts information: • "Specifications" on page 37 • "Status indicators" on page 38 • "Fn key combinations" on page 39 Specifications This topic lists the physical features for the Lenovo E49 and ZhaoYang E49 models. Processor • Windows 7: To view - Lenovo E49 Laptop | Hardware Maintenance Manual - Lenovo E49 - Page 44
Integrated wireless LAN • 10/100/1000 Mbps Ethernet communication Security feature • Fingerprint reader (on some models) Status indicators This topic presents the system status indicators that show the status of the computer. 1 2 3 Table 1. Status indicators Indicator 1 Battery status indicator - Lenovo E49 Laptop | Hardware Maintenance Manual - Lenovo E49 - Page 45
key on a conventional keyboard. Has the same function as the Home key on a conventional keyboard. Has the same function as the End key on a conventional keyboard. Increases or decreases the display brightness level. Decreases or increases the sound volume. Chapter 5. Lenovo E49 and ZhaoYang E49 - Lenovo E49 Laptop | Hardware Maintenance Manual - Lenovo E49 - Page 46
40 Hardware Maintenance Manual - Lenovo E49 Laptop | Hardware Maintenance Manual - Lenovo E49 - Page 47
. You can find a list of CRUs for your product in this Hardware Maintenance Manual. An electronic version of this manual can be found at http://www.lenovo.com/UserManuals. Follow the on-screen instructions to find the manual for your product. You might be required to return the defective CRU. When - Lenovo E49 Laptop | Hardware Maintenance Manual - Lenovo E49 - Page 48
• Torque driver If you have a torque screwdriver, refer to the Torque column in the screw information table the torque specified in the screw information table for each step. • Ensure that torque screw drivers are calibrated correctly following country specifications. 42 Hardware Maintenance Manual - Lenovo E49 Laptop | Hardware Maintenance Manual - Lenovo E49 - Page 49
. You can find a list of CRUs for your product in this Hardware Maintenance Manual. An electronic version of this manual can be found at http://www.lenovo.com/UserManuals. Follow the on-screen instructions to find the manual for your product. You might be required to return the defective CRU. When - Lenovo E49 Laptop | Hardware Maintenance Manual - Lenovo E49 - Page 50
specified in the parts list for your computer. Any other battery could ignite or explode. Unlock the manual battery latch 1 . Holding the spring-loaded battery latch in the unlocked position, remove the battery pack in the direction shown by the arrow 2 . 1 2 2 When installing: Install the - Lenovo E49 Laptop | Hardware Maintenance Manual - Lenovo E49 - Page 51
Removal steps of optical drive Remove the screw 1 . Use a screwdriver to push the optical drive in the direction shown by the arrow 2 . Then remove the optical drive 3 . 3 1 2 Step 1 Screw (quantity) M2 × 3 mm, flat-head, nylon-coated (1) Color Black Torque 1.85 kgf-cm Removal steps of optical - Lenovo E49 Laptop | Hardware Maintenance Manual - Lenovo E49 - Page 52
-head, nylon-coated (2) 1030 Bottom slot cover For access, remove this FRU: • "1010 Battery pack" on page 44 Removal steps of bottom slot cover Loosen the screws 1 , and then , remove these FRUs in order: • "1010 Battery pack" on page 44 • "1030 Bottom slot cover" on page 46 46 Hardware Maintenance - Lenovo E49 Laptop | Hardware Maintenance Manual - Lenovo E49 - Page 53
. 1 1 2 Note: If only one memory module is used on the computer you are servicing, the card must be installed in SLOT-0 ( a : lower slot), but not in SLOT disk drive assembly For access, remove these FRUs in order: • "1010 Battery pack" on page 44 • "1030 Bottom slot cover" on page 46 Attention - Lenovo E49 Laptop | Hardware Maintenance Manual - Lenovo E49 - Page 54
from the slot 3 . 3 Color Black Torque 1.85 kgf-cm When installing: Make sure that the hard disk drive connector is attached firmly. 48 Hardware Maintenance Manual - Lenovo E49 Laptop | Hardware Maintenance Manual - Lenovo E49 - Page 55
Remove the hard disk drive bracket in the direction shown by the arrow 2 . 2 Torque 4.0 kgf-cm 1060 PCI Express Mini Card for wireless LAN For access, remove these FRUs in order: • "1010 Battery pack" on page 44 • "1030 Bottom slot cover" on page 46 Chapter 7. Removing and replacing a FRU 49 - Lenovo E49 Laptop | Hardware Maintenance Manual - Lenovo E49 - Page 56
Removal steps of PCI Express Mini Card for wireless LAN In steps 1 , unplug the connectors using the removal tool antenna RF connector (P/N: 08K7159) or pick the connectors Plug the gray cable into the main connector, and the black cable into the auxiliary connector. 50 Hardware Maintenance Manual - Lenovo E49 Laptop | Hardware Maintenance Manual - Lenovo E49 - Page 57
For access, remove these FRUs in order: • "1010 Battery pack" on page 44 • "1030 Bottom slot cover" on page 46 Removal steps of thermal fan assembly Detach the connector 1 . 1 When installing: Make sure that the connector is attached firmly. Loosen the screws 2 to 8 . 7 8 2 6 5 4 3 Note - Lenovo E49 Laptop | Hardware Maintenance Manual - Lenovo E49 - Page 58
Lift the thermal fan assembly in the direction shown by the arrow 9 . Note: Be careful not to damage the connector. 9 52 Hardware Maintenance Manual - Lenovo E49 Laptop | Hardware Maintenance Manual - Lenovo E49 - Page 59
Microprocessor For access, remove these FRUs in order: • "1010 Battery pack" on page 44 • "1030 Bottom slot cover" on page 46 • "1070 Thermal fan assembly" on page 51 Attention: The microprocessor is extremely sensitive. When you service the microprocessor, avoid any kind of rough handling. Chapter - Lenovo E49 Laptop | Hardware Maintenance Manual - Lenovo E49 - Page 60
above the microprocessor socket a , and then rotate the head of the screw in the direction shown by the arrow b to secure the microprocessor. 1090 Keyboard For access, remove these FRUs in order: • "1010 Battery pack" on page 44 • "1030 Bottom slot cover" on page 46 54 Hardware Maintenance - Lenovo E49 Laptop | Hardware Maintenance Manual - Lenovo E49 - Page 61
Remove the screws 1 . 1 1 When installing: Make sure that the screws have been fastened to secure the keyboard. Step 1 Screw (quantity) M2 × 6 mm, flat-head, nylon-coated (2) Color Black Torque 1.85 kgf-cm Push hard in the direction shown by the arrows 2 to - Lenovo E49 Laptop | Hardware Maintenance Manual - Lenovo E49 - Page 62
lightly in the direction shown by the arrow 3 . Then remove the keyboard in the direction shown by the arrows 4 . 4 4 4 3 Carefully lift the keyboard until you can see how it's connected. Hold the keyboard above the computer 5 , and then detach the keyboard connector. 56 Hardware Maintenance Manual - Lenovo E49 Laptop | Hardware Maintenance Manual - Lenovo E49 - Page 63
5 7 6 When installing: Make sure that the keyboard connector is attached firmly. 1100 Keyboard bezel For access, remove these FRUs in order: • "1010 Battery pack" on page 44 • "1020 Optical drive" on page 44 • "1030 Bottom slot cover" on page 46 • "1090 Keyboard" on page 54 Chapter 7. Removing and - Lenovo E49 Laptop | Hardware Maintenance Manual - Lenovo E49 - Page 64
bezel Remove the screws 1 , 2 , and 3 that secure the keyboard bezel. 2 2 2 1 1 1 1 3 3 3 1 1 1 1 1 1 Step 1 2 3 Screw (quantity) M2 × 6 mm, flat-head, nylon-coated (10) M2 × (quantity) M2 × 6 mm, flat-head, nylon-coated (2) 58 Hardware Maintenance Manual Color Black Torque 1.85 kgf-cm - Lenovo E49 Laptop | Hardware Maintenance Manual - Lenovo E49 - Page 65
a plastic pry tool as shown in the following illustration. Then remove the keyboard bezel in the direction shown by the arrow 15 . 14 14 14 15 14 14 14 1110 Power board For access, remove these FRUs in order: • "1010 Battery pack" on page 44 • "1020 Optical drive" on page 44 14 - Lenovo E49 Laptop | Hardware Maintenance Manual - Lenovo E49 - Page 66
) M2 × 3 mm, flat-head, nylon-coated (1) 1120 Backup battery For access, remove these FRUs in order: • "1010 Battery pack" on page 44 • "1020 Optical drive" on page 44 • "1030 Bottom slot cover" on page 46 • "1090 Keyboard" on page 54 • "1100 Keyboard bezel" on page 57 Removal steps of backup - Lenovo E49 Laptop | Hardware Maintenance Manual - Lenovo E49 - Page 67
assembly" on page 47 • "1060 PCI Express Mini Card for wireless LAN" on page 49 • "1070 Thermal fan assembly" on page 51 • "1080 Microprocessor" on page 53 • "1090 Keyboard" on page 54 • "1100 Keyboard bezel" on page 57 • "1120 Backup battery" on page 60 Chapter 7. Removing and replacing a FRU 61 - Lenovo E49 Laptop | Hardware Maintenance Manual - Lenovo E49 - Page 68
board in the direction shown by the arrow 6 . Then detach the DC-in cable 7 . 7 6 1140 LCD unit For access, remove these FRUs in order: • "1010 Battery pack" on page 44 • "1020 Optical drive" on page 44 62 Hardware Maintenance - Lenovo E49 Laptop | Hardware Maintenance Manual - Lenovo E49 - Page 69
assembly" on page 47 • "1060 PCI Express Mini Card for wireless LAN" on page 49 • "1070 Thermal fan assembly" on page 51 • "1080 Microprocessor" on page 53 • "1090 Keyboard" on page 54 • "1100 Keyboard bezel" on page 57 • "1120 Backup battery" on page 60 • "1130 System board assembly" on page 61 - Lenovo E49 Laptop | Hardware Maintenance Manual - Lenovo E49 - Page 70
Silver Torque 4.0 kgf-cm When installing: • Route the antenna cables along the cable guides. As you route the cables, make sure that they are not subject to any tension . Tension could cause the cables to be damaged by the cable guides, or a wire to be broken. • Make sure that the LCD - Lenovo E49 Laptop | Hardware Maintenance Manual - Lenovo E49 - Page 71
assembly" on page 47 • "1060 PCI Express Mini Card for wireless LAN" on page 49 • "1070 Thermal fan assembly" on page 51 • "1080 Microprocessor" on page 53 • "1090 Keyboard" on page 54 • "1100 Keyboard bezel" on page 57 • "1120 Backup battery" on page 60 • "1130 System board assembly" on page 61 - Lenovo E49 Laptop | Hardware Maintenance Manual - Lenovo E49 - Page 72
Removal steps of DC-in cable and base cover Remove the screw 1 , and the DC-in bracket 2 . Remove the DC-in cable in the direction shown by the arrow 3 . 1 2 3 Step 1 Screw (quantity) M2 × 3 mm, flat-head, nylon-coated (1) Color Black Torque 1.85 kgf-cm 66 Hardware Maintenance Manual - Lenovo E49 Laptop | Hardware Maintenance Manual - Lenovo E49 - Page 73
6 FCC label Note: If you replace a part with the Windows Certificate of Authentication (COA) label 1 , return the old such as the part number, serial number, and product key. The following labels need to be peeled off from • "1010 Battery pack" on page 44 • "1140 LCD unit" on page - Lenovo E49 Laptop | Hardware Maintenance Manual - Lenovo E49 - Page 74
2 . Torque 1.85 kgf-cm 2 2 2 2 When installing: Make sure that all the latches are attached firmly. Then secure the bezel with the screws. 68 Hardware Maintenance Manual - Lenovo E49 Laptop | Hardware Maintenance Manual - Lenovo E49 - Page 75
Integrated camera For access, remove these FRUs in order: • "1010 Battery pack" on page 44 • "1140 LCD unit" on page 62 . 2030 LCD panel, LCD cable, and hinges For access, remove these FRUs in order: • "1010 Battery pack" on page 44 • "1140 LCD unit" on page 62 • "2010 LCD front bezel" on page 67 - Lenovo E49 Laptop | Hardware Maintenance Manual - Lenovo E49 - Page 76
in the direction shown by the arrow 3 . Then remove the LCD cable. 5 3 4 When installing: Make sure that the connector is attached firmly. 70 Hardware Maintenance Manual - Lenovo E49 Laptop | Hardware Maintenance Manual - Lenovo E49 - Page 77
Step 1 Screw (quantity) M2 × 3 mm, flat-head, nylon-coated (4) 2040 Antenna assembly and LCD rear cover For access, remove these FRUs in order: • "1010 Battery pack" on page 44 • "1140 LCD unit" on page 62 • "2010 LCD front bezel" on page 67 • "2020 Integrated camera" on page 69 • "2030 LCD - Lenovo E49 Laptop | Hardware Maintenance Manual - Lenovo E49 - Page 78
the LCD rear cover assembly and from the hinges in the direction shown by the arrows 1 . 1 1 Cable routing: Route the antenna cables along the cable guides and secure the antenna boards with adhesive tapes. As you route the cables, make sure that they are not subject to any tension. Tension could - Lenovo E49 Laptop | Hardware Maintenance Manual - Lenovo E49 - Page 79
Chapter 8. Locations This chapter introduces the location of the hardware components. Front view 2 1 2 12 11 10 9 3 8 7 6 4 5 Figure 1. Lenovo E49 and ZhaoYang E49 front view 1 Integrated camera (on some models) 2 Wireless antennas 3 Mute button (on some models) 4 Speaker (right) 5 Fingerprint - Lenovo E49 Laptop | Hardware Maintenance Manual - Lenovo E49 - Page 80
Right-side view 1 2 3 4 Figure 2. Lenovo E49 and ZhaoYang E49 right-side view 1 USB connector (on some models) 2 Optical drive 3 USB connector 4 Combo audio jack Rear view 1 Figure 3. Lenovo E49 and ZhaoYang E49 rear view 1 ac power connector 74 Hardware Maintenance Manual - Lenovo E49 Laptop | Hardware Maintenance Manual - Lenovo E49 - Page 81
Bottom and left-side view 1 2 3 4 5 10 6 7 98 Figure 4. Lenovo E49 and ZhaoYang E49 bottom and left-side view 1 Battery latch (manual) 2 Battery pack 3 Battery latch (spring-loaded) 4 Security keyhole 5 Fan louvers 6 Monitor connector 7 Ethernet connector 8 HDMI port 9 USB 3.0 connectors 10 - Lenovo E49 Laptop | Hardware Maintenance Manual - Lenovo E49 - Page 82
76 Hardware Maintenance Manual - Lenovo E49 Laptop | Hardware Maintenance Manual - Lenovo E49 - Page 83
CRU. See your Lenovo Limited Warranty documentation for full details. Lenovo computers contain the following types of CRUs: - Self-service CRUs: These CRUs unplug or are held by no more than two screws. Examples of these types of CRUs include the ac power adapter, power cord, battery, and hard disk - Lenovo E49 Laptop | Hardware Maintenance Manual - Lenovo E49 - Page 84
page 85 1 LCD unit (see "LCD FRUs" on page 82) 2 Hinge Door L+R 3 Power Board 3 LSS Power Board for E49A&G 4 Upper Case W/TP 78 Hardware Maintenance Manual 1 2 3 a 4 5 6 b 7 c 8 FRU no. CRU ID 90200863 N 90000247 N 90000315 N 90200869 N - Lenovo E49 Laptop | Hardware Maintenance Manual - Lenovo E49 - Page 85
4 LSS Upper Case W/TP 4 Keyboard bezel with fingerprint for E49 models 4 Keyboard bezel without fingerprint for E49 models 5 Battery for ZhaoYang E49 models, 6 cell 2.2 Ah 5 Battery for ZhaoYang E49 models, 6 cell 2.8 Ah 5 Battery for E49 models, 6 cell 2.2 Ah 5 Battery for E49 models, 6 cell 2.8 Ah - Lenovo E49 Laptop | Hardware Maintenance Manual - Lenovo E49 - Page 86
LAN, Broadcom 1X1 BGN, BT 4.0 Combo, Broadcom/BCM4313+BCM20702 bgn &BT4.0 20200100 20200101 10 Wireless LAN, Wifi non Intel 1x1, Cybertan Broadcom BCM4313 1*1 BGN MOW 20200102 10 Wireless LAN, Wifi ** ** ** ** ** ** ** ** ** ** ** ** ** ** ** ** ** N N N N N N N N 80 Hardware Maintenance Manual - Lenovo E49 Laptop | Hardware Maintenance Manual - Lenovo E49 - Page 87
Table 3. Parts list-Overall (continued) No. FRU (Overall) 11 Microprocessor, Intel I5-2540M 2.6G 3M 2c J1 PGA 11 Microprocessor, Intel I3-3110M 2.4G L1 3M 2cPGA 11 Microprocessor, Intel I3-3120M 2.5G L1 3M 2cPGA 11 Microprocessor, Intel I5-3320M 2.6G L1 3M 2cPGA 11 Microprocessor, Intel I7-3520M 2. - Lenovo E49 Laptop | Hardware Maintenance Manual - Lenovo E49 - Page 88
CRU ID N N N N N 90201081 N 90201268 N 90201269 N 90201270 N 90201271 N 04W4285 N LCD FRUs Lenovo E49 and ZhaoYang E49 models use a 14-inch, high-definition (HD), light-emitting diode (LED), liquid-crystal display (LCD) (Table 4 "Parts list - LCD" on page 83). 82 Hardware Maintenance Manual - Lenovo E49 Laptop | Hardware Maintenance Manual - Lenovo E49 - Page 89
FRU 1 LCD bezel with camera hole 2 Hinges 3 Antenna for ZhaoYang E49 models (right) 4 Camera for ZhaoYang E49 models, 0.3M 4 Camera for ZhaoYang E49 models, 1M 4 Camera for E49 models, 720 p 4 Camera for E49 models, 0.3 M 5 LCD cover 1 2 3 4 5 FRU no. 90200865 04W4294 90200867 04W4282 90200872 - Lenovo E49 Laptop | Hardware Maintenance Manual - Lenovo E49 - Page 90
, high-definition, anti-glare - Antenna set for E49 models Keyboard Table 5. ZhaoYang E49 keyboard FRU US English Table 6. E49 keyboard FRU Arabic Czech Korean Indian Russian Slovak Slovenian Traditional Chinese Thai 84 Hardware Maintenance Manual FRU no. 90200858 04W4286 90200871 18200396 18200243 - Lenovo E49 Laptop | Hardware Maintenance Manual - Lenovo E49 - Page 91
Table 6. E49 keyboard (continued) FRU Turkish UK English US English US English, International FRU no. 04W2838 04W2846 04W3006 04W3011 04W2834 04W2842 04W3007 04W3012 CRU ID * * * * Miscellaneous parts Table 7. Parts list - ZhaoYang E49 system miscellaneous parts FRU (b) ODD Bracket (c) ODD Bezel - Lenovo E49 Laptop | Hardware Maintenance Manual - Lenovo E49 - Page 92
adapters FRU ZhaoYang E49 EuP model E49 EuP model FRU no. 36001929 36001651 36001943 36001714 45N0215 45N0219 45N0223 CRU ID N * FRU no. 36001941 36001927 36001942 45N0221 45N0217 45N0225 CRU ID N * Power cords A Lenovo power cord for a specific N 145000595 N 86 Hardware Maintenance Manual - Lenovo E49 Laptop | Hardware Maintenance Manual - Lenovo E49 - Page 93
m Taiwan • LINETEK LS15+VCTF+LP-53 1 m U.K. • LINETEK LP-61L+ H03VV-F+ LS15 1 m U.S.A • LINETEK LP-30B + SPT-2 + LS15 1 m Table 13. Parts list - ZhaoYang E49 3-pin power cords (Longwell) Country or region Argentina • Longwell LP-24+H03VV-F+LS-18 1 m Australia, New Zealand • Longwell LP-23A+LFC-3R+LS - Lenovo E49 Laptop | Hardware Maintenance Manual - Lenovo E49 - Page 94
• Longwell LP-30B+SPT-2 18AWG+LS-18 1 m Table 14. Parts list - ZhaoYang E49 3-pin power cords (Volex) Country or region Argentina • VOLEX VA2073+H03VV-F+VAC5S 1 m m Japan • VOLEX VAC5S+VCTF+M755 1 m 88 Hardware Maintenance Manual FRU no. 145000555 CRU ID N 145000558 N 145000554 N 145000565 - Lenovo E49 Laptop | Hardware Maintenance Manual - Lenovo E49 - Page 95
Volex US15S3+SPT-2 +VAC5S 1 m Table 15. Parts list - ZhaoYang E49 2-pin power cords (Linetek) Country or region Africa • LINETEK PE364("O")+H03VVH2 +RVV 0.75/2C+COC03 1 m European Union • LINETEK LP21+H03VVH2-F+ LS7 1 m India • LINETEK LP28+IS:694 0.75/2C+ LS7H 1 m Israel • LINETEK LP45+H03VV-F+LS7 - Lenovo E49 Laptop | Hardware Maintenance Manual - Lenovo E49 - Page 96
or region U.S.A • LINETEK LP5+SPT-2 #18/2C+ LS7C 1 m UK • LINETEK LP61L+H03VVH2-F+ LS7H 1 m Table 16. Parts list - E49 3-pin power cords Country or region India European Union South Africa Taiwan U.K. U.S.A FRU no. 145500021 CRU ID N 145500019 N FRU no. 42T5065 42T5150 42T5029 42T5114 42T5056 - Lenovo E49 Laptop | Hardware Maintenance Manual - Lenovo E49 - Page 97
are not intended for use in implantation or other life support applications where malfunction may result in injury or death to persons. The information contained in this document does not affect or change Lenovo product specifications or warranties. Nothing in this document shall operate as an - Lenovo E49 Laptop | Hardware Maintenance Manual - Lenovo E49 - Page 98
refer to the corresponding information in the User Guide. EU contact: Lenovo, Einsteinova 21, 851 01 Bratislava, Slovakia Trademarks The following terms are trademarks of Lenovo in the United States, other countries or both: Lenovo OneKey Windows is the trademark of the Microsoft group of companies - Lenovo E49 Laptop | Hardware Maintenance Manual - Lenovo E49 - Page 99
- Lenovo E49 Laptop | Hardware Maintenance Manual - Lenovo E49 - Page 100
-
 1
1 -
 2
2 -
 3
3 -
 4
4 -
 5
5 -
 6
6 -
 7
7 -
8
-
9
-
10
-
11
-
12
-
13
-
14
-
15
-
16
-
17
-
18
-
19
-
20
-
21
-
22
-
23
-
24
-
25
-
26
-
27
-
28
-
29
-
30
-
31
-
32
-
33
-
34
-
35
-
36
-
37
-
38
-
39
-
40
-
41
-
42
-
43
-
44
-
45
-
46
-
47
-
48
-
49
-
50
-
51
-
52
-
53
-
54
-
55
-
56
-
57
-
58
-
59
-
60
-
61
-
62
-
63
-
64
-
65
-
66
-
67
-
68
-
69
-
70
-
71
-
72
-
73
-
74
-
75
-
76
-
77
-
78
-
79
-
80
-
81
-
82
-
83
-
84
-
85
-
86
-
87
-
88
-
89
-
90
-
91
-
92
-
93
-
94
-
95
-
96
-
97
-
98
-
99
-
100
 |
 |
Hardware Maintenance Manual
Lenovo E49 and ZhaoYang E49