Lenovo G455 Laptop Lenovo G455/G555 UserGuide V1.0 - Page 42
Removing the optical drive, Total Memory
 |
View all Lenovo G455 Laptop manuals
Add to My Manuals
Save this manual to your list of manuals |
Page 42 highlights
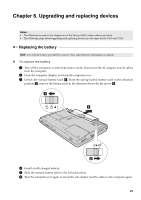
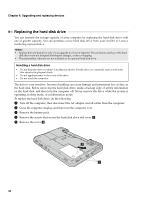
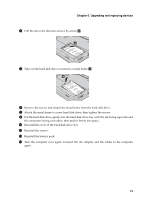
Chapter 6. Upgrading and replacing devices Note: If only one DIMM is used on the computer you are servicing, the card must be installed in SLOT-0 ( a : lower slot), but not in SLOT-1 ( b : upper slot). b a To make sure that the SO-DIMM is installed correctly, do as follows: 1 Turn the computer on. 2 Hold F2 during startup. The BIOS Setup Utility screen opens. The Total Memory item shows the total amount of memory installed in your computer. Removing the optical drive To remove the optical drive, do the following: 1 Remove the Memory/Wireless module/CPU (central processing unit) compartment cover. 2 Remove the screw shown in the figure a. 3 Gently pull the optical drive out b. 1 2 34
-
 1
1 -
2
-
3
-
4
-
5
-
6
-
7
-
8
-
9
-
10
-
11
-
12
-
13
-
14
-
15
-
16
-
17
-
18
-
19
-
20
-
21
-
22
-
23
-
24
-
25
-
26
-
27
-
28
-
29
-
30
-
31
-
32
-
33
-
34
-
35
-
36
-
 37
37 -
 38
38 -
 39
39 -
 40
40 -
 41
41 -
 42
42 -
 43
43 -
 44
44 -
 45
45 -
 46
46 -
 47
47 -
48
-
49
-
50
-
51
-
52
-
53
-
54
-
55
-
56
-
57
-
58
-
59
-
60
-
61
-
62
-
63
-
64
-
65
-
66
-
67
-
68
-
69
-
70
-
71
-
72
-
73
-
74
-
75
-
76
-
77
-
78
-
79
-
80
-
81
-
82
-
83
-
84
-
85
-
86
-
87
-
88
-
89
-
90
-
91
-
92
-
93
-
94
-
95
-
96
-
97
-
98
-
99
-
100
-
101
-
102
-
103
-
104
-
105
-
106
-
107
-
108
-
109
-
110
-
111
-
112
-
113
-
114
-
115
-
116
 |
 |
34
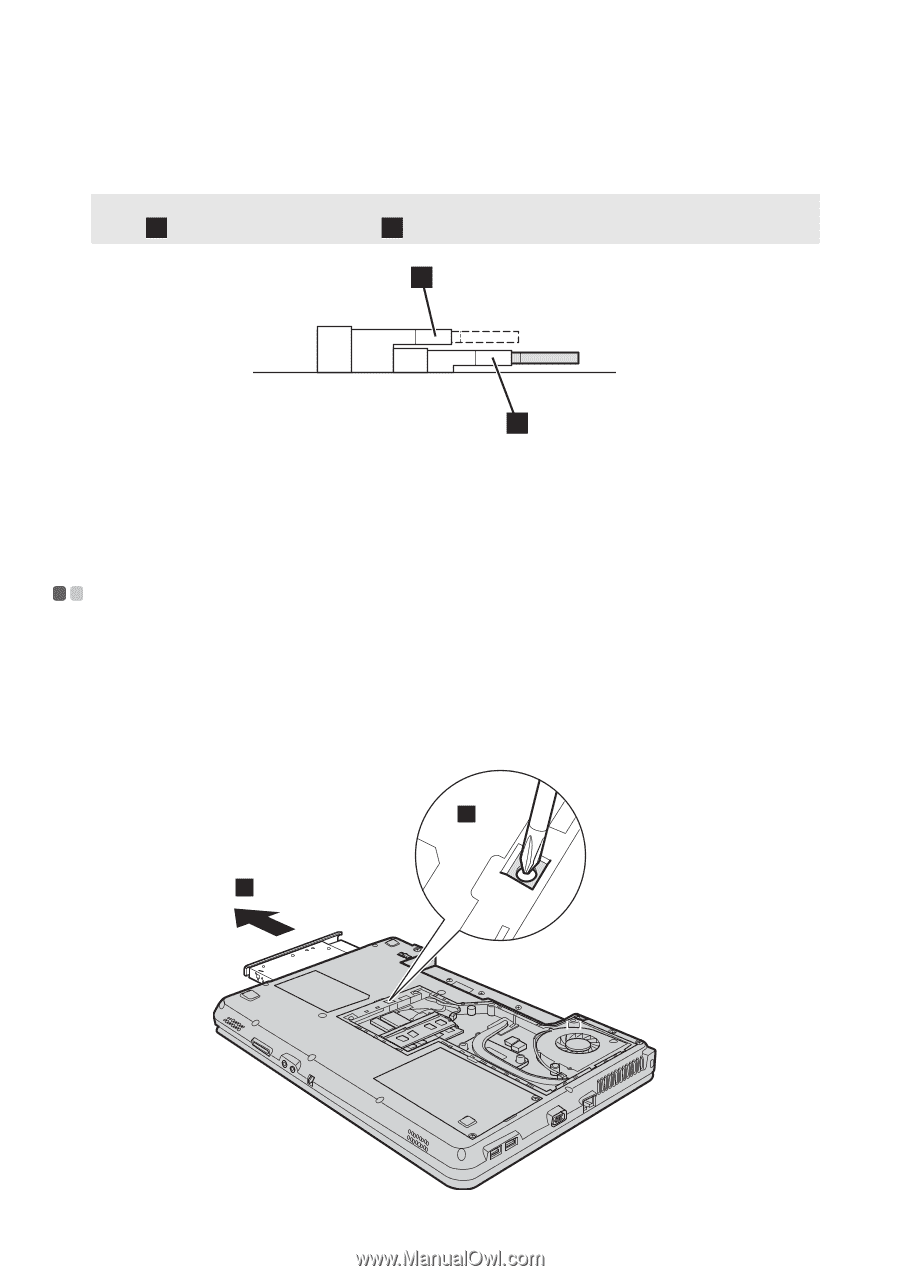
Chapter 6. Upgrading and replacing devices
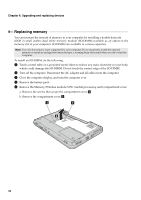
To make sure that the SO-DIMM is installed correctly, do as follows:
1
Turn the computer on.
2
Hold F2 during startup. The BIOS Setup Utility screen opens. The
Total Memory
item
shows the total amount of memory installed in your computer.
Removing the optical drive
- - - - - - - - - - - - - - - - - - - - - - - - - - - - - - - - - - - - - - - - - - - - - - - - - - - - - - - - - - - - - - - - - - - - - - - - - - - - - - - - - - - - -
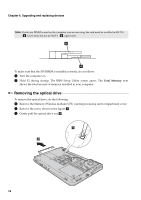
To remove the optical drive, do the following:
1
Remove the Memory/Wireless module/CPU (central processing unit) compartment cover.
2
Remove the screw shown in the figure
.
3
Gently pull the optical drive out
Note:
If only one DIMM is used on the computer you are servicing, the card must be installed in SLOT-0
(
: lower slot), but not in SLOT-1 (
: upper slot).
a
b
b
a
a
b
2
1