Lenovo IdeaCentre B540p Lenovo IdeaCentre B3/B5 Series User Guide - Page 55
Mounting the computer onto a wall, To install a VESA wall mount - specs
 |
View all Lenovo IdeaCentre B540p manuals
Add to My Manuals
Save this manual to your list of manuals |
Page 55 highlights
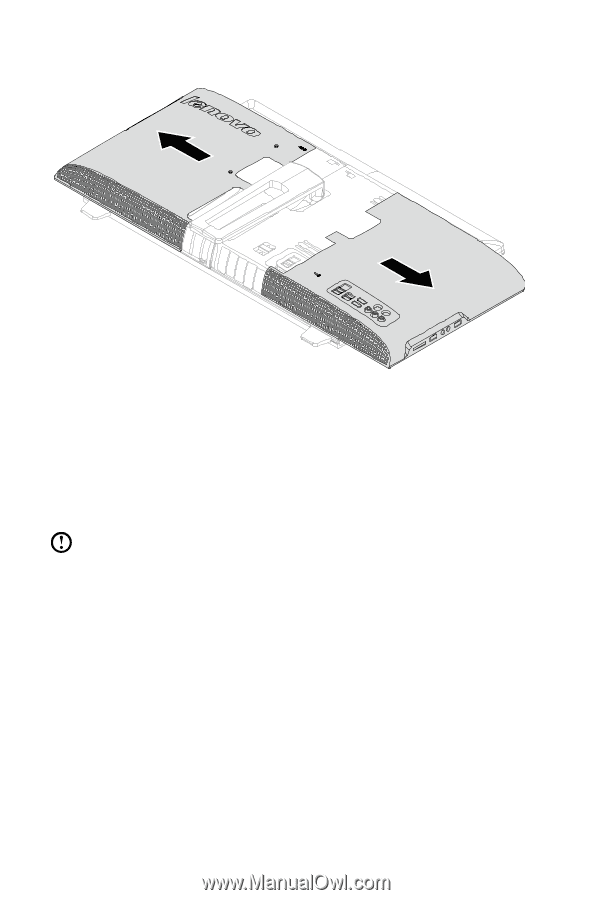
4. Remove the 2 cover pieces by sliding them in opposite directions as shown. 6.2.3 Mounting the computer onto a wall The computer can be mounted onto a wall. Before doing this, you will first need to install a UL listed VESA wall mount* (to be purchased separately) onto the back of the computer. To install a VESA wall mount Note: It may be helpful to place the computer face-down on a soft flat surface for this procedure. Lenovo recommends that you use a blanket, towel, or other soft cloth to protect the touch screen from scratching or other damage. * VESA wall mount spec: VESA100, 100mm x 100mm, M4 bolts. 50 User Guide
-
 1
1 -
2
-
3
-
4
-
5
-
6
-
7
-
8
-
9
-
10
-
11
-
12
-
13
-
14
-
15
-
16
-
17
-
18
-
19
-
20
-
21
-
22
-
23
-
24
-
25
-
26
-
27
-
28
-
29
-
30
-
31
-
32
-
33
-
34
-
35
-
36
-
37
-
38
-
39
-
40
-
41
-
42
-
43
-
44
-
45
-
46
-
47
-
48
-
49
-
 50
50 -
 51
51 -
 52
52 -
 53
53 -
 54
54 -
 55
55 -
 56
56 -
 57
57 -
 58
58 -
 59
59 -
 60
60 -
61
-
62
-
63
-
64
-
65
-
66
-
67
 |
 |
50
User Guide
4. Remove the 2 cover pieces by sliding them in opposite directions as shown.
6.2.3 Mounting the computer onto a wall
The computer can be mounted onto a wall. Before doing this, you will first need to
install a UL listed
VESA wall mount*
(to be purchased separately) onto the back of
the computer.
To install a VESA wall mount
Note:
It may be helpful to place the computer face-down on a soft flat
surface for this procedure. Lenovo recommends that you use a blanket,
towel, or other soft cloth to protect the touch screen from scratching or
other damage.
* VESA wall mount spec:
VESA100, 100mm x 100mm, M4 bolts.