Lenovo K300 Lenovo IdeaCentre K3 Series Hardware Replacement Guide V1.1 - Page 13
Slide the computer cover to the rear of the chassis to remove.
 |
UPC - 884942469558
View all Lenovo K300 manuals
Add to My Manuals
Save this manual to your list of manuals |
Page 13 highlights
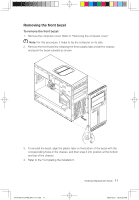
3. Disconnect all cables attached to the computer. This includes power cords, input/output (I/O) cables, and any other cables that are connected to the computer. Refer to "Locating connectors on the rear of the computer". 4. Remove the two screws that secure the computer cover at the rear of the chassis. 5. Slide the computer cover to the rear of the chassis to remove. Note: For this procedure, it helps to lay the computer on its side. 10 Hardware Replacement Guide 31041387_K3_HRG_EN_V1.1.indd 10 2009.10.23 10:30:10 AM
-
 1
1 -
2
-
3
-
4
-
5
-
6
-
7
-
 8
8 -
 9
9 -
 10
10 -
 11
11 -
 12
12 -
 13
13 -
 14
14 -
 15
15 -
 16
16 -
 17
17 -
 18
18 -
19
-
20
-
21
-
22
-
23
-
24
-
25
-
26
-
27
-
28
-
29
-
30
-
31
-
32
-
33
-
34
-
35
-
36
-
37
 |
 |
±0
Hardware Replacement Guide
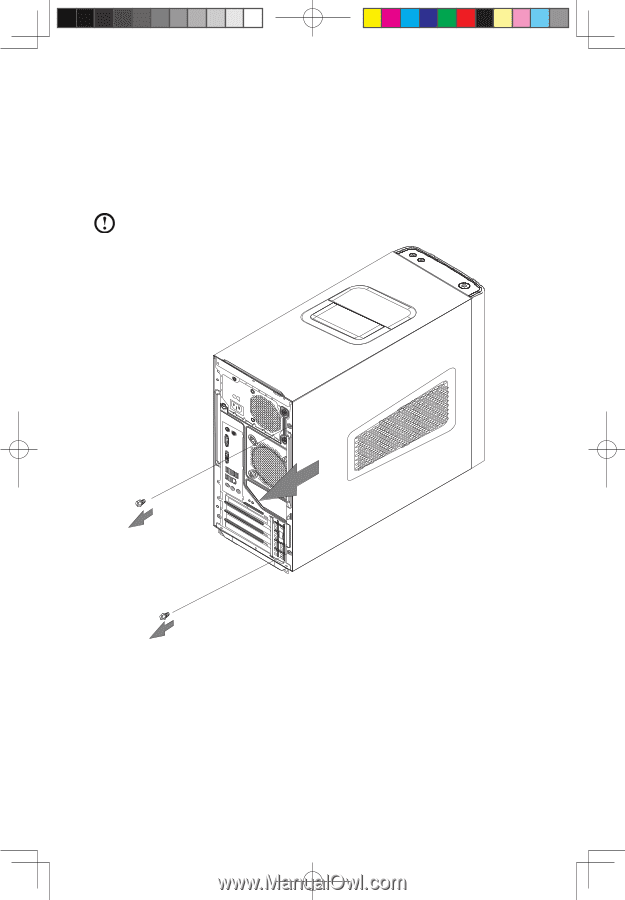
3.
Disconnect all cables attached to the computer. This includes power cords,
input/output (I/O) cables, and any other cables that are connected to the
computer. Refer to “Locating connectors on the rear of the computer”.
4.
Remove the two screws that secure the computer cover at the rear of the
chassis.
5.
Slide the computer cover to the rear of the chassis to remove.
Note:
For this procedure, it helps to lay the computer on its side.
31041387_K3_HRG_EN_V1.1.indd
10
2009.10.23
10:30:10 AM