Lenovo ThinkPad 560E TP 560Z Setup Guide that was provided with the system tha - Page 3
Setting Up Your Computer
 |
View all Lenovo ThinkPad 560E manuals
Add to My Manuals
Save this manual to your list of manuals |
Page 3 highlights
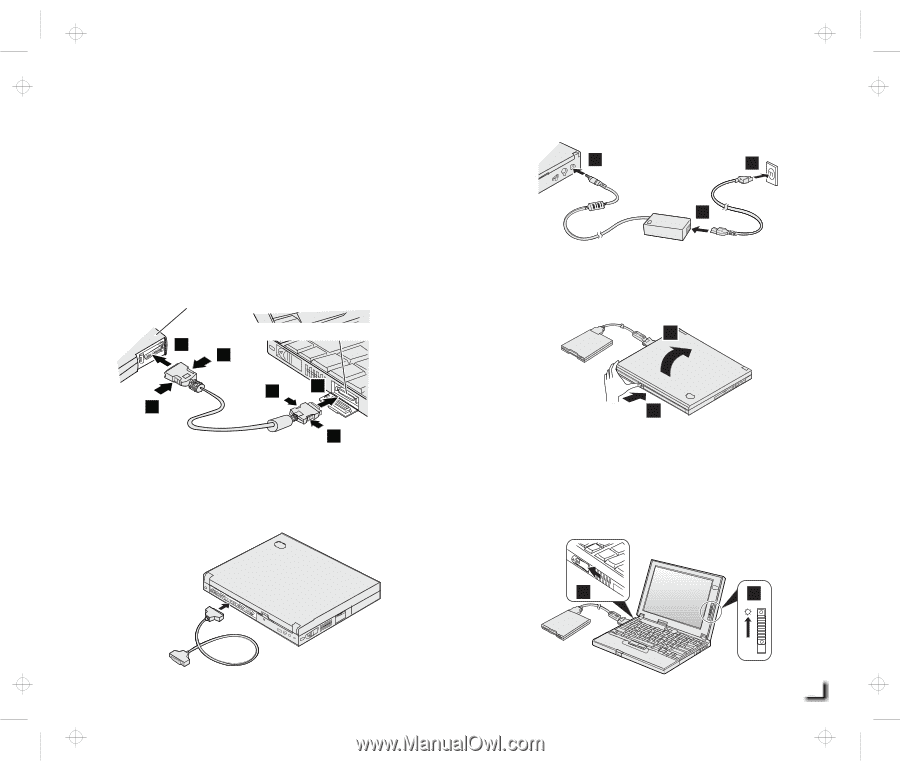
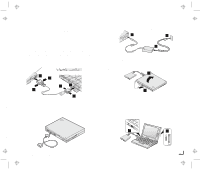
Setting Up Your Computer You are now ready to assemble and start your computer. 1 Connect the external diskette drive. a) Open the cover on the external diskette drive connector. b) Attach the cable to the external diskette drive, and then to the external diskette drive connector on the side of the computer. Press the sides of the connector 1 as you connect it to the devices 2 . External diskette drive External diskette drive connector 2 1 1 2 1 1 2 If you want to connect a printer to your computer, open the connector cover. Connect one end of the printer cable to the parallel connector and the other end to your printer. Then power on the printer. 3 Connect the AC Adapter to the computer's power jack (at the rear of the computer) in the order shown. 1 33 2 4 Open the liquid crystal display (LCD). Press the LCD button 1 and open the LCD 2 . Then position the LCD so that it is convenient for viewing. 2 1 5 Power on the computer. a) Push and release the power switch 1 . The power switch automatically snaps back to its original position. b) Adjust the brightness of the display with the brightness control 2 . 1 2 Title: C79FOMST CreationDate: 06/21/98 14:58:06 3 Copyright IBM Corporation 1998
-
 1
1 -
 2
2 -
 3
3 -
 4
4
 |
 |