Lenovo ThinkPad Edge E320 Hardware Maintenance Manual - ThinkPad Edge E320, E3 - Page 66
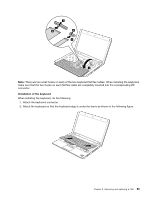
Keyboard bezel assembly and power button board, To make sure that the keyboard is housed firmly
 |
View all Lenovo ThinkPad Edge E320 manuals
Add to My Manuals
Save this manual to your list of manuals |
Page 66 highlights
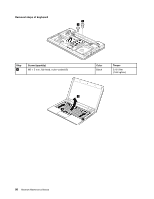
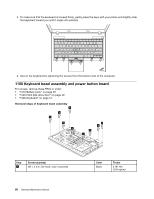
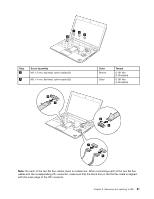
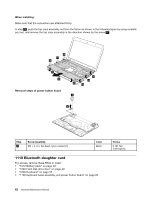
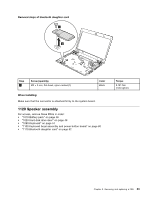
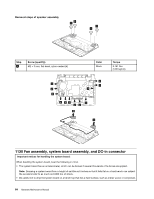
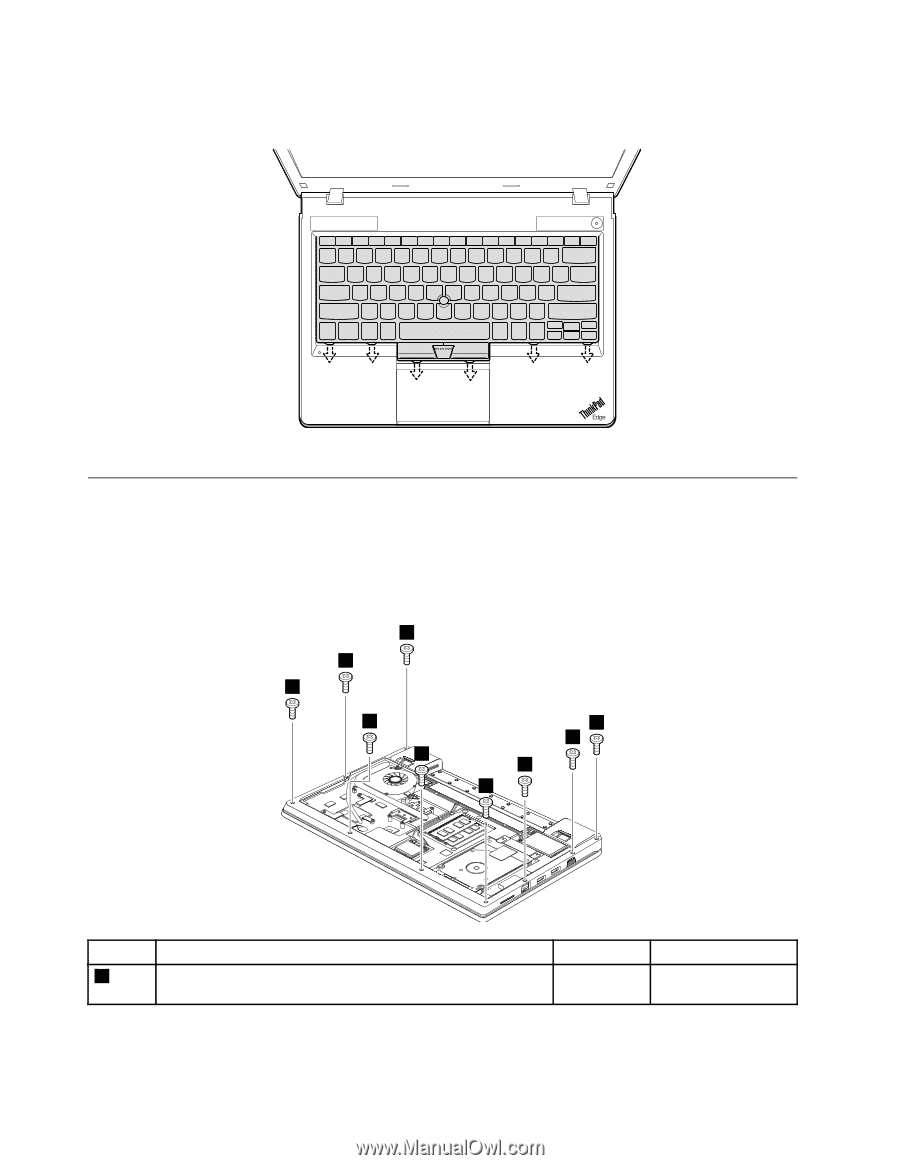
3. To make sure that the keyboard is housed firmly, gently press the keys with your palms and slightly slide the keyboard toward you until it snaps into position. 4. Secure the keyboard by tightening the screws from the bottom side of the computer. 1100 Keyboard bezel assembly and power button board For access, remove these FRUs in order: • "1010 Battery pack" on page 48 • "1020 Hard disk drive door" on page 49 • "1090 Keyboard" on page 57 Removal steps of keyboard bezel assembly 1 1 1 1 1 1 1 1 1 Step 1 Screw (quantity) M2 × 5 mm, flat-head, nylon-coated (9) 60 Hardware Maintenance Manual Color Black Torque 0.181 Nm (1.85 kgfcm)
-
 1
1 -
2
-
3
-
4
-
5
-
6
-
7
-
8
-
9
-
10
-
11
-
12
-
13
-
14
-
15
-
16
-
17
-
18
-
19
-
20
-
21
-
22
-
23
-
24
-
25
-
26
-
27
-
28
-
29
-
30
-
31
-
32
-
33
-
34
-
35
-
36
-
37
-
38
-
39
-
40
-
41
-
42
-
43
-
44
-
45
-
46
-
47
-
48
-
49
-
50
-
51
-
52
-
53
-
54
-
55
-
56
-
57
-
58
-
59
-
60
-
 61
61 -
 62
62 -
 63
63 -
 64
64 -
 65
65 -
 66
66 -
 67
67 -
 68
68 -
 69
69 -
 70
70 -
 71
71 -
72
-
73
-
74
-
75
-
76
-
77
-
78
-
79
-
80
-
81
-
82
-
83
-
84
-
85
-
86
-
87
-
88
-
89
-
90
-
91
-
92
-
93
-
94
-
95
-
96
-
97
-
98
-
99
-
100
-
101
-
102
-
103
-
104
-
105
-
106
-
107
-
108
-
109
-
110
-
111
-
112
 |
 |
3. To make sure that the keyboard is housed firmly, gently press the keys with your palms and slightly slide
the keyboard toward you until it snaps into position.
4. Secure the keyboard by tightening the screws from the bottom side of the computer.
1100 Keyboard bezel assembly and power button board
For access, remove these FRUs in order:
•
“1010 Battery pack” on page 48
•
“1020 Hard disk drive door” on page 49
•
“1090 Keyboard” on page 57
Removal steps of keyboard bezel assembly
1
1
1
1
1
1
1
1
1
Step
Screw (quantity)
Color
Torque
1
M2 × 5 mm, flat-head, nylon-coated (9)
Black
0.181 Nm
(1.85 kgfcm)
60
Hardware Maintenance Manual