Lenovo ThinkPad Edge S430 Hardware Maintenance Manual - Page 77
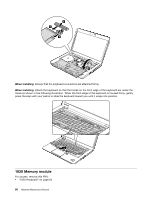
When installing
 |
View all Lenovo ThinkPad Edge S430 manuals
Add to My Manuals
Save this manual to your list of manuals |
Page 77 highlights
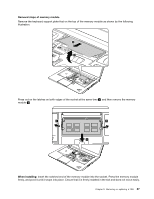
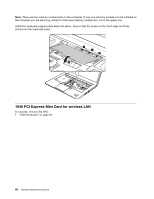
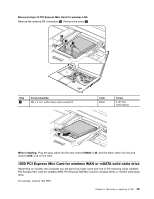
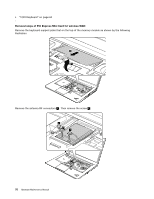
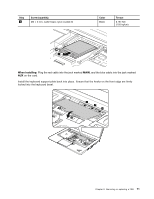
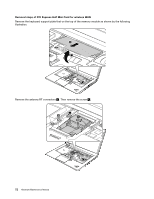
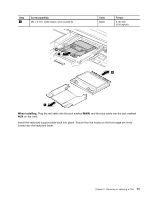
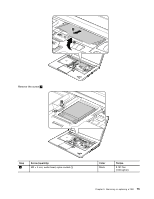
Step 4 Screw (quantity) M2 × 3 mm, wafer-head, nylon-coated (1) Color Black Torque 0.181 Nm (1.85 kgfcm) 3 When installing: Plug the red cable into the jack marked MAIN, and the blue cable into the jack marked AUX on the card. Install the keyboard support plate back into place. Ensure that the hooks on the front edge are firmly locked into the keyboard bezel. 1 1 1 2 Chapter 9. Removing or replacing a FRU 71
-
 1
1 -
2
-
3
-
4
-
5
-
6
-
7
-
8
-
9
-
10
-
11
-
12
-
13
-
14
-
15
-
16
-
17
-
18
-
19
-
20
-
21
-
22
-
23
-
24
-
25
-
26
-
27
-
28
-
29
-
30
-
31
-
32
-
33
-
34
-
35
-
36
-
37
-
38
-
39
-
40
-
41
-
42
-
43
-
44
-
45
-
46
-
47
-
48
-
49
-
50
-
51
-
52
-
53
-
54
-
55
-
56
-
57
-
58
-
59
-
60
-
61
-
62
-
63
-
64
-
65
-
66
-
67
-
68
-
69
-
70
-
71
-
 72
72 -
 73
73 -
 74
74 -
 75
75 -
 76
76 -
 77
77 -
 78
78 -
 79
79 -
 80
80 -
 81
81 -
 82
82 -
83
-
84
-
85
-
86
-
87
-
88
-
89
-
90
-
91
-
92
-
93
-
94
-
95
-
96
-
97
-
98
-
99
-
100
-
101
-
102
-
103
-
104
 |
 |
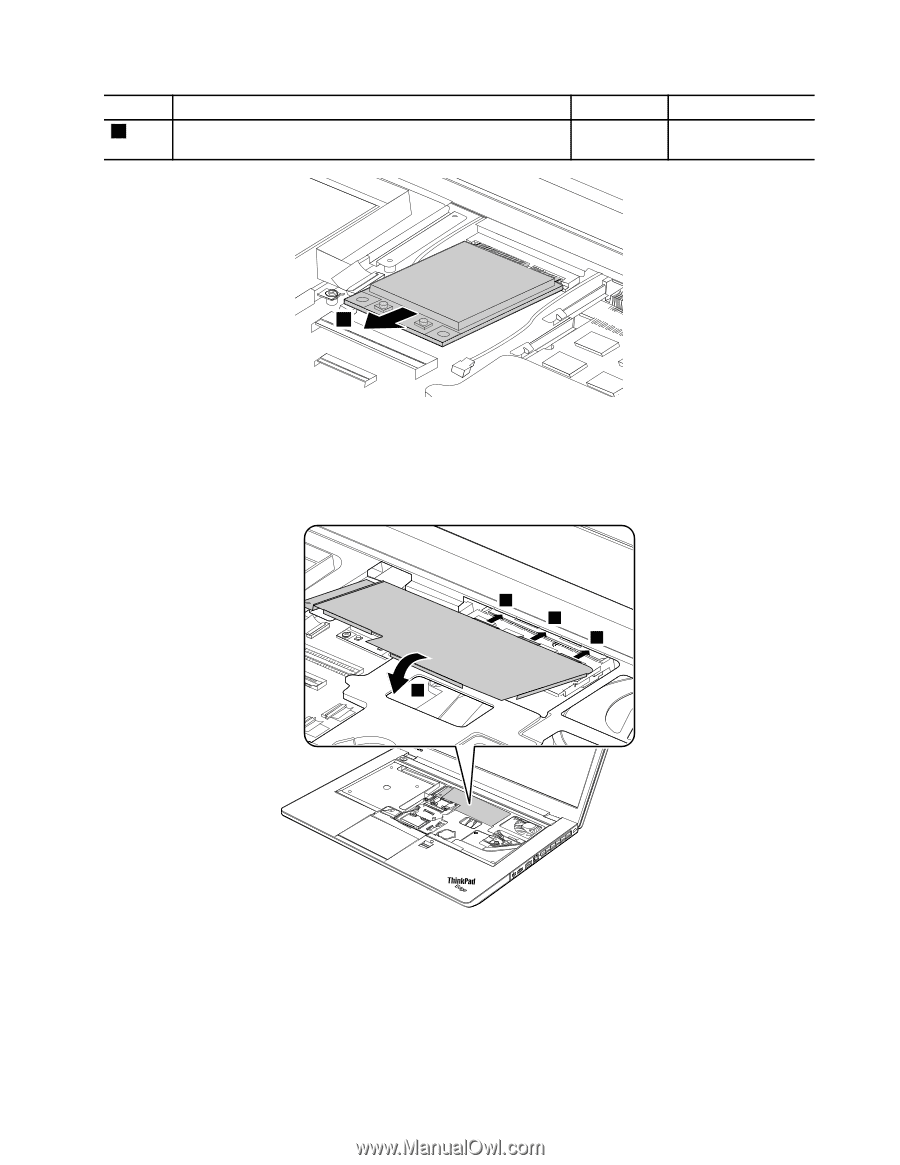
Step
Screw (quantity)
Color
Torque
4
M2 × 3 mm, wafer-head, nylon-coated (1)
Black
0.181 Nm
(1.85 kgfcm)
3
When installing:
Plug the red cable into the jack marked
MAIN
, and the blue cable into the jack marked
AUX
on the card.
Install the keyboard support plate back into place. Ensure that the hooks on the front edge are firmly
locked into the keyboard bezel.
2
1
1
1
Chapter 9
.
Removing or replacing a FRU
71