Lenovo ThinkPad T420s (English) Lenovo AutoLock Deployment Guide - Page 13
Working with Group Policy and ADMX files, Adding ADMX files, General settings - camera
 |
View all Lenovo ThinkPad T420s manuals
Add to My Manuals
Save this manual to your list of manuals |
Page 13 highlights
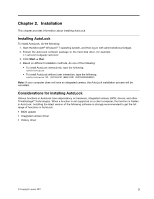
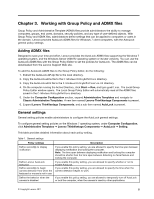
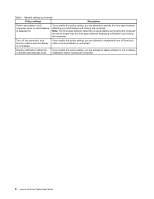
Chapter 3. Working with Group Policy and ADMX files Group Policy and Administrative Template (ADMX) files provide administrators the ability to manage computers, groups, end users, domains, security policies, and any type of user‐defined objects. With Group Policy and ADMX files, administrators define settings that can be applied to computers or users in the domain. Lenovo provides AutoLock ADMX files for Windows 7 client computers, with the AutoLock general policy settings. Adding ADMX files Designed to save your time and effort, Lenovo provides the AutoLock ADMX files supporting the Windows 7 operating system, and the Windows Server 2008 R2 operating system or its later versions. You can use the AutoLock ADMX files with the Group Policy Editor to set the policies for AutoLock. The ADMX files can be downloaded from the Lenovo Support Web site. To add the AutoLock ADMX files to the Group Policy Editor, do the following: 1. Extract the AutoLock‐GP.zip file to the local directory. 2. Copy the AutoLock.admx file to the C:\Windows\PolicyDefinitions directory. 3. Copy the AutoLock.adml file to the C:\Windows\PolicyDefinitions\en-US directory. 4. On the computer running the Active Directory, click Start ➙ Run, and type gpedit.msc. The Local Group Policy Editor window opens. The Local Group Policy Editor will automatically read all the ADMX files saved in the C:\Windows\PolicyDefinitions directory. 5. Under the Computer Configuration section, expand Administrative Templates and navigate to Classic Administrative Templates. A new item named Lenovo ThinkVantage Components is present. 6. Expand Lenovo ThinkVantage Components, and a sub-item named AutoLock is present. General settings General setting policies enable administrators to configure the AutoLock general settings. To configure general setting policies on the Windows 7 operating system, under Computer Configuration, click Administrative Templates ➙ Lenovo ThinkVantage Components ➙ AutoLock ➙ Setting. This table provides detailed information about each policy setting. Table 1. General settings Policy settings Define second(s) to display notification Define Lenovo AutoLock execution Define second(s) to begin camera detection from when the keyboard or mouse is not in use Define the behavior when the camera is disabled Description If you enable this policy setting, you are allowed to specify the time span between displaying notification and locking the computer. Note: The time span between displaying notification and locking the computer should be shorter than the time span between detecting no facial feature and locking the computer. If you enable this policy setting, you are allowed to specify whether or not to enable AutoLock. If you enable this policy setting, you are allowed to specify the time when the camera detection begins to work. If you enable this policy setting, you are allowed to temporarily turn off AutoLock or lock the computer, when the camera is used by other applications. © Copyright Lenovo 2011 5
-
 1
1 -
2
-
3
-
4
-
5
-
6
-
7
-
 8
8 -
 9
9 -
 10
10 -
 11
11 -
 12
12 -
 13
13 -
 14
14 -
 15
15 -
 16
16 -
 17
17 -
 18
18
 |
 |
