Lenovo ThinkPad T43 ThinkPad T43/p - Hardware Maintenance Manual (July 2005) - Page 170
secure
 |
View all Lenovo ThinkPad T43 manuals
Add to My Manuals
Save this manual to your list of manuals |
Page 170 highlights
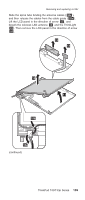
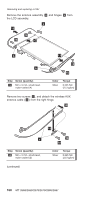
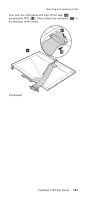
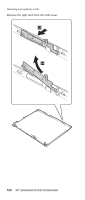
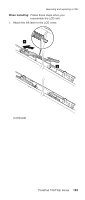
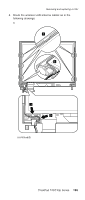
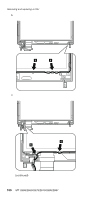
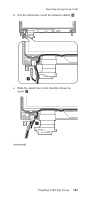
Removing and replacing a FRU 2. Paste three gaskets only for the models with Bluetooth wireless features. For the other models, skip this step. 95.5 mm 68.5 mm 41.5 mm 3. Connect the LCD cable assembly to the LCD panel and secure it with the tape. 4. Attach the wireless LAN antenna cables (MAIN, AUX) and the hinges to the LCD panel. 5. Attach the LCD panel to the LCD cover. (continued) 164 MT 2668/2669/2678/2679/2686/2687
-
 1
1 -
2
-
3
-
4
-
5
-
6
-
7
-
8
-
9
-
10
-
11
-
12
-
13
-
14
-
15
-
16
-
17
-
18
-
19
-
20
-
21
-
22
-
23
-
24
-
25
-
26
-
27
-
28
-
29
-
30
-
31
-
32
-
33
-
34
-
35
-
36
-
37
-
38
-
39
-
40
-
41
-
42
-
43
-
44
-
45
-
46
-
47
-
48
-
49
-
50
-
51
-
52
-
53
-
54
-
55
-
56
-
57
-
58
-
59
-
60
-
61
-
62
-
63
-
64
-
65
-
66
-
67
-
68
-
69
-
70
-
71
-
72
-
73
-
74
-
75
-
76
-
77
-
78
-
79
-
80
-
81
-
82
-
83
-
84
-
85
-
86
-
87
-
88
-
89
-
90
-
91
-
92
-
93
-
94
-
95
-
96
-
97
-
98
-
99
-
100
-
101
-
102
-
103
-
104
-
105
-
106
-
107
-
108
-
109
-
110
-
111
-
112
-
113
-
114
-
115
-
116
-
117
-
118
-
119
-
120
-
121
-
122
-
123
-
124
-
125
-
126
-
127
-
128
-
129
-
130
-
131
-
132
-
133
-
134
-
135
-
136
-
137
-
138
-
139
-
140
-
141
-
142
-
143
-
144
-
145
-
146
-
147
-
148
-
149
-
150
-
151
-
152
-
153
-
154
-
155
-
156
-
157
-
158
-
159
-
160
-
161
-
162
-
163
-
164
-
 165
165 -
 166
166 -
 167
167 -
 168
168 -
 169
169 -
 170
170 -
 171
171 -
 172
172 -
 173
173 -
 174
174 -
 175
175 -
176
-
177
-
178
-
179
-
180
-
181
-
182
-
183
-
184
-
185
-
186
-
187
-
188
-
189
-
190
-
191
-
192
-
193
-
194
-
195
-
196
-
197
-
198
-
199
-
200
-
201
-
202
-
203
-
204
-
205
-
206
-
207
-
208
-
209
-
210
-
211
-
212
-
213
-
214
-
215
-
216
-
217
-
218
-
219
-
220
-
221
-
222
-
223
-
224
-
225
-
226
-
227
-
228
-
229
-
230
-
231
-
232
-
233
-
234
-
235
-
236
-
237
-
238
-
239
-
240
-
241
-
242
-
243
-
244
-
245
-
246
-
247
-
248
-
249
-
250
-
251
-
252
-
253
-
254
 |
 |
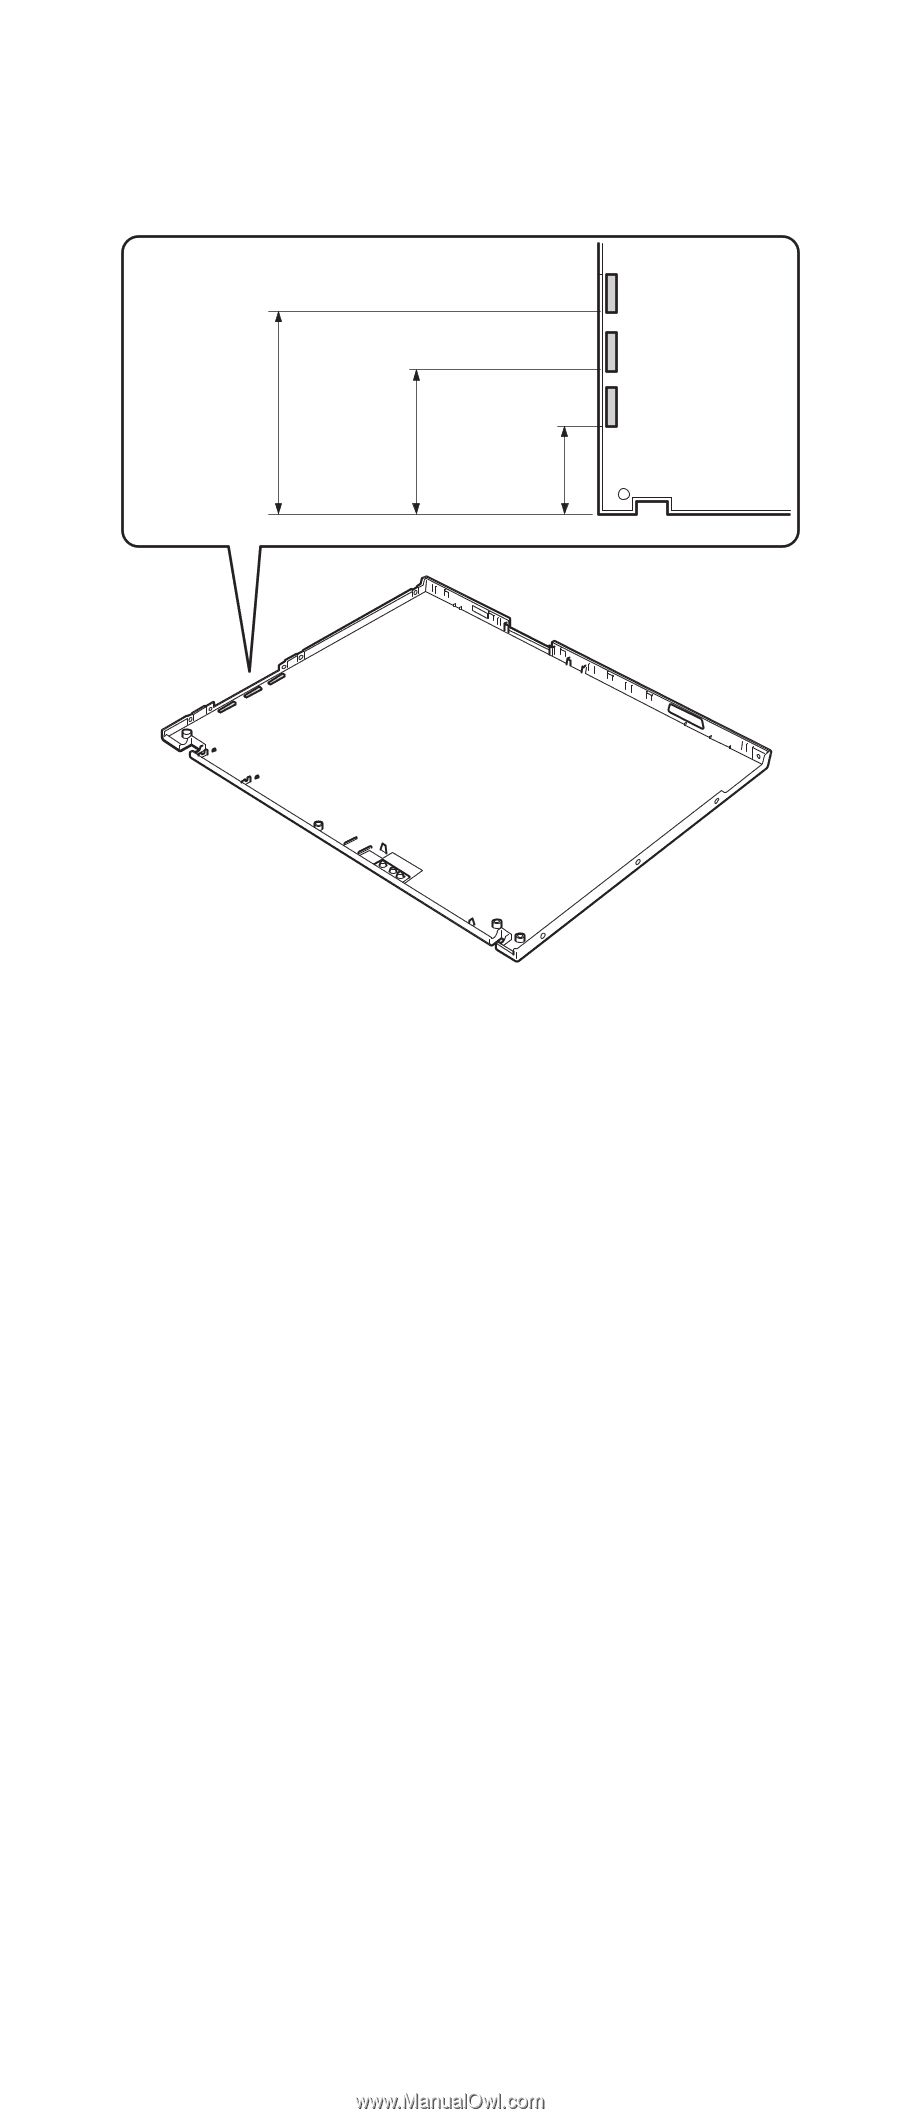
2.
Paste
three
gaskets
only
for
the
models
with
Bluetooth
wireless
features.
For
the
other
models,
skip
this
step.
41.5 mm
68.5 mm
95.5 mm
3.
Connect
the
LCD
cable
assembly
to
the
LCD
panel
and
secure
it
with
the
tape.
4.
Attach
the
wireless
LAN
antenna
cables
(MAIN,
AUX)
and
the
hinges
to
the
LCD
panel.
5.
Attach
the
LCD
panel
to
the
LCD
cover.
(continued)
Removing
and
replacing
a
FRU
164
MT
2668/2669/2678/2679/2686/2687