Lenovo ThinkPad W520 (English) User Guide - Page 214
Installing Windows XP - sata
 |
View all Lenovo ThinkPad W520 manuals
Add to My Manuals
Save this manual to your list of manuals |
Page 214 highlights
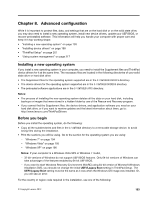
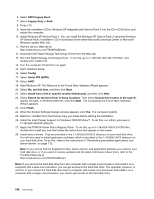
Installing Registry Patches for Windows Vista Install the following Registry Patches: • Registry Patch enabling Device Initiated Power Management on SATA • Registry Patch enabling USB S3 Power Management • Registry patch to change IDLE IRP timing by Fingerprint reader • Registry patch enabling Wake Up on LAN from Standby for Energy Star • Registry patch to improve USB device detection on resume from sleep • Fix for Issue of HDD with HD Detection To install these Registry Patches, go to : http://support.lenovo.com Installing the Windows Vista Update Module Package The Windows Vista Update Modules are in the following directory: C:\SWTOOLS\OSFIXES\. The name of each subfolder is the number of a fix module. For information about each fix module, go to the Microsoft Knowledge Base homepage at http://support.microsoft.com/, type the number of the fix module you need in the search field, and click Search. Note: The Web site address might change without notice. If the homepage is not displayed, search for it from the Microsoft top page. To install a fix module, run the .exe file in a subfolder and follow the instructions on the screen. Note: If you remove the hard disk drive from the computer with a single-core processor and install it on a computer with a dual-core processor, you can get access to the hard disk drive. The opposite, however, is not true: If you remove the hard disk drive from a computer with a dual-core processor and install it on a computer with a single-core processor, you cannot get access to the hard disk drive. Installing Windows XP Before you start, print these instructions. Note: Your computer supports Windows XP with Service Pack 3. Before you install the Windows XP Service Pack 3, make sure you install the Windows XP Service Pack 2 first. You must install Intel Rapid Storage Technology Driver before installing the operating system. To install it, you may need to attach a diskette drive to your computer. If you have a diskette drive, follow the procedure below. Note: If your computer has been set up to use RAID, you must follow the procedure that uses the diskette drive to install Intel Rapid Storage Technology Driver. Before installing the operating system, install Intel Rapid Storage Technology Driver as follows: Note: Be sure to install Intel Rapid Storage Technology Driver before installing the operating system. Otherwise your computer will not respond; it will only display a blue screen. 1. Attach a diskette drive to your computer. 2. Copy Intel Rapid Storage Technology Driver from C:\SWTOOLS\DRIVERS\IMSM to a diskette. 3. To make sure that SATA AHCI (or SATA RAID, if your computer is set up to use RAID) is enabled, start the ThinkPad Setup program. 4. Select Config. 196 User Guide
-
 1
1 -
2
-
3
-
4
-
5
-
6
-
7
-
8
-
9
-
10
-
11
-
12
-
13
-
14
-
15
-
16
-
17
-
18
-
19
-
20
-
21
-
22
-
23
-
24
-
25
-
26
-
27
-
28
-
29
-
30
-
31
-
32
-
33
-
34
-
35
-
36
-
37
-
38
-
39
-
40
-
41
-
42
-
43
-
44
-
45
-
46
-
47
-
48
-
49
-
50
-
51
-
52
-
53
-
54
-
55
-
56
-
57
-
58
-
59
-
60
-
61
-
62
-
63
-
64
-
65
-
66
-
67
-
68
-
69
-
70
-
71
-
72
-
73
-
74
-
75
-
76
-
77
-
78
-
79
-
80
-
81
-
82
-
83
-
84
-
85
-
86
-
87
-
88
-
89
-
90
-
91
-
92
-
93
-
94
-
95
-
96
-
97
-
98
-
99
-
100
-
101
-
102
-
103
-
104
-
105
-
106
-
107
-
108
-
109
-
110
-
111
-
112
-
113
-
114
-
115
-
116
-
117
-
118
-
119
-
120
-
121
-
122
-
123
-
124
-
125
-
126
-
127
-
128
-
129
-
130
-
131
-
132
-
133
-
134
-
135
-
136
-
137
-
138
-
139
-
140
-
141
-
142
-
143
-
144
-
145
-
146
-
147
-
148
-
149
-
150
-
151
-
152
-
153
-
154
-
155
-
156
-
157
-
158
-
159
-
160
-
161
-
162
-
163
-
164
-
165
-
166
-
167
-
168
-
169
-
170
-
171
-
172
-
173
-
174
-
175
-
176
-
177
-
178
-
179
-
180
-
181
-
182
-
183
-
184
-
185
-
186
-
187
-
188
-
189
-
190
-
191
-
192
-
193
-
194
-
195
-
196
-
197
-
198
-
199
-
200
-
201
-
202
-
203
-
204
-
205
-
206
-
207
-
208
-
 209
209 -
 210
210 -
 211
211 -
 212
212 -
 213
213 -
 214
214 -
 215
215 -
 216
216 -
 217
217 -
 218
218 -
 219
219 -
220
-
221
-
222
-
223
-
224
-
225
-
226
-
227
-
228
-
229
-
230
-
231
-
232
-
233
-
234
-
235
-
236
-
237
-
238
-
239
-
240
-
241
-
242
-
243
-
244
-
245
-
246
-
247
-
248
-
249
-
250
-
251
-
252
-
253
-
254
-
255
-
256
-
257
-
258
-
259
-
260
-
261
-
262
-
263
-
264
-
265
-
266
-
267
-
268
-
269
-
270
-
271
-
272
-
273
-
274
-
275
-
276
-
277
-
278
-
279
-
280
-
281
-
282
-
283
-
284
-
285
-
286
-
287
-
288
-
289
-
290
-
291
-
292
-
293
-
294
-
295
-
296
-
297
 |
 |