Lenovo ThinkPad W701 (English) Rescue and Recovery 4.5 Deployment Guide - Page 24
Scheduling backups and associated tasks, Sysprep Backup/Restore, Sysprep backup changes in Windows 7 - accessories
 |
View all Lenovo ThinkPad W701 manuals
Add to My Manuals
Save this manual to your list of manuals |
Page 24 highlights
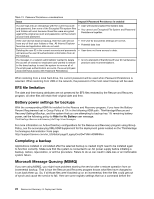
Scheduling backups and associated tasks The scheduler is not designed to be specific to the Rescue and Recovery program; however, the configuration is stored in the registry. When the Rescue and Recovery program is installed, it will populate the scheduler with the appropriate settings. Here is a description of the structure for the scheduler: • Location: Install folder. • Entry for each scheduled task. • Script to run. • Named pipe to be used for progress notifications. This is an optional setting. • Schedule information monthly, weekly, daily, weekday, or weekend - multiple schedules. Tuesdays and Fridays for example, can be supported by creating two schedules. • Parameters to pass to tasks. For the Rescue and Recovery program, perform incremental backups on schedule, with callbacks before and after the backup. In the Rescue and Recovery ADM file, there is an option to configure the Schedule Task 1 and Schedule Task 2 settings. The following registry keys must be added for the scheduled tasks: • For Schedule Task 1, this key is HKLM\Software\Lenovo\Scheduler\tasks\task1 • For Schedule Task 2, this key is HKLM\Software\Lenovo\Scheduler\tasks\task2 Note: If the task needs to be shown, add the DWORD value name TaskShow and set the value to 1 in this key. By default, tasks are hidden. Sysprep Backup/Restore Sysprep Backup/Restore is performed by using the RRCMD parameter. For instructions on RRCMD, see "RRCMD command-line interface" on page 53. Sysprep backup changes in Windows 7 The Sysprep backup operation in Windows 7 is different from that in Windows XP or Windows Vista. This is due to the new version Windows RE built from Windows 7. You can download the accessory package from the Lenovo Support Web site at http://support.lenovo.com. Follow the steps to perform the correct Sysprep backup operation through Generalize option. Overview of Windows RE (Recovery Environment) installation process in Windows 7 Unlike Windows Vista, Windows RE has been installed to the Windows 7 operating system. On a system installed using the setup.exe file, prior to OOBE (Out-Of-Box Experience), the default Windows RE image (winre.wim) is located in the \Windows\System32\Recovery subdirectory. However, once the user completes OOBE, the following will happen: 1. A Recovery folder is created on the system partition (C partition). 2. The WinRE.wim file is moved to C:\Recovery\(Subdirectory). 3. An OS Loader entry is created for Windows RE in the BCD (Boot Configuration Data). 4. The RecoverySequence setting is created in the Windows 7 object in the BCD. 5. Other (undocumented) configuration files are updated. 18 Rescue and Recovery 4.5 Deployment Guide
-
 1
1 -
2
-
3
-
4
-
5
-
6
-
7
-
8
-
9
-
10
-
11
-
12
-
13
-
14
-
15
-
16
-
17
-
18
-
 19
19 -
 20
20 -
 21
21 -
 22
22 -
 23
23 -
 24
24 -
 25
25 -
 26
26 -
 27
27 -
 28
28 -
 29
29 -
30
-
31
-
32
-
33
-
34
-
35
-
36
-
37
-
38
-
39
-
40
-
41
-
42
-
43
-
44
-
45
-
46
-
47
-
48
-
49
-
50
-
51
-
52
-
53
-
54
-
55
-
56
-
57
-
58
-
59
-
60
-
61
-
62
-
63
-
64
-
65
-
66
-
67
-
68
-
69
-
70
-
71
-
72
-
73
-
74
-
75
-
76
-
77
-
78
-
79
-
80
-
81
-
82
-
83
-
84
-
85
-
86
 |
 |