Lenovo ThinkPad X21 ThinkPad X20, X21, X22, X23, X24 Hardware Maintenance Manu - Page 31
Master + User. The Master + User, Attention, Supervisor password, How to remove the power-on password
 |
View all Lenovo ThinkPad X21 manuals
Add to My Manuals
Save this manual to your list of manuals |
Page 31 highlights
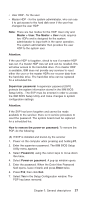
v User HDP - for the user v Master HDP - for the system administrator, who can use it to get access to the hard disk even if the user has changed the user HDP Note: There are two modes for the HDP: User only and Master + User. The Master + User mode requires two HDPs and is designed for the system administrator to input both in the same operation. The system administrator then provides the user HDP to the system user. Attention: If the user HDP is forgotten, check to see if a master HDP was set. If a master HDP was set and can be recalled, this will allow access to the hard-disk drive. If no master HDP is available, IBM does not provide any services to reset either the user or the master HDPs nor recover data from the hard-disk drive. The hard-disk drive can be replaced for a scheduled fee. Supervisor password: A supervisor password (SVP) protects the system information stored in the IBM BIOS Setup Utility . The SVP must be entered in order to access the IBM BIOS Setup Utility and make changes to system configuration settings. Attention: If the SVP has been forgotten and cannot be made available to the servicer, there is no service procedure to reset the password. The system board must be replaced for a scheduled fee. How to remove the power-on password: To remove the POP, do the following: (A) If SVP is installed and known by the servicer 1. Power on the computer while pressing and holding F1. 2. Enter the supervisor password. The IBM BIOS Setup Utility menu appears. 3. Select Password, using the cursor keys to move down the menu. 4. Select Power-on password. A pop-up window opens. 5. Enter the password. When the Enter New Password field opens, leave it blank and press Enter twice. 6. Press F10; then click Exit. 7. Select Yes in the Setup Configuration window. The POP has been removed. Chapter 2. General descriptions 27
-
 1
1 -
2
-
3
-
4
-
5
-
6
-
7
-
8
-
9
-
10
-
11
-
12
-
13
-
14
-
15
-
16
-
17
-
18
-
19
-
20
-
21
-
22
-
23
-
24
-
25
-
 26
26 -
 27
27 -
 28
28 -
 29
29 -
 30
30 -
 31
31 -
 32
32 -
 33
33 -
 34
34 -
 35
35 -
 36
36 -
37
-
38
-
39
-
40
-
41
-
42
-
43
-
44
-
45
-
46
-
47
-
48
-
49
-
50
-
51
-
52
-
53
-
54
-
55
-
56
-
57
-
58
-
59
-
60
-
61
-
62
-
63
-
64
-
65
-
66
-
67
-
68
-
69
-
70
-
71
-
72
-
73
-
74
-
75
-
76
-
77
-
78
-
79
-
80
-
81
-
82
-
83
-
84
-
85
-
86
-
87
-
88
-
89
-
90
-
91
-
92
-
93
-
94
-
95
-
96
-
97
-
98
-
99
-
100
-
101
-
102
-
103
-
104
-
105
-
106
-
107
-
108
-
109
-
110
-
111
-
112
-
113
-
114
-
115
-
116
-
117
-
118
-
119
-
120
-
121
-
122
-
123
-
124
-
125
-
126
-
127
-
128
-
129
-
130
-
131
-
132
-
133
-
134
-
135
-
136
-
137
-
138
-
139
-
140
-
141
 |
 |
