Lenovo ThinkServer RD120 (English) Installation Guide - Page 15
Introduction
 |
View all Lenovo ThinkServer RD120 manuals
Add to My Manuals
Save this manual to your list of manuals |
Page 15 highlights
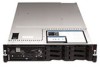
Chapter 1. Introduction This Installation Guide contains instructions for setting up your Lenovo® ThinkServer™ RD120 Types 6444, 6445, 6446, and 6447 server and basic instructions for installing some optional devices. More detailed instructions for installing optional devices are in the User Guide on the ThinkServer Documentation DVD, which comes with the server. This document contains information about: v Setting up and cabling the server v Starting and configuring the server v Installing some optional devices v Solving problems Attention: The information in this document regarding installing and removing power supplies and connecting and disconnecting power refers to ac power supplies only. If the server contains dc power supplies, see the documentation that comes with the dc power supplies. In a dc power environment, only trained service personnel other than Lenovo service technicians are authorized to connect or disconnect power to the dc power supply and to install and remove a dc power supply. The server has two model styles, which are based on the size and number of hard disk drive bays: v The 3.5-inch models have six 3.5-inch hot-swap hard disk drive bays. Install only 3.5-inch drives in these models. If you intend to install a tape drive, the tape drive will occupy two of the six 3.5-inch drive bays. v The 2.5-inch models have eight 2.5-inch hot-swap hard disk drive bays and one 3.5-inch tape drive bay. Install only 2.5-inch hard disk drives and an optional 3.5-inch tape drive in these models. Throughout this documentation, the terms 2.5-inch models and 3.5-inch models are used to distinguish between the server styles. If firmware and documentation updates are available, you can download them from the Lenovo Web site. The server might have features that are not described in the documentation that comes with the server, and the documentation might be updated occasionally to include information about those features, or technical updates might be available to provide additional information that is not included in the server documentation. To check for updates, complete the following steps: Note: Changes are made periodically to the Lenovo Web site. The actual procedure might vary slightly from what is described in this document. 1. Go to: http://www.lenovo.com/support. © Lenovo 2008, 2009. Portions © IBM Corp. 2007. 1
-
 1
1 -
2
-
3
-
4
-
5
-
6
-
7
-
8
-
9
-
 10
10 -
 11
11 -
 12
12 -
 13
13 -
 14
14 -
 15
15 -
 16
16 -
 17
17 -
 18
18 -
 19
19 -
 20
20 -
21
-
22
-
23
-
24
-
25
-
26
-
27
-
28
-
29
-
30
-
31
-
32
-
33
-
34
-
35
-
36
-
37
-
38
-
39
-
40
-
41
-
42
-
43
-
44
-
45
-
46
-
47
-
48
-
49
-
50
-
51
-
52
-
53
-
54
-
55
-
56
-
57
-
58
-
59
-
60
-
61
-
62
-
63
-
64
-
65
-
66
-
67
-
68
-
69
-
70
-
71
-
72
-
73
-
74
-
75
-
76
-
77
-
78
-
79
-
80
-
81
-
82
-
83
-
84
-
85
-
86
-
87
-
88
-
89
-
90
-
91
-
92
-
93
-
94
-
95
-
96
-
97
-
98
-
99
-
100
 |
 |
