Lenovo ThinkServer TD340 (English) User Guide and Hardware Maintenance Manual - Page 117
Installing the RAID card, hard-disk-drive backplanes. See Connecting the cables
 |
View all Lenovo ThinkServer TD340 manuals
Add to My Manuals
Save this manual to your list of manuals |
Page 117 highlights
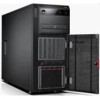
Installing the RAID card Attention: Do not open your server or attempt any repair before reading and understanding "Safety information" on page iii and "Guidelines" on page 83. This topic provides instructions on how to install the RAID card. Before you begin, print all the related instructions or ensure that you can view the PDF version on another computer for reference. Notes: • Use any documentation that comes with the RAID card and follow those instructions in addition to the instructions in this topic. • Ensure that you back up your data before installing the RAID card because you might need to reconfigure RAID and reinstall the operating system after installing the RAID card. • If your server has one microprocessor installed, it is recommended that the RAID card be installed into the PCI-E slot 5 or PCI-E slot 2. If your server has two microprocessors installed, it is recommended that the RAID card be installed into the PCI-E slot 4. To install the RAID card, do the following: 1. Remove all media from the drives and turn off all attached devices and the server. Then, disconnect all power cords from electrical outlets and disconnect all cables that are connected to the server. 2. Remove the server cover. See "Removing the server cover" on page 85. 3. Lay the server on its side for easier operation. 4. Locate the appropriate PCI-E slot on the system board. See "System board components" on page 48. 5. Remove any parts or disconnect any cables that might impede your operation. 6. Touch the static-protective package that contains the RAID card to any unpainted surface on the outside of the server. Then, take the RAID card out of the package. Note: Carefully handle the RAID card by its edges. 7. Install the RAID card. The procedure is similar to that of the Ethernet card. See "Installing the Ethernet card" on page 100. 8. Connect signal cables to the connectors on the new RAID card and the connectors on the hot-swap hard-disk-drive backplanes. See "Connecting the cables" on page 43. 9. Install the PCI card bracket assembly that comes with the RAID card. See "Removing and reinstalling the PCI card bracket assembly" on page 89. What to do next: • To work with another piece of hardware, go to the appropriate section. • To complete the installation, go to "Completing the parts replacement" on page 205. Then, configure RAID for your server. See "Configuring RAID" on page 72. • After a Lenovo RAID card is installed, do the following: 1. Check the version of the new RAID card firmware by pressing Ctrl+H when starting the Setup Utility program. 2. Go to http://www.lenovo.com/drivers and follow the instructions on the Web page to download the latest version of firmware. Then, install the firmware to your server. Note: If you want to use the Firmware Updater program, ensure that it is the latest version. To get the latest version of the Firmware Updater program, go to http://www.lenovo.com/drivers, locate different versions of the program, and then identify the latest version by comparing readme files. If the latest Chapter 6. Installing, removing, or replacing hardware 105
-
 1
1 -
2
-
3
-
4
-
5
-
6
-
7
-
8
-
9
-
10
-
11
-
12
-
13
-
14
-
15
-
16
-
17
-
18
-
19
-
20
-
21
-
22
-
23
-
24
-
25
-
26
-
27
-
28
-
29
-
30
-
31
-
32
-
33
-
34
-
35
-
36
-
37
-
38
-
39
-
40
-
41
-
42
-
43
-
44
-
45
-
46
-
47
-
48
-
49
-
50
-
51
-
52
-
53
-
54
-
55
-
56
-
57
-
58
-
59
-
60
-
61
-
62
-
63
-
64
-
65
-
66
-
67
-
68
-
69
-
70
-
71
-
72
-
73
-
74
-
75
-
76
-
77
-
78
-
79
-
80
-
81
-
82
-
83
-
84
-
85
-
86
-
87
-
88
-
89
-
90
-
91
-
92
-
93
-
94
-
95
-
96
-
97
-
98
-
99
-
100
-
101
-
102
-
103
-
104
-
105
-
106
-
107
-
108
-
109
-
110
-
111
-
 112
112 -
 113
113 -
 114
114 -
 115
115 -
 116
116 -
 117
117 -
 118
118 -
 119
119 -
 120
120 -
 121
121 -
 122
122 -
123
-
124
-
125
-
126
-
127
-
128
-
129
-
130
-
131
-
132
-
133
-
134
-
135
-
136
-
137
-
138
-
139
-
140
-
141
-
142
-
143
-
144
-
145
-
146
-
147
-
148
-
149
-
150
-
151
-
152
-
153
-
154
-
155
-
156
-
157
-
158
-
159
-
160
-
161
-
162
-
163
-
164
-
165
-
166
-
167
-
168
-
169
-
170
-
171
-
172
-
173
-
174
-
175
-
176
-
177
-
178
-
179
-
180
-
181
-
182
-
183
-
184
-
185
-
186
-
187
-
188
-
189
-
190
-
191
-
192
-
193
-
194
-
195
-
196
-
197
-
198
-
199
-
200
-
201
-
202
-
203
-
204
-
205
-
206
-
207
-
208
-
209
-
210
-
211
-
212
-
213
-
214
-
215
-
216
-
217
-
218
-
219
-
220
-
221
-
222
-
223
-
224
-
225
-
226
-
227
-
228
-
229
-
230
-
231
-
232
-
233
-
234
-
235
-
236
-
237
-
238
-
239
-
240
-
241
-
242
-
243
-
244
-
245
-
246
 |
 |
