Lenovo Yoga 2 13 Laptop User Guide - Lenovo Yoga 2 13 - Page 16
Getting to know your computer, Novo button, Rotation lock, button, Volume down
 |
View all Lenovo Yoga 2 13 Laptop manuals
Add to My Manuals
Save this manual to your list of manuals |
Page 16 highlights
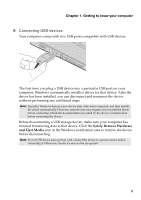
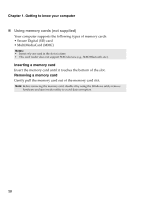
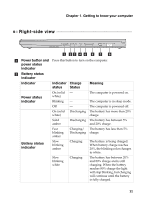
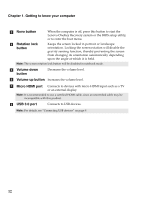
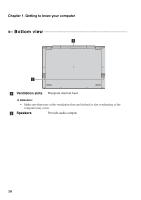
Chapter 1. Getting to know your computer c Novo button When the computer is off, press this button to start the Lenovo OneKey Recovery system or the BIOS setup utility, or to enter the boot menu. d Rotation lock button Keeps the screen locked in portrait or landscape orientation. Locking the screen rotation will disable the gravity sensing function, thereby preventing the screen from changing its orientation automatically depending upon the angle at which it is held. Note: The screen rotation lock button will be disabled in notebook mode. e Volume down button Decreases the volume level. f Volume up button Increases the volume level. g Micro HDMI port Connects to devices with micro HDMI input such as a TV or an external display. Note: It is recommended to use a certified HDMI cable, since an uncertified cable may be incompatible with this product. h USB 3.0 port Connects to USB devices. Note: For details, see "Connecting USB devices" on page 9. 12
-
 1
1 -
2
-
3
-
4
-
5
-
6
-
7
-
8
-
9
-
10
-
 11
11 -
 12
12 -
 13
13 -
 14
14 -
 15
15 -
 16
16 -
 17
17 -
 18
18 -
 19
19 -
 20
20 -
 21
21 -
22
-
23
-
24
-
25
-
26
-
27
-
28
-
29
-
30
-
31
-
32
-
33
-
34
-
35
-
36
-
37
-
38
 |
 |
