LevelOne FNS-1020 Manual - Page 8
Master
 |
View all LevelOne FNS-1020 manuals
Add to My Manuals
Save this manual to your list of manuals |
Page 8 highlights
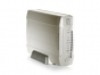
4. Hardware Installation 1. Unfasten the two screws from the rear and remove the back panel. 2. Pull out front panel and inner tray. 3. Make sure the jumper on your hard drive is set to Master 4. Install your 3.5-inch IDE or SATA hard drive and connect the data and power cables. Then use the screws provided to fasten the hard drive. * Consult the instructions on your hard drive as it differs from each manufacturer. 8
-
 1
1 -
2
-
 3
3 -
 4
4 -
 5
5 -
 6
6 -
 7
7 -
 8
8 -
 9
9 -
 10
10 -
 11
11 -
 12
12 -
 13
13 -
14
-
15
-
16
-
17
-
18
-
19
-
20
-
21
-
22
-
23
-
24
-
25
-
26
-
27
-
28
-
29
-
30
-
31
-
32
-
33
-
34
-
35
-
36
-
37
-
38
-
39
-
40
-
41
-
42
-
43
-
44
-
45
-
46
-
47
-
48
-
49
 |
 |

8
4. Hardware Installation
1.
Unfasten the two screws from the rear and
remove the back panel.
2.
Pull out front panel and inner tray.
3.
Make sure the jumper on your hard drive is
set to
Master
* Consult the instructions on your hard drive as it
differs from each manufacturer.
4.
Install your 3.5-inch IDE or SATA hard drive
and connect the data and power cables.
Then use the screws provided to fasten the
hard drive.