LevelOne PLI-3110 Manual - Page 6
Setup
 |
View all LevelOne PLI-3110 manuals
Add to My Manuals
Save this manual to your list of manuals |
Page 6 highlights
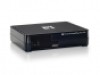
Rear Panel The rear panel contains an AC Power Cord Plug (100-240V), a Security Button, a recessed Reset Button, and an Ethernet Port for 48V-802.3af PoE enabled device. Reset Button on the side Power Port Security Button Ethernet Port PoE Port 1.4 Setup Plug and Play Installation for Homes: HomePlug is plug and play device; user is able to plug and play without any complex configuration and settings. Please execute the following hardware installation steps 1 to 4. Installation in homes with Existing HomePlug Network: 1. Connect the HomePlug Pro PoE Ethernet Port to a 802.3af enabled PoE Device. 2. Plug the HomePlug Pro PoE into a power outlet. 3. Wait a few seconds for startup to be completed, and then check the LEDs. • The Power LED should be ON • The HomePlug LED will be ON • The PoE LED should be ON 4. Hardware Installation is now completed, enjoy HomePlug Powerline connectivity. Installation in homes with NO EXISTING HomePlug Network: 1. Make sure that another HomePlug 200M device is connected to your network at the router or directly to a com- puter. 2. Connect the HomePlug Pro PoE Ethernet Port to a 802.3af enabled PoE Device. 3. Wait a few seconds for startup to be completed, and then check the LEDs. • The Power LED should be ON • The HomePlug LED will be ON • The PoE LED should be ON 4. Hardware Installation is now completed, enjoy HomePlug Powerline connectivity. 5
-
 1
1 -
 2
2 -
 3
3 -
 4
4 -
 5
5 -
 6
6 -
 7
7 -
 8
8 -
 9
9 -
 10
10
 |
 |
