LevelOne WAP-6003 User Manual - Page 8
Procedure for Hardware Installation
 |
View all LevelOne WAP-6003 manuals
Add to My Manuals
Save this manual to your list of manuals |
Page 8 highlights
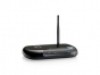
1.5 Procedure for Hardware Installation Step 1. Attach the antenna. 1.1. Remove the antenna from its plastic wrapper. 1.2. Screw the antenna in a clockwise direction to the back panel of the unit. 1.3. Once secured, position the antenna upward at its connecting joint. This will ensure optimal reception. 1.Turn off the Power Switch first. Step 2 Insert the Ethernet cable into LAN Port: Insert the Ethernet patch cable into LAN port on the back panel of Router, and an available Ethernet port on the network adapter in the computer you will use to configure the unit. Step 4. Power on Router: 4.1. Connect the power adapter to the receptor on the back panel of your Router. Step 5. Complete the setup. 5.1. When complete, the Status LED will flash. 8
-
 1
1 -
2
-
 3
3 -
 4
4 -
 5
5 -
 6
6 -
 7
7 -
 8
8 -
 9
9 -
 10
10 -
 11
11 -
 12
12 -
 13
13 -
14
-
15
-
16
-
17
-
18
-
19
-
20
-
21
-
22
-
23
-
24
-
25
-
26
-
27
-
28
-
29
-
30
-
31
-
32
-
33
-
34
-
35
-
36
-
37
-
38
-
39
-
40
-
41
-
42
 |
 |
