LevelOne WBR-6803 Manual - Page 6
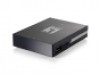
B. LED indicators, C. Installation Steps, Step 1. Install the battery
 |
View all LevelOne WBR-6803 manuals
Add to My Manuals
Save this manual to your list of manuals |
Page 6 highlights
B. LED indicators Power LED indicator: Power Source Battery Only Power Adapter ON/OFF Switch LED Status ON Green in flash ON Red OFF N/A ON Green ON Amber OFF OFF Amber N/A Description Device ON, and Battery is in use. Device ON, and Battery is low. Device OFF Device ON, and Battery is fully charged. Device ON, and Battery is charging, or no Battery installed. Device OFF, and Battery is charging. Device OFF Other LED indicator: Ethernet LED USB LED WiFi LED LED Status Green Green in flash Green Green in flash Green Green in flash Description RJ45 cable is plugged, and Ethernet connection is established. Data access 3G/3.5G is on Data access WLAN is on Data access C. Installation Steps Step 1. Install the battery: Turn OFF the power switch, open the battery lid, and then insert the Li-ion battery into the battery holder. DO NOT insert or remove the Li-ion battery while the power switch is at ON position. Step 2. Close the battery lid 6
-
 1
1 -
 2
2 -
 3
3 -
 4
4 -
 5
5 -
 6
6 -
 7
7 -
 8
8 -
 9
9 -
 10
10 -
 11
11 -
 12
12 -
13
-
14
-
15
-
16
-
17
-
18
-
19
-
20
-
21
-
22
-
23
-
24
-
25
-
26
-
27
-
28
-
29
-
30
-
31
-
32
-
33
-
34
-
35
-
36
-
37
-
38
-
39
-
40
-
41
-
42
-
43
-
44
-
45
-
46
-
47
-
48
-
49
-
50
-
51
-
52
-
53
-
54
-
55
-
56
-
57
-
58
-
59
-
60
-
61
-
62
-
63
-
64
-
65
-
66
 |
 |
