LevelOne WBR-6805 Manual - Page 9
Installation and Basic Configuration, 2.1 Operation Mode
 |
View all LevelOne WBR-6805 manuals
Add to My Manuals
Save this manual to your list of manuals |
Page 9 highlights
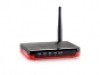
Chapter 2 Installation and Basic Configuration This chapter will guide you steps by steps to install and configure the Wireless Router. We suggest you go over the whole chapter first and then do more advanced operation. 2.1 Operation Mode In this device, there are three modes for your selection: AP mode Router mode Client mode Different mode functions different. You can glide the slide switch on the left side of the device to the left hand side (AP mode), middle (Router mode) or right hand side (Client mode) to choose the mode you want. Before installation, please choose an operation mode first and then go on other configurations. 2.2 Connect This Router to Your Network Steps to build up the network: 1. Connect the phone line from the wall socket to the line-in port on the ADSL modem, or the coaxial cable to the line-in port on the cable modem. 2. A---Router Mode: Connect the ADSL or cable modem to the Ethernet WAN port on the back of the Wireless Router by using the UTP cable. B---AP Mode: Connect a router to one of the two ports on the back of this device by using the UTP cable. C---Client Mode: Go to steps 3 directly. 3. Plug-in the USB cable to the modem and turn on the power. Install the Ethernet card into the computer by referring to the User Guide that came with the card. 4. Connect the computer to the Wireless Router by using standard twisted-pair Ethernet cable from the computer's Ethernet card to a 10/100Mbps Ethernet LAN port on the back of the Wireless Router. (In AP/Client mode both the ports can be used as LAN ports) 5. Plug the USB cable (mini-USB cable) into the router port and put the other end into an electric service outlet (recommend output value: 5V/1A DC). 9
-
 1
1 -
2
-
3
-
 4
4 -
 5
5 -
 6
6 -
 7
7 -
 8
8 -
 9
9 -
 10
10 -
 11
11 -
 12
12 -
 13
13 -
 14
14 -
15
-
16
-
17
-
18
-
19
-
20
-
21
-
22
-
23
-
24
-
25
-
26
-
27
-
28
-
29
-
30
-
31
-
32
-
33
-
34
-
35
-
36
-
37
-
38
-
39
-
40
-
41
-
42
-
43
-
44
-
45
-
46
-
47
-
48
-
49
 |
 |
