LevelOne WGR-6013 Manual - Page 9
Button Definition, 6 Procedure for Hardware Installation
 |
View all LevelOne WGR-6013 manuals
Add to My Manuals
Save this manual to your list of manuals |
Page 9 highlights
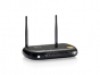
1.5 Button Definition WPS Wireless On Reset Description When Wireless is On, press this button (about 1 sec) to execute WPS function. When Wireless is off, Press this button (about 5 sec) to enable "Wireless Radio". when wireless schedule is enabled, wireless schedule has higher priority than wireless on/off button. 1. Press this button then Power on the device 2. Press about 6 second, the device will reset to default then Status LED flashes per sec in Normal status. Notice: If Status LED flashes very fast, it means to press this button too long and please try again. 1.6 Procedure for Hardware Installation Step 1 Insert the Ethernet cable into LAN Port: Insert the Ethernet patch cable into LAN port on the back panel of Router, and an available Ethernet port on the network adapter in the computer you will use to configure the unit. 9
-
 1
1 -
2
-
3
-
 4
4 -
 5
5 -
 6
6 -
 7
7 -
 8
8 -
 9
9 -
 10
10 -
 11
11 -
 12
12 -
 13
13 -
 14
14 -
15
-
16
-
17
-
18
-
19
-
20
-
21
-
22
-
23
-
24
-
25
-
26
-
27
-
28
-
29
-
30
-
31
-
32
-
33
-
34
-
35
-
36
-
37
-
38
-
39
-
40
-
41
-
42
-
43
-
44
-
45
-
46
-
47
-
48
-
49
-
50
-
51
-
52
-
53
-
54
-
55
-
56
-
57
-
58
-
59
-
60
-
61
-
62
-
63
-
64
-
65
-
66
-
67
-
68
-
69
-
70
-
71
-
72
-
73
-
74
-
75
-
76
-
77
-
78
-
79
-
80
-
81
-
82
-
83
-
84
-
85
-
86
-
87
-
88
-
89
-
90
-
91
-
92
-
93
 |
 |
