LevelOne WPS-1133 Quick Install Guide - Page 13
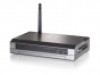
Wired Network with Print Server - wireless print server
 |
View all LevelOne WPS-1133 manuals
Add to My Manuals
Save this manual to your list of manuals |
Page 13 highlights
English Before you start, you should prepare the following items: One Windows-based PC with print server setup CD One printer One printer cable One HUB Wired Network with Print Server(Figure A) Wireless Network with Print Server(Figure B) Hardware Installation: 1. Turn off the printer's power. 2. Connect the print server to your printer with the supplied printer cable. 3. Turn the printer's power on. 4. Plug the AC power adapter into the power connector on the print server. 5. Wait 10 seconds as part of the print server's Power On Self Test (POST). Software Installation: 1. To enable network communication with print server, your com- puter must have a proper IP address, e.g. 192.168.0.100 2. Insert the setup CD into your CD-ROM and the following mes- sage appears. 3. Choose FPS-1031, FPS-1032, FPS-1033 or WPS-1133. 4. Choose Setup Wizard to install the print server and configure the connected printer. 5. Click Next, the wizard will automatically discover the print serv- er.(Figure 1) 6. From the Select a Print Server screen, select the print server that you want to configure and click Next. 7. On the Change Settings screen, select No or Yes: (Figure 2) For FPS-1031/1032/1033 (Figure 3-1) Click No if you want the print server to keep using the default IP address and keep the default settings, and then click Next.(Figure 3-1) 13
-
 1
1 -
2
-
3
-
4
-
5
-
6
-
7
-
 8
8 -
 9
9 -
 10
10 -
 11
11 -
 12
12 -
 13
13 -
 14
14 -
 15
15 -
 16
16 -
 17
17 -
 18
18 -
19
-
20
-
21
-
22
-
23
-
24
-
25
-
26
-
27
-
28
-
29
-
30
-
31
-
32
-
33
-
34
-
35
-
36
-
37
-
38
-
39
-
40
-
41
-
42
-
43
-
44
-
45
-
46
-
47
-
48
-
49
-
50
-
51
-
52
-
53
-
54
-
55
-
56
-
57
-
58
-
59
-
60
-
61
-
62
-
63
-
64
-
65
-
66
-
67
-
68
-
69
-
70
-
71
-
72
-
73
-
74
-
75
-
76
-
77
-
78
 |
 |
