Lexmark 1100 User's Guide - Page 17
Scanning, Open the Lexmark All-In-One Center see
 |
UPC - 734646553759
View all Lexmark 1100 manuals
Add to My Manuals
Save this manual to your list of manuals |
Page 17 highlights
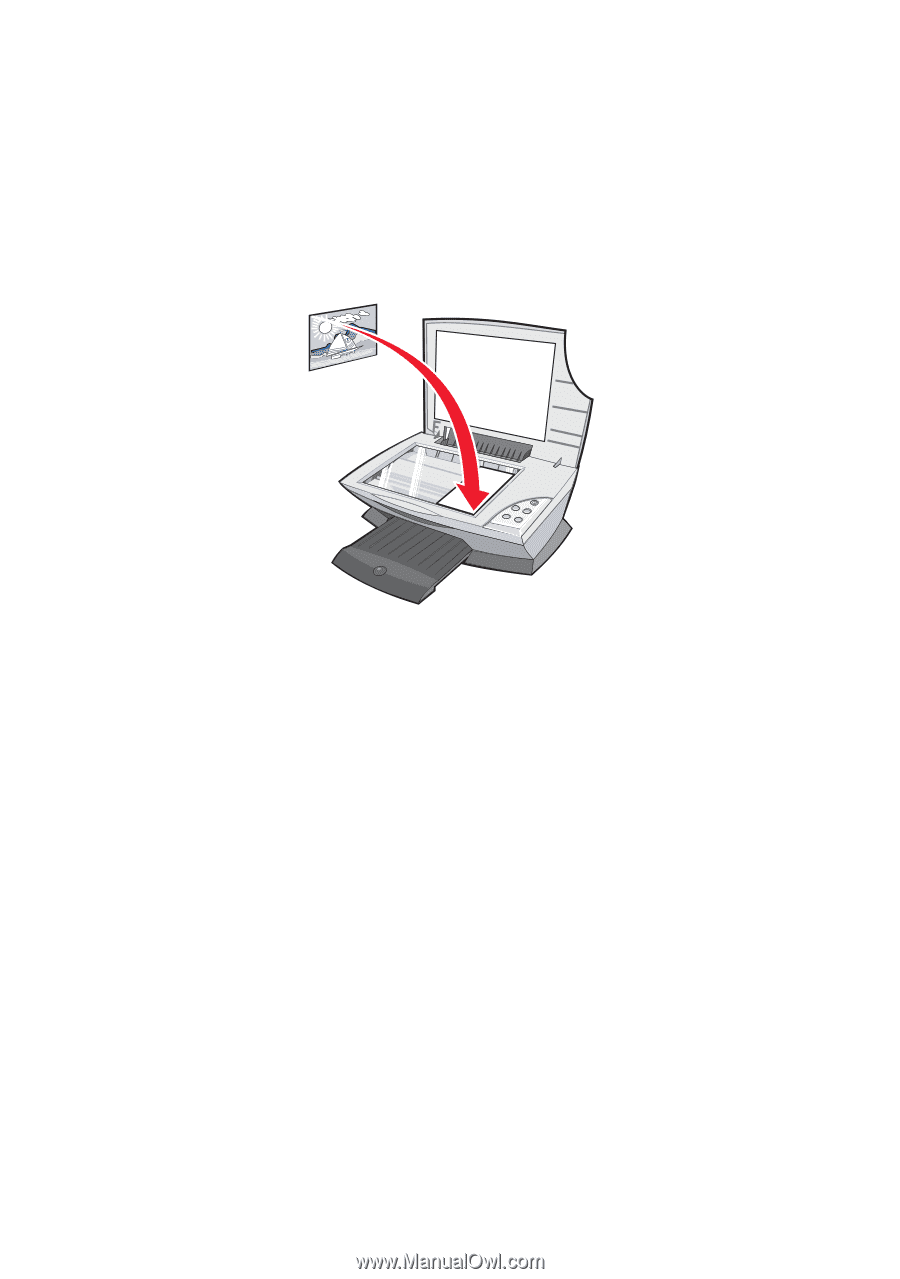
Scanning The following steps show you how to scan and save images. 1 Open the top cover of the All-In-One. 2 Place the item you want to scan face down on the glass. Make sure the upper left corner of the front of the item aligns with the arrow. 3 Close the top cover. 4 Open the Lexmark All-In-One Center (see page 3). The All-In-One Main Page displays. 5 Click the Preview Now button located in the upper right corner of the All-In-One Main Page. An image of the scanned item displays in the preview section. 6 Click and drag to select a specific area of the preview image to scan. 7 Click See More Scan Settings to review and change the scan settings. 8 Select your scan settings. 13
-
 1
1 -
2
-
3
-
4
-
5
-
6
-
7
-
8
-
9
-
10
-
11
-
 12
12 -
 13
13 -
 14
14 -
 15
15 -
 16
16 -
 17
17 -
 18
18 -
 19
19 -
 20
20 -
 21
21 -
 22
22 -
23
-
24
-
25
-
26
-
27
-
28
-
29
-
30
-
31
-
32
-
33
-
34
-
35
 |
 |
13
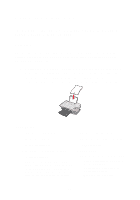
Scanning
The following steps show you how to scan and save images.
1
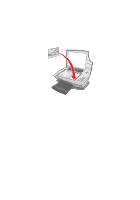
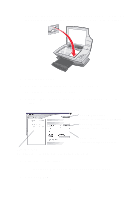
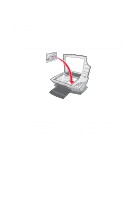
Open the top cover of the All-In-One.
2
Place the item you want to scan face down on the glass. Make sure
the upper left corner of the front of the item aligns with the arrow.
3
Close the top cover.
4
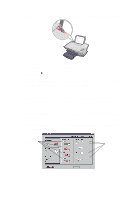
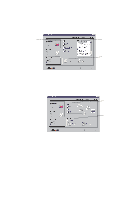
Open the Lexmark All-In-One Center (see page 3).
The All-In-One Main Page displays.
5
Click the
Preview Now
button located in the upper right corner of
the All-In-One Main Page.
An image of the scanned item displays in the preview section.
6
Click and drag to select a specific area of the preview image to
scan.
7
Click
See More Scan Settings
to review and change the scan
settings.
8
Select your scan settings.