Lexmark 18H0500 Online User's Guide for Mac OS X 10.0.3 to 10.1 - Page 23
Step 3: Print your photos
 |
View all Lexmark 18H0500 manuals
Add to My Manuals
Save this manual to your list of manuals |
Page 23 highlights
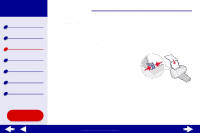
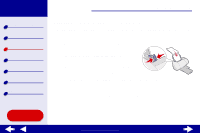
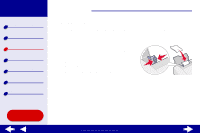
Lexmark Z54 Printer overview Basic printing Printing ideas Maintenance Troubleshooting Notices Index Printing ideas 23 f From the pop-up menu in the upper left, choose Quality & Media. g From the Paper Type pop-up menu, choose Glossy/Photo. h From the Print Quality area, click Better or Best for the print quality. Note: Higher print quality settings result in better quality documents, but may take longer to print. Step 3: Print your photos Click Print. Note: To prevent smearing, remove each photo as it exits the printer and let it dry before stacking. Using this Guide... www.lexmark.com
-
 1
1 -
2
-
3
-
4
-
5
-
6
-
7
-
8
-
9
-
10
-
11
-
12
-
13
-
14
-
15
-
16
-
17
-
 18
18 -
 19
19 -
 20
20 -
 21
21 -
 22
22 -
 23
23 -
 24
24 -
 25
25 -
 26
26 -
 27
27 -
 28
28 -
29
-
30
-
31
-
32
-
33
-
34
-
35
-
36
-
37
-
38
-
39
-
40
-
41
-
42
-
43
-
44
-
45
-
46
-
47
-
48
-
49
-
50
-
51
-
52
-
53
-
54
-
55
-
56
-
57
-
58
-
59
-
60
-
61
-
62
-
63
-
64
-
65
-
66
-
67
-
68
-
69
-
70
-
71
-
72
-
73
-
74
-
75
-
76
-
77
-
78
-
79
-
80
-
81
-
82
-
83
-
84
-
85
-
86
-
87
-
88
-
89
-
90
-
91
-
92
-
93
-
94
-
95
-
96
-
97
-
98
-
99
-
100
-
101
-
102
-
103
 |
 |

23
Printing ideas
Printer overview
Basic printing
Printing ideas
Maintenance
Troubleshooting
Notices
Index
Lexmark Z54
Using this
Guide...
www.lexmark.com
f
From the pop-up menu in the upper left, choose Quality & Media.
g
From the Paper Type pop-up menu, choose Glossy/Photo.
h
From the Print Quality area, click Better or Best for the print quality.
Note:
Higher print quality settings result in better quality documents, but may
take longer to print.
Step 3: Print your photos
Click Print.
Note:
To prevent smearing, remove each photo as it exits the printer and let it dry
before stacking.