Lexmark 20R1000 User's Guide - Page 115
Checking ink levels, Using Windows, Using Macintosh, Using the printer control panel
 |
UPC - 734646080064
View all Lexmark 20R1000 manuals
Add to My Manuals
Save this manual to your list of manuals |
Page 115 highlights
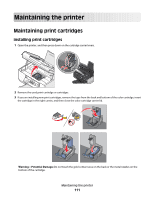
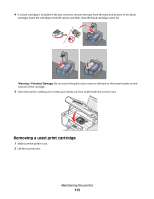
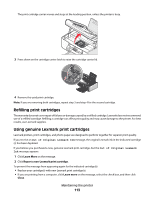
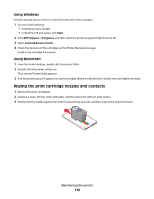
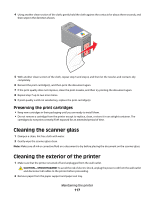
3 Press the arrow buttons until Clean Cartridges appears, and then press . A page prints, forcing ink through the print cartridge nozzles to clean them. 4 Print the document again to verify that the print quality has improved. Using Windows 1 Load plain Letter-size paper. 2 Do one of the following: • In Windows Vista, click . • In Windows XP and earlier, click Start. 3 Click All Programs or Programs, and then select the printer program folder from the list. 4 From the printer folder, click Maintenance Œ Clean Cartridges. 5 Click Print. A page prints, forcing ink through the print cartridge nozzles to clean them. 6 Print the document again to verify that the print quality has improved. Using Macintosh 1 Load plain Letter-size paper. 2 From the Finder desktop, double click the printer folder. 3 Double-click the printer utility icon. 4 From the Maintenance tab, click Clean Print Nozzles. A page prints, forcing ink through the print cartridge nozzles to clean them. 5 Print the document again to verify that the print quality has improved. If print quality has not improved, then try cleaning the nozzles up to two more times, or wipe the print cartridge nozzles and contacts. Checking ink levels Using the printer control panel 1 From the printer control panel, press , and then press . 2 Press again. 3 Press the arrow buttons until Color Ink appears, and then press . Check the ink level of the color cartridge. Install a new cartridge if necessary. 4 Press . 5 If a black cartridge is included in the box contents, and if you have installed a black cartridge in the printer, then press the arrow buttons until Black Ink appears, and then press . Check the ink level of the black cartridge. Install a new cartridge if necessary. 6 Press until you exit Setup, or press another mode button. Maintaining the printer 115
-
 1
1 -
2
-
3
-
4
-
5
-
6
-
7
-
8
-
9
-
10
-
11
-
12
-
13
-
14
-
15
-
16
-
17
-
18
-
19
-
20
-
21
-
22
-
23
-
24
-
25
-
26
-
27
-
28
-
29
-
30
-
31
-
32
-
33
-
34
-
35
-
36
-
37
-
38
-
39
-
40
-
41
-
42
-
43
-
44
-
45
-
46
-
47
-
48
-
49
-
50
-
51
-
52
-
53
-
54
-
55
-
56
-
57
-
58
-
59
-
60
-
61
-
62
-
63
-
64
-
65
-
66
-
67
-
68
-
69
-
70
-
71
-
72
-
73
-
74
-
75
-
76
-
77
-
78
-
79
-
80
-
81
-
82
-
83
-
84
-
85
-
86
-
87
-
88
-
89
-
90
-
91
-
92
-
93
-
94
-
95
-
96
-
97
-
98
-
99
-
100
-
101
-
102
-
103
-
104
-
105
-
106
-
107
-
108
-
109
-
 110
110 -
 111
111 -
 112
112 -
 113
113 -
 114
114 -
 115
115 -
 116
116 -
 117
117 -
 118
118 -
 119
119 -
 120
120 -
121
-
122
-
123
-
124
-
125
-
126
-
127
-
128
-
129
-
130
-
131
-
132
-
133
-
134
-
135
-
136
-
137
-
138
-
139
-
140
-
141
-
142
-
143
-
144
-
145
-
146
-
147
-
148
-
149
-
150
-
151
-
152
-
153
-
154
-
155
-
156
-
157
-
158
-
159
-
160
-
161
-
162
-
163
-
164
-
165
-
166
-
167
-
168
-
169
-
170
-
171
-
172
-
173
 |
 |