Lexmark 4036-306 Setup Guide - Page 51
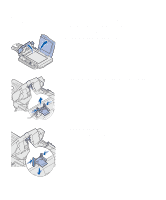
Replacing the pad assembly, squeezing and pulling out the upper part of the pad clamp.
 |
View all Lexmark 4036-306 manuals
Add to My Manuals
Save this manual to your list of manuals |
Page 51 highlights
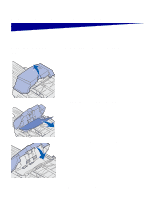
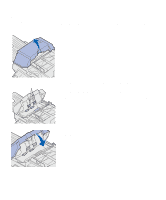
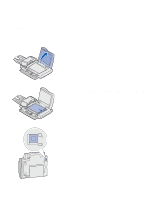
Replacing the pad assembly If you experience problems with papers double-feeding through the automatic document feeder, the pad assembly may be worn. To replace the automatic document feeder pad: 1 Turn the scanner off. 2 Open the automatic document feeder. 3 Remove the old automatic document feeder pad assembly by squeezing and pulling out the upper part of the pad clamp. Pad clamp 4 Hold the upper part of the new clamp, squeeze, and place it gently in the pad holder. 5 Close the automatic document feeder. Maintain your scanner 47
-
 1
1 -
2
-
3
-
4
-
5
-
6
-
7
-
8
-
9
-
10
-
11
-
12
-
13
-
14
-
15
-
16
-
17
-
18
-
19
-
20
-
21
-
22
-
23
-
24
-
25
-
26
-
27
-
28
-
29
-
30
-
31
-
32
-
33
-
34
-
35
-
36
-
37
-
38
-
39
-
40
-
41
-
42
-
43
-
44
-
45
-
 46
46 -
 47
47 -
 48
48 -
 49
49 -
 50
50 -
 51
51 -
 52
52 -
 53
53 -
 54
54 -
 55
55
 |
 |

47
Maintain your scanner
Replacing the pad
assembly
If you experience problems with papers double-feeding through the
automatic document feeder, the pad assembly may be worn.
To replace the automatic document feeder pad:
1
Turn the scanner off.
2
Open the automatic document feeder.
3
Remove the old automatic document feeder pad assembly by
squeezing and pulling out the upper part of the pad clamp.
4
Hold the upper part of the new clamp, squeeze, and place it
gently in the pad holder.
5
Close the automatic document feeder.
Pad clamp