Lexmark 652dtn User's Guide
Lexmark 652dtn - T B/W Laser Printer Manual
 |
UPC - 734646083362
View all Lexmark 652dtn manuals
Add to My Manuals
Save this manual to your list of manuals |
Lexmark 652dtn manual content summary:
- Lexmark 652dtn | User's Guide - Page 1
T650, T652, T654 User's Guide Important: For information about T656 products, go to http://md.lexmark.com/ md/?func=publications&folder=v12721881&file=v12721881_en.pdf. September 2009 Machine type(s): 4062, 4551, 4552, 4553 Model(s): 01A, 21A, 23A, 41A, 43A, n01, gn1, - Lexmark 652dtn | User's Guide - Page 2
(T650 only) ...35 Attaching cables...36 Verifying printer setup...37 Printing a menu settings page...38 Printing a network setup page ...38 Setting up the printer software...38 Installing printer software ...38 Updating available options in the printer driver...39 Setting up wireless printing...40 - Lexmark 652dtn | User's Guide - Page 3
and letterhead...66 Using recycled paper...67 Storing paper...68 Supported paper sizes, types, and weights...68 Paper sizes supported by the printer ...68 Paper types and weights supported by the printer ...70 Paper types and weights supported by the output bins 70 Printing 72 Printing a document - Lexmark 652dtn | User's Guide - Page 4
paper jam...89 271-279 paper jams...90 280 paper jams...90 281 paper jam...91 282 paper jam...91 283 staple jam...92 Understanding printer menus 94 Menus list...94 Paper menu...95 Default Source menu...95 Paper Size/Type menu ...95 Configure MP menu...98 Envelope Enhance...99 Substitute - Lexmark 652dtn | User's Guide - Page 5
166 Storing supplies...166 Conserving supplies...166 Checking the status of supplies...167 Checking the status of supplies from the printer control panel 167 Checking the status of supplies from a network computer 167 Ordering supplies...167 Ordering print cartridges ...167 Ordering a maintenance - Lexmark 652dtn | User's Guide - Page 6
fuser wiper ...169 Ordering pick rollers ...170 Ordering staple cartridges...170 Ordering a transfer roller...170 Recycling Lexmark products...170 Moving the printer...170 Before moving the printer...170 Moving the printer to another location...171 Shipping the printer ...171 Administrative support - Lexmark 652dtn | User's Guide - Page 7
adapter...182 Internal Solutions Port ...182 Solving paper feed problems...182 Paper frequently jams ...182 Paper jam message remains Toner fog or background shading appears on the page 192 Toner rubs off...192 Toner specks...193 Transparency print quality is poor...193 Contacting Customer Support - Lexmark 652dtn | User's Guide - Page 8
8 - Lexmark 652dtn | User's Guide - Page 9
the manufacturer's instructions and local regulations. CAUTION-HOT SURFACE: The inside of the printer might be hot parts may not always be obvious. The manufacturer is not responsible for the use of other replacement parts. problems. Remove the power cord from the electrical outlet before - Lexmark 652dtn | User's Guide - Page 10
tray, a duplex unit and an input option, or more than one input option. If you purchased a multifunction printer (MFP) that scans, copies, and faxes, you may need additional furniture. For more information, see www.lexmark.com/multifunctionprinters. SAVE THESE INSTRUCTIONS. Safety information 10 - Lexmark 652dtn | User's Guide - Page 11
Description Where to find The Setup information gives you instructions for setting You can find the Setup information on the side of the printer box up the printer. Follow the set of instructions for local, or on the Lexmark Web site at www.lexmark.com. network, or wireless, depending on what you - Lexmark 652dtn | User's Guide - Page 12
using a high-capacity input tray, a duplex unit and an input option, or more than one input option. If you purchased a multifunction printer (MFP) that scans, copies, and faxes, you may need additional furniture. For more information, see www.lexmark.com/multifunctionprinters. Learning about the - Lexmark 652dtn | User's Guide - Page 13
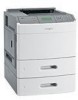
250 or 550 sheets 8 Optional 2000-sheet tray (Tray 4) 2000 sheets 9 Caster base Not applicable 1 Based on 75 g/m2 (20 lb.) paper. 2 The printer supports up to three output expander units, two 5-bin mailboxes, one high capacity output expander (not depicted), or one stapler unit (not depicted - Lexmark 652dtn | User's Guide - Page 14
- Free from direct sunlight, humidity extremes, or temperature fluctuations - Clean, dry, and free of dust • Allow the following recommended amount of space around the printer for proper ventilation: 1 Right Side 31 cm (12 in.) 2 Left Side 31 cm (12 in.) 3 Front 51 cm (20 in.) 4 Rear 31 cm (12 - Lexmark 652dtn | User's Guide - Page 15
until factory defaults are restored. • Settings chosen from a software program can also change or override the user default settings selected from the printer control panel. Enter numbers or symbols on the display. Returns the display to the previous screen 6 Indicator light 7 Stop Indicates the - Lexmark 652dtn | User's Guide - Page 16
Item 8 Menu 9 USB port Description Opens the menu index Note: The menus are available only when the printer is in the Ready state. Insert a flash drive into the front of the printer to print saved files. Note: Only the front USB port supports flash drives. Learning about the printer 16 - Lexmark 652dtn | User's Guide - Page 17
options CAUTION-SHOCK HAZARD: If you are accessing the system board or installing optional hardware or memory devices sometime after setting up the printer, then turn the printer off, and unplug the power cord from the wall outlet before continuing. If you have any other devices attached to the - Lexmark 652dtn | User's Guide - Page 18
screwdriver. CAUTION-SHOCK HAZARD: If you are accessing the system board or installing optional hardware or memory devices sometime after setting up the printer, then turn the printer off, and unplug the power cord from the wall outlet before continuing. If you have any other devices attached to the - Lexmark 652dtn | User's Guide - Page 19
appropriate connector. Warning-Potential Damage: System board electronic components are easily damaged by static electricity. Touch something metal on the printer before touching any system board electronic components or connectors. 1 Firmware and flash memory card connectors 2 Memory card connector - Lexmark 652dtn | User's Guide - Page 20
screwdriver. CAUTION-SHOCK HAZARD: If you are accessing the system board or installing optional hardware or memory devices sometime after setting up the printer, then turn the printer off, and unplug the power cord from the wall outlet before continuing. If you have any other devices attached to the - Lexmark 652dtn | User's Guide - Page 21
place. 6 Replace the system board cover and close the system board door. Installing a flash memory or firmware card Note: This task requires a flathead screwdriver. Additional printer setup 21 - Lexmark 652dtn | User's Guide - Page 22
. CAUTION-SHOCK HAZARD: If you are accessing the system board or installing optional hardware or memory devices sometime after setting up the printer, then turn the printer off, and unplug the power cord from the wall outlet before continuing. If you have any other devices attached to the - Lexmark 652dtn | User's Guide - Page 23
4 Push the card firmly into place. Notes: • The entire length of the connector on the card must touch and be flush against the system board. • Be careful not to damage the connectors. 5 Replace the system board cover and close the system board door. Additional printer setup 23 - Lexmark 652dtn | User's Guide - Page 24
Installing an Internal Solutions Port The system board supports one optional Lexmark Internal Solutions Port (ISP). Install an ISP or installing optional hardware or memory devices sometime after setting up the printer, then turn the printer off, and unplug the power cord from the wall outlet before - Lexmark 652dtn | User's Guide - Page 25
, leaving the cable attached to the printer hard disk. To unplug the cable, squeeze the paddle at the plug of the interface cable to disengage the latch before pulling the cable out. b Remove the screws holding the printer hard disk in place. c Remove the printer hard disk by pulling it upward to - Lexmark 652dtn | User's Guide - Page 26
d Remove the thumbscrews that attach the printer hard disk mounting bracket to the printer hard disk, and then remove the bracket. Set the printer hard disk aside. 4 Remove the metal cover from the ISP opening. Additional printer setup 26 - Lexmark 652dtn | User's Guide - Page 27
plastic tee, and then approach the plastic tee so that any overhanging connectors will pass through the ISP opening in the system board cage. Additional printer setup 27 - Lexmark 652dtn | User's Guide - Page 28
7 Lower the ISP toward the plastic tee until the ISP is seated between the guides of the plastic tee. 8 Insert the long thumbscrew and turn it clockwise enough to hold the ISP in place, but do not tighten the thumbscrew at this time. Additional printer setup 28 - Lexmark 652dtn | User's Guide - Page 29
Insert the plug of the ISP interface cable into the receptacle of the system board. Note: The plugs and receptacles are color coded. 12 If a printer hard disk was previously installed, then attach the printer hard disk to the ISP. For more information, see "Installing - Lexmark 652dtn | User's Guide - Page 30
13 Replace the system board cover and close the system board door. Installing a printer hard disk The optional printer hard disk can be installed with or without a Lexmark Internal Solutions Port (ISP). Note: This task requires a flathead screwdriver. CAUTION-SHOCK HAZARD: If you are accessing the - Lexmark 652dtn | User's Guide - Page 31
3 Locate the appropriate connector on the system board. Note: If an optional ISP is currently installed, then the printer hard disk must be installed onto the ISP. To install a printer hard disk onto the ISP: a Using a flathead screwdriver to loosen the screws, remove the thumbscrews that attach the - Lexmark 652dtn | User's Guide - Page 32
. Note: The plugs and receptacles are color coded. To install a printer hard disk directly onto the system board: a Align the standoffs of the printer hard disk with the holes in the system board, and then press downward on the printer hard disk until the standoffs have seated into place. Additional - Lexmark 652dtn | User's Guide - Page 33
b Attach the two provided screws to secure the printer hard disk mounting bracket. c Insert the plug of the printer hard disk interface cable into the receptacle of the system board. Note: The plugs and receptacles are color coded. 4 Replace the system board cover and - Lexmark 652dtn | User's Guide - Page 34
furniture. For more information, see www.lexmark.com/multifunctionprinters. Install the printer and any options you have purchased in the option. Installing paper drawers The printer supports up to four optional drawers. A drawer consists of a tray and a support unit. All drawers are installed - Lexmark 652dtn | User's Guide - Page 35
tray and above any optional drawers. Notes: • T652dn and T654dn models have an internal duplex unit installed in the printer. • T652n and T654n models do not support an optional duplex unit. CAUTION-SHOCK HAZARD: If you are accessing the system board or installing optional hardware or memory - Lexmark 652dtn | User's Guide - Page 36
18 kg (40 lb) and requires two or more trained personnel to move it safely. Removing an optional duplex unit Warning-Potential Damage: Lifting the printer from the duplex unit without pushing in the safety latches could damage the latches. To remove the duplex unit, push in the safety latches on - Lexmark 652dtn | User's Guide - Page 37
you installed is not listed, then it is not installed correctly. Remove the option and install it again. • Network setup page-If your printer is a network model and is attached to a network, print a network setup page to verify the network connection. This page also provides important information - Lexmark 652dtn | User's Guide - Page 38
up the printer software Installing printer software A printer driver is software that lets the computer communicate with the printer. The printer software is typically installed during the initial printer setup. If you need to install the software after setup, follow these instructions: For Windows - Lexmark 652dtn | User's Guide - Page 39
appears. 4 Double-click the Install icon. 5 Follow the instructions on the screen. Using the World Wide Web 1 Go to the Lexmark Web site at www.lexmark.com. 2 From the Drivers & Downloads menu, click Driver Finder. 3 Select your printer, and then select your operating system. 4 Download the - Lexmark 652dtn | User's Guide - Page 40
Some ad hoc networks will also require the auto setting. Check with your system support person if you are not sure which channel to select. • Security Method-There are on configuring 802.1X security, see the Networking Guide on the Software and Documentation CD. Additional printer setup 40 - Lexmark 652dtn | User's Guide - Page 41
to the same wireless network where you want to set up the printer. 1 Connect the power cable, and then turn the printer on. Make sure the printer and computer are fully on and ready. Do not connect the USB cable until instructed to do so on the screen 2 Insert the Software and Documentation CD - Lexmark 652dtn | User's Guide - Page 42
Attach. 7 Connect the cables in the following order: a Temporarily connect a USB cable between the computer on the wireless network and the printer. Note: After the printer is configured, the software will instruct you to disconnect the temporary USB cable so you can print wirelessly. b If your - Lexmark 652dtn | User's Guide - Page 43
3 Open the Safari browser. 4 From the Bookmarks drop-down menu, select Show. 5 Under Collections, select Bonjour or Rendezvous, and then double-click the printer name. Note: The application is referred to as Rendezvous in Mac OS X version 10.3, but is now called Bonjour by Apple Computer. 6 From the - Lexmark 652dtn | User's Guide - Page 44
For IP printing: In Mac OS X version 10.5 or later 1 From the Apple menu, choose System Preferences. 2 Click Print & Fax. 3 Click +. 4 Select the printer from the list. 5 Click Add. In Mac OS X version 10.4 and earlier 1 From the Finder desktop, choose Go > Applications. 2 Double-click the Utilities - Lexmark 652dtn | User's Guide - Page 45
second pop-up menu, select Local AppleTalk zone. 9 Select the printer from the list. 10 Click Add. Installing the printer on a wired network Use the following instructions to install the printer on a wired network. These instructions apply to Ethernet and fiber optic network connections. Before you - Lexmark 652dtn | User's Guide - Page 46
network setup page. You will need the IP address if you are configuring access for computers on a different subnet than the printer. 4 Install the drivers and add the printer. a Install a PPD file on the computer: 1 Insert the Software and Documentation CD in the CD or DVD drive. 2 Double-click the - Lexmark 652dtn | User's Guide - Page 47
add it using the IP address. Contact your system support person for assistance. Changing port settings after installing a new network Internal Solutions Port When a new network Lexmark Internal Solutions Port (ISP) is installed in the printer, the printer configurations on computers that access the - Lexmark 652dtn | User's Guide - Page 48
select it. 10 Click Configure Port. 11 Type the new IP address in the "Printer Name or IP Address" field. You can find the new IP address on the network setup page and make a note of the new IP address. 2 Locate the printer IP address in the TCP/IP section of the network setup page. You will need - Lexmark 652dtn | User's Guide - Page 49
port settings. c Make any necessary changes to the serial settings. d Save the new settings. e Print a menu settings page. 2 Install the printer driver: a Insert the Software and Documentation CD. It launches automatically. If the CD does not launch automatically, then do the following: 1 Click , or - Lexmark 652dtn | User's Guide - Page 50
. m Select any other optional software you want to install, and then click Next. n Click Finish to complete the printer software installation. 3 Set the COM port parameters: After the printer driver is installed, you must set the serial parameters in the communications (COM) port assigned to the - Lexmark 652dtn | User's Guide - Page 51
guides in the tray for all trays except the multipurpose feeder. The Paper Size setting for the multipurpose feeder must be set manually manually for all trays that do not contain plain paper. 1 Make sure the printer is on and Ready appears. 2 From the printer The smallest supported Universal size is - Lexmark 652dtn | User's Guide - Page 52
size (in the portrait orientation) allows the printer to support the size, including support for standard features such as duplex printing and different in appearance, they require the same process for loading paper. Use these instructions to load paper in either tray: 1 Pull the tray out. Note: Do - Lexmark 652dtn | User's Guide - Page 53
position for the paper size being loaded. Notes: • Use the size indicators on the bottom of the tray to help position the guides. • For standard paper sizes, lock the length guide. 4 Flex the sheets back and forth to loosen them, and then fan them. Do not fold or crease the paper. Straighten - Lexmark 652dtn | User's Guide - Page 54
on the side of the tray which indicates the maximum height for loading paper. Do not overload the tray. 6 If necessary, adjust the paper guides to lightly touch the sides of the stack, and lock the length guide for the paper sizes indicated on the tray. Loading paper and specialty media 54 - Lexmark 652dtn | User's Guide - Page 55
type previously loaded in the tray, then change the Paper Type setting for the tray from the printer control panel. Loading the 2000-sheet tray 1 Pull the tray out. 2 Pull up and slide the width guide to the correct position for the paper size being loaded. Loading paper and specialty media 55 - Lexmark 652dtn | User's Guide - Page 56
3 Unlock the length guide. 4 Push the length guide release latch to raise the length guide, slide the guide to the correct position for the paper size being loaded, and then lock the guide. Loading paper and specialty media 56 - Lexmark 652dtn | User's Guide - Page 57
5 Flex the sheets back and forth to loosen them, and then fan them. Do not fold or crease the paper. Straighten the edges on a level surface. 6 Load the paper stack: • Print side facedown for single-sided printing • Print side faceup for duplex printing Note: Paper must be loaded differently in the - Lexmark 652dtn | User's Guide - Page 58
Without an optional StapleSmart II Finisher With an optional StapleSmart II Finisher Duplex (two-sided) printing Duplex (two-sided) printing Note: Notice the maximum fill line on the side of the tray which indicates the maximum height for loading paper. Do not overload the tray. 7 Insert the - Lexmark 652dtn | User's Guide - Page 59
the release latch, and then pull down the multipurpose feeder door. 2 Pull out the extension until it is fully extended. 3 Squeeze and slide the width guide to the far right. 4 Flex the sheets of paper or specialty media back and forth to loosen them, and then fan them. Do not fold - Lexmark 652dtn | User's Guide - Page 60
Envelopes Transparencies* * Avoid touching the print side of transparencies. Be careful not to scratch them. 5 Load the paper or specialty media. Slide the stack gently into the multipurpose feeder until it comes to a stop. Without an optional StapleSmart II Finisher With an optional StapleSmart - Lexmark 652dtn | User's Guide - Page 61
the width guide to lightly touch the edge of the paper stack. Make sure the paper fits loosely in the multipurpose feeder, lies flat, and is not bent or wrinkled. 7 From the printer control panel, set the Paper Size and Paper Type. Loading the envelope feeder 1 Adjust the envelope support for the - Lexmark 652dtn | User's Guide - Page 62
maximum stack height by forcing paper under the stack height limiter. 6 Adjust the width guide to lightly touch the edge of the paper stack. 7 Lower the envelope weight to touch the paper stack. 8 From the printer control panel, set the Paper Size and Paper Type. Loading paper and specialty media - Lexmark 652dtn | User's Guide - Page 63
guides in each tray except the multipurpose feeder. The printer can sense A4, A5, JIS B5, Letter, Legal, Executive, and Universal paper sizes. The multipurpose feeder and trays using other paper sizes can be linked manually tray. The temperature of the fuser varies according to the specified Paper - Lexmark 652dtn | User's Guide - Page 64
IP address into the address field of your Web browser. Note: If you do not know the IP address of the printer, then print a network setup page and locate the IP address in the TCP/IP section. 2 Click Settings. 3 Under Default Settings, click Paper Menu. 4 Click Custom - Lexmark 652dtn | User's Guide - Page 65
the Card Stock & Label Guide available on the Lexmark Web site at www.lexmark.com/publications. Weight The printer can automatically feed paper weights and can cause feeding problems. Smoothness Paper smoothness directly affects print quality. If paper is too rough, then toner cannot fuse to it - Lexmark 652dtn | User's Guide - Page 66
resulting in fewer paper feeding problems and better print quality. affected by the temperature in the printer fuser • Preprinted papers that require part forms or documents For more information about Lexmark, visit www.lexmark are not affected by the resin in toner. Inks that are oxidation-set or oil - Lexmark 652dtn | User's Guide - Page 67
company, Lexmark supports the use of recycled paper produced specifically for use in laser (electro-photographic) printers. While no • Surface roughness (measured in Sheffield units, impacts print clarity and how well toner fuses to the paper) • Surface friction (determines how easily sheets can be - Lexmark 652dtn | User's Guide - Page 68
size, select the closest larger listed size. For information on card stock and labels, see the Card Stock & Label Guide on the Lexmark Web site. Paper sizes supported by the printer Note: An optional 250-sheet Universally Adjustable Tray is available for sizes smaller than A5, such as index cards - Lexmark 652dtn | User's Guide - Page 69
this size. 3 This size setting formats the page for 216 x 356 mm (8.5 x 14 in.) unless the size is specified by the software application. 4 To support duplexing, the Universal width must be between 148 mm (5.8 in) and 216 mm (8.5 in); Universal length must be between 182 mm (7.2 in) and 356 mm ( - Lexmark 652dtn | User's Guide - Page 70
Paper types and weights supported by the printer The printer engine supports 60-176 g/m2 (16-47 lb) paper weights. The duplex unit supports 63-170 g/m2 (17-45 lb) label fuser cleaner which is included with the special cartridge required for label applications. Paper types and weights supported by - Lexmark 652dtn | User's Guide - Page 71
X X Envelopes X X Labels 3 • Paper • Vinyl Transparencies X X X X 1 Supports 60-90 g/m2 (16-24 lb) paper weights. 2 Maximum of 50 sheets of 75 heavier paper. 3 Printing labels requires a special label fuser cleaner which is included with the special cartridge required for label applications. - Lexmark 652dtn | User's Guide - Page 72
can affect how reliably documents print. For more information, see "Avoiding jams" on page 81 and "Storing paper" on page 68. Printing a document 1 From the printer control panel Paper menu, set the Paper Type and Paper Size to match the loaded paper. 2 Send the print job: For Windows users a With - Lexmark 652dtn | User's Guide - Page 73
problems, avoid getting fingerprints on the transparencies. • Before loading transparencies, fan the stack to prevent sheets from sticking together. • We recommend Lexmark part number 12A5010 for A4-size transparencies and Lexmark part laser printers. Check • Adjust the width guide to fit the width - Lexmark 652dtn | User's Guide - Page 74
fuser cleaner which is included with the special cartridge required for label applications. For more information, see "Ordering supplies" on page 167. For detailed information on label printing, characteristics, and design, see the Card Stock & Label Guide available on the Lexmark printer and driver - Lexmark 652dtn | User's Guide - Page 75
the Held Jobs menu. Repeat When you send a Repeat print job, the printer prints all requested copies of the job and stores the job in memory so Other types of held jobs include: • Profiles from various sources including Lexmark Document Solutions Suite (LDSS) • Forms from a kiosk • Bookmarks • - Lexmark 652dtn | User's Guide - Page 76
then assign a user name. For a confidential job, also enter a four-digit PIN. 4 Click OK or Print, and then go to the printer to release the job. 5 From the printer control panel, press the arrow buttons until Held jobs appears, and then press . 6 Press the arrow buttons until appears next to your - Lexmark 652dtn | User's Guide - Page 77
for use with the printer. For more information, visit the Lexmark Web site at www.lexmark.com. Notes: • High-speed flash drives must support the full-speed USB standard. Flash drives supporting only USB low-speed capabilities are not supported. • Flash drives must support the FAT (File Allocation - Lexmark 652dtn | User's Guide - Page 78
, and then press . Printing the print quality test pages Print the print quality test pages to isolate print quality problems. 1 Turn the printer off. 2 Hold down and while turning the printer on. 3 Release the buttons when the clock appears, and wait for CONFIG MENU to appear. 4 Press the arrow - Lexmark 652dtn | User's Guide - Page 79
For Macintosh users In Mac OS X version 10.5 or later: 1 From the Apple menu, choose System Preferences. 2 Click Print & Fax, and then double-click the printer icon. 3 From the printer window, select the job to cancel. 4 From the icon bar at the top of the window, click the Delete icon. Printing 79 - Lexmark 652dtn | User's Guide - Page 80
10.4 and earlier: 1 From the Go menu, choose Applications. 2 Double-click Utilities, and then double-click Print Center or Printer Setup Utility. 3 Double-click the printer icon. 4 From the printer window, select the job to cancel. 5 From the icon bar at the top of the window, click the Delete icon - Lexmark 652dtn | User's Guide - Page 81
printer is printing. Load them prior to printing, or wait for a prompt to load them. • Do not load too much paper. Make sure the stack height does not exceed the indicated maximum height. • Make sure the guides information, see "Paper types and weights supported by the printer" on page 70. • Do not - Lexmark 652dtn | User's Guide - Page 82
from the paper path and then press . Jam numbers 200-203, 230 231-239 241-245 250 260 271-279 280-282 283 Area Printer Optional external duplex unit Paper trays Multipurpose feeder Envelope feeder Optional output bins StapleSmart II Finisher Staple cartridge 200 and 201 paper jams 1 Push the - Lexmark 652dtn | User's Guide - Page 83
to light for extended periods. Warning-Potential Damage: The jammed paper may be covered with unfused toner which can stain garments and skin. 5 Remove the jammed paper. CAUTION-HOT SURFACE: The inside of the printer might be hot. To reduce the risk of injury from a hot component, allow the surface - Lexmark 652dtn | User's Guide - Page 84
If the paper is not exiting the printer: 1 Pull down the top rear door. 2 Slowly remove the jammed paper to avoid tearing it. 3 Close the top rear door. 4 Press . 230 paper jam Rear paper jams 1 Remove the standard tray from the printer. Clearing jams 84 - Lexmark 652dtn | User's Guide - Page 85
2 Pull down the bottom rear door. 3 Push the tab down. 4 Remove the jammed paper. 5 Close the bottom rear door. 6 Insert the standard tray. 7 Press . Clearing jams 85 - Lexmark 652dtn | User's Guide - Page 86
Front paper jams 1 Remove the standard tray from the printer. 2 Push the tab down. 3 Remove the jammed paper. 4 Insert the standard tray. 5 Press . 231-239 paper jams (optional external duplex unit) Rear paper jams 1 Push - Lexmark 652dtn | User's Guide - Page 87
3 Close the rear duplex door. 4 Press . Front paper jams 1 Remove the standard tray from the printer. 2 Remove the duplex jam access tray. 3 Raise the recessed duplex bar. 4 Remove the jammed paper. 5 Replace the duplex jam access tray. Clearing jams 87 - Lexmark 652dtn | User's Guide - Page 88
paper, and then insert the tray. 3 Press . 4 If the jam message persists for a 250-sheet or 550-sheet tray, then remove the tray from the printer. 5 Remove the jammed paper, and then insert the tray. 6 Press . 250 paper jam 1 Remove the paper from the multipurpose feeder. Clearing jams 88 - Lexmark 652dtn | User's Guide - Page 89
surface. 3 Load the paper into the multipurpose feeder. 4 Slide the paper guide toward the inside of the tray until it lightly rests against the edge of the feeder up and then out of the printer, and then set it aside. 3 Remove the envelope from the printer. Note: If you cannot remove the envelope - Lexmark 652dtn | User's Guide - Page 90
5 Flex and stack the envelopes. 6 Load the envelopes in the envelope feeder. 7 Adjust the paper guide. 8 Lower the envelope weight. 9 Press . 271-279 paper jams To clear a jam in the output expander, high-capacity output stacker, the 5-bin mailbox, or the - Lexmark 652dtn | User's Guide - Page 91
281 paper jam 1 Clear the jam from the stapler output bin. 2 Press . 282 paper jam To prevent paper jams, the stapler motor does not run when the stapler door is open. 1 Close the stapler door until it clicks into place. 2 Press . Clearing jams 91 - Lexmark 652dtn | User's Guide - Page 92
283 staple jam 1 Press the latch to open the stapler door. 2 Pull the latch of the staple cartridge holder down, and then pull the holder out of the printer. 3 Use the metal tab to lift the staple guard, and then remove any loose staples. Clearing jams 92 - Lexmark 652dtn | User's Guide - Page 93
4 Press down on the staple guard until it snaps into place. 5 Push the cartridge holder firmly back into the stapler unit until the cartridge holder clicks into place. 6 Close the stapler door. 7 Press . Clearing jams 93 - Lexmark 652dtn | User's Guide - Page 94
Network Setup Page or Network Setup Page. 2 Depending on the printer setup, this menu item appears as Standard Network or Network . Print Quality Printing Guide Media Guide Print Defects Menu Map Information Guide Connection Guide Moving Guide Supplies Guide Understanding printer menus 94 - Lexmark 652dtn | User's Guide - Page 95
Feeder Envelope Feeder Manual Paper Manual Env Description Sets not supported for Oficio, Folio, or Statement paper sizes. • The 2000-sheet tray supports A4, Letter, and Legal paper sizes. * Appears only if Tray Size Sensing is turned off. For more information, contact Customer Support - Lexmark 652dtn | User's Guide - Page 96
automatically sense paper size. The paper size value must be set. * Appears only if Tray Size Sensing is turned off. For more information, contact Customer Support. Note: Only installed trays, drawers, and feeders are listed in this menu. Understanding - Lexmark 652dtn | User's Guide - Page 97
up to six types of envelopes. Manual Paper Size A4 A5 A6 JIS B5 Letter Legal Executive Oficio Statement Universal Specifies the size of the paper being manually loaded Note: A4 is the international factory default setting information, contact Customer Support. Note: Only installed trays, drawers, and feeders - Lexmark 652dtn | User's Guide - Page 98
turned off. For more information, contact Customer Support. Note: Only installed trays, drawers, and feeders are listed in this menu. Configure MP menu Menu item Configure MP Cassette Manual First Description Determines when the printer selects paper from the multipurpose feeder Notes: • Cassette - Lexmark 652dtn | User's Guide - Page 99
relative texture of the card stock loaded in a specific tray Notes: • Normal is the factory default setting. • Settings appear only if card stock is supported. Specifies the relative texture of the transparencies loaded in a specific tray Note: Normal is the factory default setting. Understanding - Lexmark 652dtn | User's Guide - Page 100
: Normal is the factory default setting. Specifies the relative texture of the paper loaded in a specific tray Note: Normal is the factory default setting. Understanding printer menus 100 - Lexmark 652dtn | User's Guide - Page 101
is the factory default setting. Specifies the relative weight of the vinyl labels loaded in a specific tray Note: Normal is the factory default setting. Understanding printer menus 101 - Lexmark 652dtn | User's Guide - Page 102
weight of the custom paper type loaded in a specific tray Notes: • Normal is the factory default setting. • Settings appear only if the custom type is supported. Understanding printer menus 102 - Lexmark 652dtn | User's Guide - Page 103
so that the one-sided job prints correctly. Notes: • Selecting a setting for one paper type will not affect other paper types. • To set the printer default to duplex printing for all print jobs, use the Finishing menu. • For information on paper loading orientation, see "Loading paper and specialty - Lexmark 652dtn | User's Guide - Page 104
two-sided orientation depending on the print job. Notes: • Off is the factory default setting. • Custom Loading is available only if the custom type is supported. Understanding printer menus 104 - Lexmark 652dtn | User's Guide - Page 105
with the other paper size settings and includes similar options, such as support for duplex printing and printing multiple pages on one sheet. Menu item the portrait width Notes: • If the width exceeds the maximum, the printer uses the maximum width allowed. • 8.5 inches is the US factory default - Lexmark 652dtn | User's Guide - Page 106
the portrait height Notes: • If the height exceeds the maximum, the printer uses the maximum height allowed. • 14 inches is the US factory default appears only if the longest edge is shorter than the maximum width supported in the tray. Description Specifies the default output bin Note: Standard Bin - Lexmark 652dtn | User's Guide - Page 107
List NetWare Setup Page Description Selects an output bin for each supported paper type Available selections for each type are: Disabled Standard Bin trays, installed memory, the total page count, alarms, timeouts, the printer control panel language, the TCP/IP address, the status of supplies - Lexmark 652dtn | User's Guide - Page 108
PostScript Fonts Print Directory Asset Report Description Prints a report in English of all the fonts available for the printer language currently set in the printer Note: A separate list is available for PCL and PostScript emulations. Each emulator report contains print samples and information - Lexmark 652dtn | User's Guide - Page 109
increments. • The maximum size allowed depends on the amount of memory in the printer, the size of the other link buffers, and whether Resource Save is set is the factory default setting. • The On value buffers jobs on the printer hard disk. This menu selection appears only when a formatted disk is - Lexmark 652dtn | User's Guide - Page 110
setup Print NetWare Setup Page Notes: • The Setup Page contains information about the network printer settings, such as the TCP/IP address. • The NetWare Setup Page menu item appears only on models that support NetWare and shows information about NetWare settings. Network Card menu This menu is - Lexmark 652dtn | User's Guide - Page 111
is selected, then the setting is saved as 10. Allows the printer to print a banner page Note: Off is the factory default setting change the current TCP/IP Address Note: Manually setting the IP address sets the Enable DHCP and Enable RARP to Off on systems that support BOOTP and RARP. Lets you view or - Lexmark 652dtn | User's Guide - Page 112
using the File Transfer Protocol. Note: Yes is the factory default setting. Enables the built-in web server (Embedded Web Server). When enabled, the printer can be monitored and managed remotely using a web browser. Note: Yes is the factory default setting. Lets you view or change the current WINS - Lexmark 652dtn | User's Guide - Page 113
the wireless network Lets you select an available network for the printer to use Lets you view the quality of the wireless connection Set Zone Description Activates AppleTalk support Note: On is the factory default setting. Shows the assigned AppleTalk name - Lexmark 652dtn | User's Guide - Page 114
SNAP Packet Burst Yes No NSQ/GSQ Mode Yes No Description Activates NetWare support Note: No is the factory default setting. Lets you view the LexLink menu Menu item Activate On Off View Nickname Description Activates LexLink support Note: Off is the factory default setting. Lets you view the - Lexmark 652dtn | User's Guide - Page 115
processing is resumed. • The USB buffer size value can be changed in 1-K increments. • The maximum size allowed depends on the amount of memory in the printer, the size of the other link buffers, and whether the Resource Save setting is On or Off. • To increase the maximum size range for the - Lexmark 652dtn | User's Guide - Page 116
. Sets the network address, netmask, or gateway information for an external print server that is attached to the printer using a USB cable. Note: This menu item is available only if the printer is attached to an external print server through the USB port. Parallel menu This menu appears only if - Lexmark 652dtn | User's Guide - Page 117
be changed in 1K increments. • The maximum size allowed depends on the amount of memory in the printer, the size of the other link buffers, and whether Resource Save is set to On or Off. • The Standard setting tries to resolve parallel port communication problems. Understanding printer menus 117 - Lexmark 652dtn | User's Guide - Page 118
Mac Binary PS On Off Auto Parallel With ENA ENA Address ENA Netmask ENA Gateway Description Determines whether or not the printer honors printer hardware initialization requests from the computer Notes: • Off is the factory default setting. • The computer requests initialization by activating the - Lexmark 652dtn | User's Guide - Page 119
is the factory default setting. • When the On setting is used, the printer performs NPA processing. If the data is not in NPA format, it is increments. • The maximum size allowed depends on the amount of memory in the printer, the size of the other link buffers, and whether Resource Save is set to - Lexmark 652dtn | User's Guide - Page 120
the factory default setting. Sets the parity for serial input and output data frames Note: None is the factory default setting. Determines whether the printer uses the DSR Signal. DSR is a handshaking signal used by most serial cables. Notes: • Off is the factory default setting. • The serial port - Lexmark 652dtn | User's Guide - Page 121
send the e-mail Note: 30 seconds is the factory default setting. Specifies a reply address of up to 128 characters in e-mail sent by the printer Sets the printer to use SSL for increased security when connecting to the SMTP server Notes: • Disabled is the factory default setting for Use SSL. • When - Lexmark 652dtn | User's Guide - Page 122
Logins Login failures Failure time frame Lockout time Login timeout Description Limits the number and time frames of failed login attempts from the printer control panel before all users are locked out Notes: • "Login failures" specifies the number of failed login attempts before users are locked - Lexmark 652dtn | User's Guide - Page 123
can be wiped and returned to service. Disk Wiping erases only print job data that is not currently in use by the file system from the printer hard disk. All permanent data on the printer hard disk is preserved, such as downloaded fonts, macros, and held jobs. Manual Wiping overwrites all disk space - Lexmark 652dtn | User's Guide - Page 124
print job data that is not currently in use by the file system from the printer hard disk. All permanent data on the printer hard disk is preserved, such as downloaded fonts, macros, and held jobs. Both manual and scheduled wiping allow the file system to reuse marked disk space without first having - Lexmark 652dtn | User's Guide - Page 125
Observe DST On Off Enable NTP On Off Description Lets you view the current date and time settings for the printer Note: Date/Time is set in YYYY-MM-DD HH:MM format. Note: GMT is the factory default of devices on a network Note: On is the factory default setting. Understanding printer menus 125 - Lexmark 652dtn | User's Guide - Page 126
Paper Quiet Mode Off On Description Sets the language of the text appearing on the display Note: All languages may not be available for all printers. Minimizes the use of energy, paper, or specialty media Notes: • Off is the factory default setting. Off resets the - Lexmark 652dtn | User's Guide - Page 127
• Dim • Off Power Saver • Bright • Dim • Off Alarms Alarm Control Cartridge Alarm Staple Alarm Timeouts Job Hold Timeout 5-255 sec Description Instructs the printer to run the setup wizard Notes: • Yes is the factory default setting. • After completing the setup wizard by selecting Done at the - Lexmark 652dtn | User's Guide - Page 128
the print job Notes: • 90 seconds is the factory default setting. • When the timer expires, any partially printed page still in the printer is printed, and then the printer checks to see if any new print jobs are waiting. • Print Timeout is available only when using PCL emulation. This setting has - Lexmark 652dtn | User's Guide - Page 129
. All downloads stored in RAM are deleted. Downloads stored in flash memory or on a printer hard disk are not affected. Sets a pre-configured or customized message to appear on the and Custom Text 1 are messages that can be customized by a system support person. Understanding printer menus 129 - Lexmark 652dtn | User's Guide - Page 130
at the boundary. • The Whole Page setting allows the image to be moved into the non-printable area defined by the Normal setting, but the printer will clip the image at the Normal setting boundary. • The Whole Page setting only affects pages printed using a PCL 5e interpreter. This setting has no - Lexmark 652dtn | User's Guide - Page 131
, the requested paper size and type, the total number of printed pages, and the total number of copies requested. • Job Accounting is available only when a printer hard disk is installed and working properly. It should not be Read/Write or Write protected. Job Buffer Size should not be set to 100 - Lexmark 652dtn | User's Guide - Page 132
default setting. • From the Paper menu, Configure MP must be set to Cassette in order for Multi-Purpose Feeder to appear as a menu setting. Understanding printer menus 132 - Lexmark 652dtn | User's Guide - Page 133
images are in portrait or landscape orientation. Specifies the orientation of a multiple-page sheet Note: Auto is the factory default setting. The printer chooses between portrait and landscape. Prints a border around each page image when using N-up (pages-sides) Note: None is the factory default - Lexmark 652dtn | User's Guide - Page 134
Off Fonts Horizontally Vertically Both Directions Toner Darkness 1-10 Enhance Fine Lines On Off Gray Correction Auto Off Brightness -6 to +6 Contrast 0-5 Description Specifies the printed output resolution Note: 600 dpi is the factory default setting. The printer driver default is 1200 IQ. Enhances - Lexmark 652dtn | User's Guide - Page 135
not appear if Job Accounting is set to MarkTrackTM using NPA. Assists in isolating the source of a print job problem Notes: • When Activate is selected, all data sent to the printer is printed in hexadecimal and character representation and control codes are not executed. • To exit or deactivate Hex - Lexmark 652dtn | User's Guide - Page 136
a PDF Note: Do Not Print is the factory default setting. Description Prints a page containing the PostScript error Note: Off is the factory default setting. Understanding printer menus 136 - Lexmark 652dtn | User's Guide - Page 137
factory default setting. It shows the factory default set of fonts downloaded into printer RAM. • Flash and Disk settings appear only if applicable and show all characters, punctuation, and special symbols. Symbol sets support the different languages or specific programs such as math symbols for - Lexmark 652dtn | User's Guide - Page 138
Specifies the number of lines that print on each page Notes: • 64 is the US factory default setting. 68 is the international default setting. • The printer sets the amount of space between each line based on the Lines per Page, Paper Size, and Orientation settings. Select the desired Paper Size and - Lexmark 652dtn | User's Guide - Page 139
MP Feeder Off None 0-199 Assign Tray Off None 0-199 Assign Manual Paper Off None 0-199 Assign Man Env Off None 0-199 Tray 3 Tray Renumber Restore Defaults Yes No Description Configures the printer to work with printer software or programs that use different source assignments for trays, - Lexmark 652dtn | User's Guide - Page 140
setting. Sets the page margin for HTML documents Notes: • 19 mm is the factory default setting. • Margin size can be increased in 1-mm increments. Understanding printer menus 140 - Lexmark 652dtn | User's Guide - Page 141
Flash Drive menu Menu item Copies 1-999 Paper Source Tray MP Feeder Manual Paper Manual Env Description Specifies whether to print backgrounds on HTML documents Note: Print is the for all print jobs Note: Tray 1 (standard tray) is the factory default setting. Understanding printer menus 141 - Lexmark 652dtn | User's Guide - Page 142
and the left edge of landscape pages. Specifies the orientation of a multiple-page sheet Notes: • Auto is the factory default setting. The printer chooses between portrait and landscape. • Long Edge uses landscape. • Short Edge uses portrait. Specifies that multiple-page images be printed on one - Lexmark 652dtn | User's Guide - Page 143
the guides Provides information about solving print quality issues Provides information about loading paper and other speciality media Provides a list of the paper sizes supported in trays, drawers, and feeders Provides information about resolving print defects Provides a list of the printer control - Lexmark 652dtn | User's Guide - Page 144
Menu item Connection Guide Moving Guide Supplies Guide Description Provides information about connecting the printer locally (USB) or to a network Provides instructions for safely moving the printer Provides part numbers for ordering supplies Understanding printer menus 144 - Lexmark 652dtn | User's Guide - Page 145
Understanding printer messages When Manual Feeder appears on the display, it refers to the buttons until Continue appears, and then press if the paper was changed. • Press the arrow buttons until printer. • Cancel the current print job. Use Current appears, and then press to print on the paper - Lexmark 652dtn | User's Guide - Page 146
tray. 6 Connect the power cord to a properly grounded outlet. 7 Restart the printer. If the error occurs again: 1 Turn the printer off. 2 Unplug the power cord from the wall outlet. 3 Remove the tray. 4 Contact Customer Support. • Press to clear the message and print without using the tray. Clearing - Lexmark 652dtn | User's Guide - Page 147
x/y XX% DO NOT POWER OFF Wait for the message to clear. Warning-Potential Damage: Do not power off while the printer is attempting to recover the printer hard disk. Disk recovery takes place in several phases. The percentage completed during each phase appears on the display. Enabling Menus - Lexmark 652dtn | User's Guide - Page 148
is in the Ready state, and Hex Trace is active. You can use Hex Trace to troubleshoot printer problems. Insert staple cartridge Try one or more of the following: • Insert a staple cartridge to clear the message. • Press to clear the message and print without - Lexmark 652dtn | User's Guide - Page 149
cartridge to continue printing. Invalid Engine Code You need to download valid engine code for the printer. For more information, visit the Lexmark Web site at www.lexmark.com, or contact customer support. Note: Engine code may be downloaded while this message appears on the display. Understanding - Lexmark 652dtn | User's Guide - Page 150
inside the printer. Note: Network code may be downloaded while this message appears on the display. Invalid PIN Enter a valid PIN. Load manual feeder with printer menus cannot be accessed because your system support person disabled the menus. Wait for the message to clear. Understanding printer - Lexmark 652dtn | User's Guide - Page 151
is not ready to receive or process data, or the printer ports are offline. No recognized file types Either there are no files saved on the flash drive, or the files saved are not supported. Convert files to any of the following supported file types: .pdf, .gif, .jpeg, .jpg, .bmp, .png, .tiff, .tif - Lexmark 652dtn | User's Guide - Page 152
the information retrieval process. Printing Wait for the message to clear. Printing from USB drive DO NOT REMOVE Warning-Potential Damage: Do not turn the printer off or remove the flash drive while this message is displayed. Wait for the message to clear. Programming disk DO NOT POWER OFF Wait for - Lexmark 652dtn | User's Guide - Page 153
. 5 Connect the power cord to a properly grounded outlet. 6 Restart the printer. If the error occurs again: 1 Turn the printer off. 2 Unplug the power cord from the wall outlet. 3 Remove the specified bin. 4 Contact Customer Support. • Press to clear the message and print without using the specified - Lexmark 652dtn | User's Guide - Page 154
5 Connect the power cord to a properly grounded outlet. 6 Restart the printer. If the error occurs again: 1 Turn the printer off. 2 Unplug the power cord from the wall outlet. 3 Remove the envelope feeder. 4 Contact Customer Support. • Press to clear the message and print without using the envelope - Lexmark 652dtn | User's Guide - Page 155
name> Remove the paper from the specified bin. The printer automatically senses paper removal and resumes printing. If removing the paper does not clear the message, press . Replace wiper Try one or more of the following: • Replace the fuser wiper. • Press the arrow buttons until Continue appears - Lexmark 652dtn | User's Guide - Page 156
, the charge roll, the transfer roller, and the fuser. Securely clearing disk space The printer hard disk wiping process needs to recover. The message keep printed pages from spilliing out of the bin. The number of pages supported in the output bin is dependent on what type of media is being used - Lexmark 652dtn | User's Guide - Page 157
Toner low Try one or more of the following: • Replace the print cartridge. • Press to Insert the specified tray into the printer. Unsupported disk An unsupported printer hard disk has been installed. Remove the unsupported device, and then install a supported one. Unsupported USB device, please - Lexmark 652dtn | User's Guide - Page 158
cartridge, and then install a new one. 32 Cartridge part number unsupported by device Remove the print cartridge, and then install a supported one. 34 Short paper Try one or more of . • Delete fonts, macros, and other data in printer memory. to stop the defragment process and Understanding - Lexmark 652dtn | User's Guide - Page 159
the print job. • Cancel the current print job. to print the portion of the job already 37 Insufficient memory, some held jobs were deleted The printer deleted some held jobs in order to process current jobs. Press the arrow buttons until Continue appears, and then press to clear the message. 37 - Lexmark 652dtn | User's Guide - Page 160
is the proper one for the serial port. • Check that the serial interface parameters (protocol, baud, parity, and data bits) are set correctly on the printer and host computer. • Press the arrow buttons until Continue appears, and then press to continue printing. • Turn the - Lexmark 652dtn | User's Guide - Page 161
is the number of the serial port. Try one or more of the following: • Press the arrow buttons until Continue appears, and then press The printer discards any data received through the serial port. • Make sure the Serial Buffer menu item is not set to Disabled. to clear the message. Understanding - Lexmark 652dtn | User's Guide - Page 162
Press the arrow buttons until Continue appears, and then press The printer discards any data received through the parallel port. • Make sure the : • Press the arrow buttons until Continue appears, and then press The printer discards any data received through the USB port. • Make sure the USB - Lexmark 652dtn | User's Guide - Page 163
clear the message and continue printing without using the envelope feeder. 59 Incompatible output bin Only options designed specifically for this printer are supported. Try one or more of the following: • Remove the specified output bin. • Press to clear the message and continue printing without - Lexmark 652dtn | User's Guide - Page 164
and continue 80 Routine maintenance needed The printer needs to have routine maintenance done. Order a maintenance kit, which contains all the items necessary to replace the pick rollers, the charge roll, the transfer roller, and the fuser. 88 Cartridge low The toner is low. Replace the print - Lexmark 652dtn | User's Guide - Page 165
Emulation error, load emulation option The printer automatically clears the message in 30 seconds and then disables the download emulator on the firmware card. To fix this, download the correct download emulator version from the Lexmark Web site at www.lexmark.com. Understanding printer messages 165 - Lexmark 652dtn | User's Guide - Page 166
cloth to clean the interior may cause damage to your printer. 5 Make sure the paper support and standard exit bin are dry before beginning a new There are some settings you can change from the printer control panel that will help you conserve toner and paper. For more information, see "Supplies - Lexmark 652dtn | User's Guide - Page 167
authorized supplies dealers in your area. In other countries or regions, visit the Lexmark Web Site at www.lexmark.com or contact the place where you purchased the printer. Note: All life estimates for printer supplies assume printing on letter- or A4-size plain paper. Ordering print cartridges - Lexmark 652dtn | User's Guide - Page 168
Recommended print cartridges Part name For the US and Canada Print Cartridge Lexmark Return Program Cartridge Regular cartridge T650A11A T650A21A High Yield Print Cartridge T650H11A to replace the pick rollers, the charge roll, the transfer roller, and the fuser. Maintaining the printer 168 - Lexmark 652dtn | User's Guide - Page 169
the printer, remove the print cartridge to view the label on the fuser. Part name Maintenance kit Part number 40X4723 (100 V T1 fuser) 40X4724 (110 V T1 fuser) 40X4765 (220 V T1 fuser) 40X4766 (100 V T2 fuser) 40X4767 (110 V T2 fuser) 40X4768 (220 V T2 fuser) Ordering charge rolls When toner fog - Lexmark 652dtn | User's Guide - Page 170
Web site at www.lexmark.com/recycle. 2 Find the product type you want to recycle, and then select your country from the list. 3 Follow the instructions on the computer screen. Moving the printer Before moving the printer Remove all printer options before moving the printer. CAUTION-POTENTIAL INJURY - Lexmark 652dtn | User's Guide - Page 171
Any cart used to move the options must have a surface able to support the dimensions of the options. • Keep the printer in an upright position. • Avoid severe jarring movements. Shipping the printer When shipping the printer, use the original packaging or call the place of purchase for a relocation - Lexmark 652dtn | User's Guide - Page 172
's Guide on the Lexmark Web site at www.lexmark.com. Checking the device status Using the Embedded Web Server, you can view paper tray settings, the level of toner in the print cartridge, the percentage of life remaining in the maintenance kit, and capacity measurements of certain printer parts - Lexmark 652dtn | User's Guide - Page 173
in the e-mail addresses. 5 Click Submit. Note: See your system support person to set up the e-mail server. Viewing reports You can view for assessing the status of the printer, the network, and supplies. To view reports from a network printer: 1 Type the printer IP address into the address field - Lexmark 652dtn | User's Guide - Page 174
then press . 7 Press the arrow buttons to increase or decrease the number of minutes before the printer enters Power Saver mode, and then press . Restoring the factory default settings If you want to retain Now appears, and then press . Restoring Factory Defaults appears. Administrative support 174 - Lexmark 652dtn | User's Guide - Page 175
Troubleshooting Solving basic problems Solving basic printer problems If there are basic printer problems, or the printer is unresponsive, make sure: • The power cord is plugged into the printer and a properly grounded electrical outlet. • The electrical outlet is not turned off by any switch or - Lexmark 652dtn | User's Guide - Page 176
is Not Connected, check the network cables, and then try printing the network setup page again. Contact your system support person to make sure the network is functioning correctly. Copies of the printer software are also available on the Lexmark Web site at www.lexmark.com. Troubleshooting 176 - Lexmark 652dtn | User's Guide - Page 177
ETHERNET CABLE For more information, visit the Lexmark Web site at www.lexmark.com. MAKE SURE PRINTER CABLES ARE SECURELY CONNECTED Check the cable connections to the printer and print server to make sure they press . 6 Press the arrow buttons until Off appears, and then press . Troubleshooting 177 - Lexmark 652dtn | User's Guide - Page 178
specify the type from the Print dialog. Incorrect characters print MAKE SURE THE PRINTER IS NOT IN HEX TRACE MODE If Ready Hex appears on the display of paper in each tray to be linked. • Move the paper guides to the correct positions for the paper size loaded in each tray. USE Troubleshooting 178 - Lexmark 652dtn | User's Guide - Page 179
appears, and then press . Solving option problems Settings chosen from the software program or application can change or override settings chosen from the printer control panel. If an option is not information, see "Updating available options in the printer driver" on page 39. Troubleshooting 179 - Lexmark 652dtn | User's Guide - Page 180
hardware setup documentation that came with the paper tray, or see the latest comprehensive User's Guide available on our Web site at www.lexmark.com/publications. MAKE SURE THE LIST OF OPTIONS IN THE PRINTER DRIVER IS UP TO DATE From the computer you are printing from, verify that the paper tray - Lexmark 652dtn | User's Guide - Page 181
the option, or go to www.lexmark.com/publications to view the option instruction sheet. Memory card Make sure the memory card is securely connected to the printer system board. Flash memory card Make sure the flash memory card is securely connected to the printer system board. Troubleshooting 181 - Lexmark 652dtn | User's Guide - Page 182
securely connected to the printer system board. Internal Solutions Port If the Lexmark Internal Solutions Port (ISP Guide on the Software and Documentation CD Solving paper feed problems on the multipurpose feeder. CHECK THE PAPER GUIDES Move the guides in the tray to the correct positions for - Lexmark 652dtn | User's Guide - Page 183
until Exit Config Menu appears, and then press . The information in the following topics may help you solve print quality problems. If these suggestions still do not correct the problem, then call for service. You may have a printer part that requires adjustment or replacement. Troubleshooting 183 - Lexmark 652dtn | User's Guide - Page 184
is properly removed. Reinstall the print cartridge. THE TONER MAY BE LOW When 88 Cartridge low appears, order a new print cartridge. If the problem continues, the printer may need to be serviced. For more information, contact Customer Support. Clipped images These are possible solutions. Try one - Lexmark 652dtn | User's Guide - Page 185
the Print dialog. Gray background CHECK THE TONER DARKNESS SETTING Select a lighter Toner Darkness setting: • From the printer control panel, change the setting from the : CHECK THE PAPER GUIDES Move the guides in the tray to the correct positions for the paper size loaded. Troubleshooting 185 - Lexmark 652dtn | User's Guide - Page 186
THE PAPER TYPE SETTING Make sure the paper type setting matches the paper loaded in the tray: 1 From the printer control panel, check the Paper Type setting from the Paper menu. 2 Before sending the job to print, package. • Store paper in its original wrapper until you use it. Troubleshooting 186 - Lexmark 652dtn | User's Guide - Page 187
fuser. Print is too dark These are possible solutions. Try one or more of the following: CHECK THE DARKNESS, BRIGHTNESS, AND CONTRAST SETTINGS The Toner Darkness setting is too dark, the Brightness setting is too dark, or the Contrast setting is too high. • From the printer . Troubleshooting 187 - Lexmark 652dtn | User's Guide - Page 188
loaded in the tray: 1 From the printer control panel, check the Paper Type Toner Darkness setting is too light, the Brightness setting is too light, or the Contrast setting is too low. • From the printer paper loaded in the tray: 1 From the printer control panel, check the Paper Type setting from - Lexmark 652dtn | User's Guide - Page 189
TONER .8 mm (1.88 in.) • 96.8 mm (3.81 in.) Replace the fuser if the defects occur every: • 88.0 mm (3.46 in.) • GUIDES Move the guides in the tray to the correct positions for the paper size loaded. CHECK THE PAPER Make sure you are using paper that meets the printer specifications. Troubleshooting - Lexmark 652dtn | User's Guide - Page 190
from side to side to redistribute the toner, and then reinstall it. THE PRINT CARTRIDGE MAY BE DEFECTIVE OR LOW ON TONER Replace the used print cartridge with a new one. If the problem continues, the printer may need to be serviced. For more information, contact Customer Support. Troubleshooting 190 - Lexmark 652dtn | User's Guide - Page 191
path around the print cartridge. CAUTION-HOT SURFACE: The inside of the printer might be hot. To reduce the risk of injury from a hot component TONER IN THE PAPER PATH Contact Customer Support. Streaked vertical lines These are possible solutions. Try one or more of the following: Troubleshooting 191 - Lexmark 652dtn | User's Guide - Page 192
cartridge. THE CHARGE ROLLS MAY BE DEFECTIVE Replace the charge rolls. THERE IS TONER IN THE PAPER PATH Clean any toner from the paper path. If the problem persists, then contact Customer Support. Toner rubs off These are possible solutions. Try one or more of the following: Troubleshooting 192 - Lexmark 652dtn | User's Guide - Page 193
IS TONER IN THE PAPER PATH Clean any toner from the paper path. If the problem persists, then contact Customer Support. Transparency print quality is poor Try one or more of the following: CHECK THE TRANSPARENCIES Use only transparencies recommended by the printer manufacturer. Troubleshooting 193 - Lexmark 652dtn | User's Guide - Page 194
type from the Print dialog. Contacting Customer Support When you call Customer Support, describe the problem you are experiencing, the message on the display, and the troubleshooting steps you have already taken to find a solution. You need to know your printer model type and serial number. For more - Lexmark 652dtn | User's Guide - Page 195
in conjunction with other products, programs, or services, except those expressly designated by the manufacturer, are the user's responsibility. For Lexmark technical support, visit support.lexmark.com. For information on supplies and downloads, visit www.lexmark.com. If you don't have access to - Lexmark 652dtn | User's Guide - Page 196
and StapleSmart are trademarks of Lexmark International, Inc. PCL® is a registered trademark of the Hewlett-Packard Company. PCL is Hewlett-Packard Company's designation of a set of printer commands (language) and functions included in its printer products. This printer is intended to be compatible - Lexmark 652dtn | User's Guide - Page 197
part number 1021231 for parallel attach or 1021294 for USB attach. Use of a substitute cable not properly shielded and grounded may result in a violation of FCC regulations. Any questions regarding this compliance information statement should be directed to: Director of Lexmark Technology & Services - Lexmark 652dtn | User's Guide - Page 198
N/A Ready 30 dBA Values are subject to change. See www.lexmark.com for current values. Waste from Electrical and Electronic Equipment (WEEE Lexmark Web site at www.lexmark.com for your local sales office phone number. Static sensitivity notice This symbol identifies static-sensitive parts - Lexmark 652dtn | User's Guide - Page 199
Agency (EPA) ENERGY STAR requirements as configured when shipped by Lexmark. Laser notice The printer is certified in the U.S. to conform to the requirements of maintenance, or prescribed service condition. Laser advisory label A laser notice label may be affixed to this printer as shown: Power - Lexmark 652dtn | User's Guide - Page 200
than the average. Values are subject to change. See www.lexmark.com for current values. Power Saver This product is designed with default Power Saver Timeout for this product (in minutes): 30 (T650n, T652, T654); 10 (T650dn/dtn) By using the configuration menus, the Power Saver Timeout can - Lexmark 652dtn | User's Guide - Page 201
limits. A declaration of conformity with the requirements of the directives has been signed by the Director of Manufacturing and Technical Support, Lexmark International, Inc., S.A., Boigny, France. This product satisfies the Class B limits of EN 55022 and safety requirements of EN 60950. Regulatory - Lexmark 652dtn | User's Guide - Page 202
des réglementations d'Industry Canada, l'utilisation d'une antenne de gain supérieur est strictement interdite. Pour empêcher toute interférence radio au service faisant l'objet d'une licence, cet appareil doit être utilisé à l'intérieur et loin des fenêtres afin de garantir une protection optimale - Lexmark 652dtn | User's Guide - Page 203
use only. A declaration of conformity with the requirements of the directives is available from the Director of Manufacturing and Technical Support, Lexmark International, S. A., Boigny, France. Refer to the table at the end of the Notices section for further compliance information. Česky Dansk - Lexmark 652dtn | User's Guide - Page 204
your use, and not for resale, from Lexmark or a Lexmark Remarketer, referred to in this statement as "Remarketer." Limited warranty Lexmark warrants that this product: -Is manufactured from new parts, or new and serviceable used parts, which perform like new parts -Is, during normal use, free from - Lexmark 652dtn | User's Guide - Page 205
attachments -Accidents, misuse, abuse or use inconsistent with Lexmark user's guides, manuals, instructions or guidance -Unsuitable physical or operating environment -Maintenance by anyone other than Lexmark or a Lexmark authorized servicer -Operation of a product beyond the limit of its - Lexmark 652dtn | User's Guide - Page 206
WILL APPLY AFTER THIS PERIOD. ALL INFORMATION, SPECIFICATIONS, PRICES, AND SERVICES ARE SUBJECT TO CHANGE AT ANY TIME WITHOUT NOTICE. Limitation of liability provided by Lexmark for use in connection with your Lexmark product. The term "Software Program" includes machine-readable instructions, audio/ - Lexmark 652dtn | User's Guide - Page 207
OF THE NATURE OF THE CLAIM, INCLUDING BUT NOT LIMITED TO BREACH OF WARRANTY OR CONTRACT, TORT (INCLUDING NEGLIGENCE OR STRICT LIABILITY), AND EVEN IF LEXMARK, OR ITS SUPPLIERS, AFFILIATES, OR REMARKETERS HAVE BEEN ADVISED OF THE POSSIBILITY OF SUCH DAMAGES, OR FOR ANY CLAIM BY YOU BASED ON A THIRD - Lexmark 652dtn | User's Guide - Page 208
Lexmark. You may not separate the components of the Software Program for use on more than one computer. You agree that you will not Use the Software Program, in whole or in part any taxes including, without limitation, any goods and services and personal property taxes, resulting from this Agreement - Lexmark 652dtn | User's Guide - Page 209
with the terms of this License Agreement, any other written agreement signed by you and Lexmark relating to your Use of the Software Program). To the extent any Lexmark policies or programs for support services conflict with the terms of this License Agreement, the terms of this License Agreement - Lexmark 652dtn | User's Guide - Page 210
158 32 Cartridge part number unsupported by device 158 34 Short paper 158 35 Insufficient memory to support Resource Save feature Ethernet 36 USB 36 calling Customer Support 194 Cancel not available 145 Canceling 145 canceling a job from Macintosh 79 from the printer control panel 79 from Windows - Lexmark 652dtn | User's Guide - Page 211
149 installation wireless network 41, 42 installing options in driver 39 printer software 38 installing options order of installation 34 installing printer software adding options 39 Internal Solutions Port installing 24 troubleshooting 182 Internal Solutions Port, network changing port settings 47 - Lexmark 652dtn | User's Guide - Page 212
Load with 150 Load manual feeder with 150 Load staples 150 loading card installing 20 troubleshooting 181 Menu access menu 110 network setup page printing 38 Networking Guide 172 No held jobs 151 No jobs found 17 printer hard disk 30 ordering charge rolls 169 fuser 169 fuser wiper - Lexmark 652dtn | User's Guide - Page 213
feed troubleshooting message remains after jam is cleared 183 page that jammed does not reprint 183 paper jams avoiding 81 Paper Loading menu 103 Paper Size/Type menu 95 paper sizes supported by the printer 68 Paper Texture menu 99 paper types duplex support 70 supported by output bins 70 supported - Lexmark 652dtn | User's Guide - Page 214
with 150 Load manual feeder with 150 Load staples low or missing 156 Submitting selection 156 Toner low 157 Too many failed panel logins View supplies 157 Waiting 157 printer options troubleshooting 2000-sheet tray 180 finisher 181 printer problems, solving basic 175 printer status [ - Lexmark 652dtn | User's Guide - Page 215
Tray Low 157 Tray Missing 157 tray linking 64 tray unlinking 64 trays linking 63 unlinking 63 troubleshooting checking an unresponsive printer 175 contacting Customer Support 194 solving basic printer problems 175 troubleshooting, display display is blank 175 display shows only diamonds 175 - Lexmark 652dtn | User's Guide - Page 216
190 solid color pages 190 solid white streaks 190 streaked horizontal lines 191 streaked vertical lines 191 toner fog or background shading 192 toner rubs off 192 toner specks 193 troubleshooting, printer options 2000-sheet tray 180 5-bin mailbox 181 duplex unit 181 envelope feeder 180 flash memory
-
 1
1 -
 2
2 -
 3
3 -
 4
4 -
 5
5 -
 6
6 -
 7
7 -
8
-
9
-
10
-
11
-
12
-
13
-
14
-
15
-
16
-
17
-
18
-
19
-
20
-
21
-
22
-
23
-
24
-
25
-
26
-
27
-
28
-
29
-
30
-
31
-
32
-
33
-
34
-
35
-
36
-
37
-
38
-
39
-
40
-
41
-
42
-
43
-
44
-
45
-
46
-
47
-
48
-
49
-
50
-
51
-
52
-
53
-
54
-
55
-
56
-
57
-
58
-
59
-
60
-
61
-
62
-
63
-
64
-
65
-
66
-
67
-
68
-
69
-
70
-
71
-
72
-
73
-
74
-
75
-
76
-
77
-
78
-
79
-
80
-
81
-
82
-
83
-
84
-
85
-
86
-
87
-
88
-
89
-
90
-
91
-
92
-
93
-
94
-
95
-
96
-
97
-
98
-
99
-
100
-
101
-
102
-
103
-
104
-
105
-
106
-
107
-
108
-
109
-
110
-
111
-
112
-
113
-
114
-
115
-
116
-
117
-
118
-
119
-
120
-
121
-
122
-
123
-
124
-
125
-
126
-
127
-
128
-
129
-
130
-
131
-
132
-
133
-
134
-
135
-
136
-
137
-
138
-
139
-
140
-
141
-
142
-
143
-
144
-
145
-
146
-
147
-
148
-
149
-
150
-
151
-
152
-
153
-
154
-
155
-
156
-
157
-
158
-
159
-
160
-
161
-
162
-
163
-
164
-
165
-
166
-
167
-
168
-
169
-
170
-
171
-
172
-
173
-
174
-
175
-
176
-
177
-
178
-
179
-
180
-
181
-
182
-
183
-
184
-
185
-
186
-
187
-
188
-
189
-
190
-
191
-
192
-
193
-
194
-
195
-
196
-
197
-
198
-
199
-
200
-
201
-
202
-
203
-
204
-
205
-
206
-
207
-
208
-
209
-
210
-
211
-
212
-
213
-
214
-
215
-
216
 |
 |

Lexmark T650, T652, T654
User's Guide
Important:
For information about T656 products, go to
md/?func=publications&folder=v12721881&file=v12721881_en.pdf
.
September 2009
www.lexmark.com
Machine type(s):
4062, 4551, 4552, 4553
Model(s):
01A, 21A, 23A, 41A, 43A, n01, gn1, n03, n02, xn2, gn2, dn1, d03, gd1, dn2, gd2, xd2, mn1, gm1, md1