Lexmark 782dn Clearing Jams Guide - Page 3
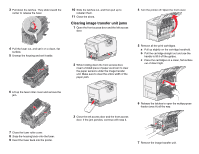
Clearing image transfer unit jams
 |
UPC - 734646028349
View all Lexmark 782dn manuals
Add to My Manuals
Save this manual to your list of manuals |
Page 3 highlights
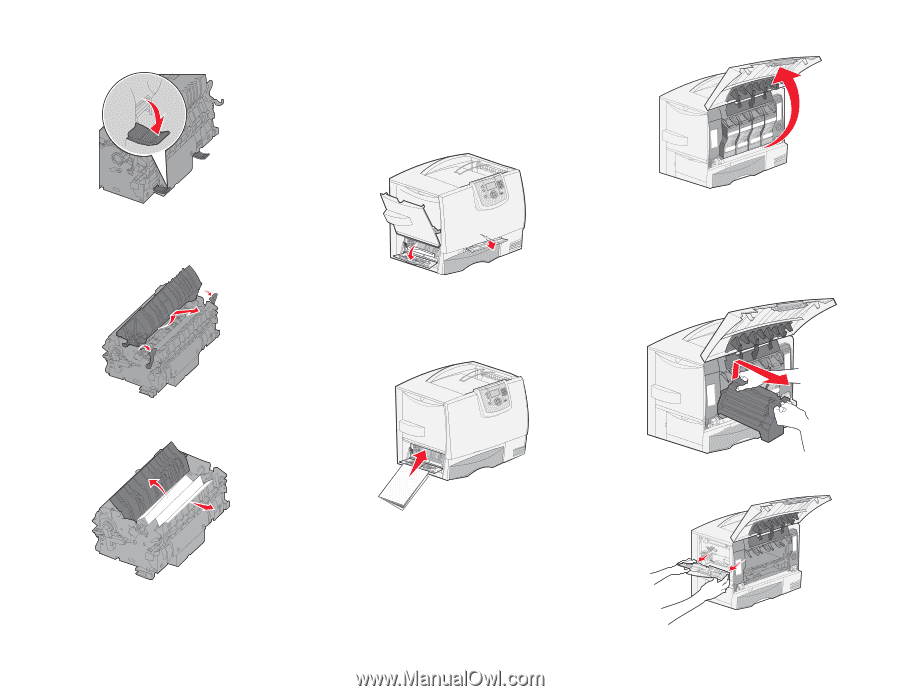
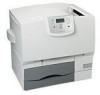
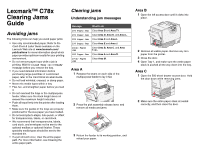
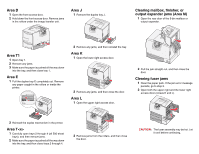
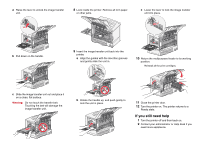
3 Pull down the latches. They slide toward the center to release the fuser. 10 Slide the latches out, and then pull up to refasten them. 11 Close the doors. Clearing image transfer unit jams 1 Open the front access door and the left access door. 4 Turn the printer off. Open the front cover. 4 Pull the fuser out, and set it on a clean, flat surface. 5 Unsnap the housing and set it aside. 2 While holding down the front access door, insert a folded piece of paper as shown to clear the paper sensors under the image transfer unit. Make sure to clear the entire width of the paper path. 5 Remove all the print cartridges. a Pull up slightly on the cartridge handhold. b Pull the cartridge straight out and use the handle to lift it off the guides. c Place the cartridges on a clean, flat surface out of direct light. 6 Lift up the fuser roller cover and remove the jam. 7 Close the fuser roller cover. 8 Snap the housing back onto the fuser. 9 Insert the fuser back into the printer. 3 Close the left access door and the front access door. If the jam persists, continue with step 4. 6 Release the latches to open the multipurpose feeder (area A) all the way. 7 Remove the image transfer unit.
-
 1
1 -
 2
2 -
 3
3 -
 4
4
 |
 |