Lexmark 912dn Setup Guide - Page 16
Installing an optional heavy media tray, Your printer supports an optional heavy
 |
UPC - 734646479226
View all Lexmark 912dn manuals
Add to My Manuals
Save this manual to your list of manuals |
Page 16 highlights
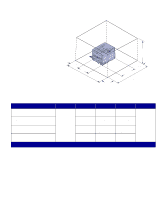
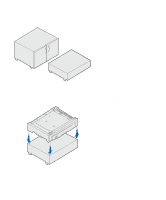
2 Have three other people help you place the printer in the chosen location. If you are installing the printer on a 550-sheet drawer, align the positioning posts on the drawer with the holes in the printer. Seat the printer securely on the drawer. 3 Remove any tape or packing material. Installing an optional heavy media tray Your printer supports an optional heavy media tray. To use this tray, simply remove the standard tray that came with the printer (Tray 1) and replace it with the heavy media tray. Store the standard tray in the box the optional tray came in. Set up the printer and paper handling options 7
-
 1
1 -
2
-
3
-
4
-
5
-
6
-
7
-
8
-
9
-
10
-
 11
11 -
 12
12 -
 13
13 -
 14
14 -
 15
15 -
 16
16 -
 17
17 -
 18
18 -
 19
19 -
 20
20 -
 21
21 -
22
-
23
-
24
-
25
-
26
-
27
-
28
-
29
-
30
-
31
-
32
-
33
-
34
-
35
-
36
-
37
-
38
-
39
-
40
-
41
-
42
-
43
-
44
-
45
-
46
-
47
-
48
-
49
-
50
-
51
-
52
-
53
-
54
-
55
-
56
-
57
-
58
-
59
-
60
-
61
-
62
-
63
-
64
-
65
-
66
-
67
-
68
-
69
-
70
-
71
-
72
-
73
-
74
-
75
-
76
-
77
-
78
-
79
-
80
-
81
-
82
-
83
 |
 |

Installing an optional heavy media
tray
2
Have three other people help you
place the printer in the chosen
location.
If you are installing the printer on a
550-sheet drawer, align the
positioning posts on the drawer
with the holes in the printer. Seat
the printer securely on the drawer.
3
Remove any tape or packing
material.
Your printer supports an optional heavy
media tray. To use this tray, simply
remove the standard tray that came with
the printer (Tray 1) and replace it with the
heavy media tray. Store the standard tray
in the box the optional tray came in.
Set up the printer and paper handling options
7