Lexmark C540 Maintenance Guide - Page 17
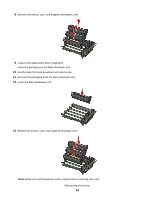
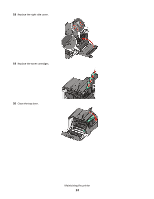
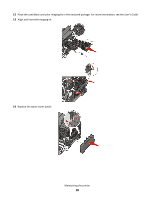
Remove the packaging from the yellow, cyan, magenta, and black developer units., Insert the yellow
 |
View all Lexmark C540 manuals
Add to My Manuals
Save this manual to your list of manuals |
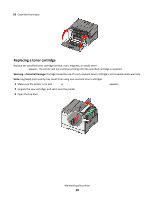
Page 17 highlights
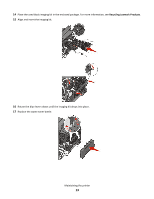
6 Lift the blue levers on the imaging kit, and then pull it toward you. 7 Press down on the blue levers, grasp the green handles on the sides, and then pull the imaging kit out. Warning-Potential Damage: Do not touch the underside of the imaging kit. This could damage the imaging kit. 8 Unpack the replacement black and color imaging kit. Leave the packaging on the developer units. 9 Gently shake the yellow, cyan, magenta, and black developer units side to side. 10 Remove the packaging from the yellow, cyan, magenta, and black developer units. 11 Insert the yellow, cyan, magenta, and black developer units. Maintaining the printer 17
-
 1
1 -
2
-
3
-
4
-
5
-
6
-
7
-
8
-
9
-
10
-
11
-
 12
12 -
 13
13 -
 14
14 -
 15
15 -
 16
16 -
 17
17 -
 18
18 -
 19
19 -
 20
20 -
 21
21 -
 22
22 -
23
-
24
-
25
-
26
-
27
-
28
 |
 |

6
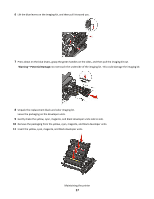
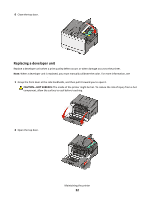
Lift the blue levers on the imaging kit, and then pull it toward you.
7
Press down on the blue levers, grasp the green handles on the sides, and then pull the imaging kit out.
Warning—Potential Damage:
Do not touch the underside of the imaging kit. This could damage the imaging kit.
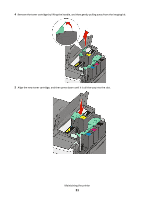
8
Unpack the replacement black and color imaging kit.
Leave the packaging on the developer units.
9
Gently shake the yellow, cyan, magenta, and black developer units side to side.
10
Remove the packaging from the yellow, cyan, magenta, and black developer units.
11
Insert the yellow, cyan, magenta, and black developer units.
Maintaining the printer
17