Lexmark CX510 Email Guide
Lexmark CX510 Manual
 |
View all Lexmark CX510 manuals
Add to My Manuals
Save this manual to your list of manuals |
Lexmark CX510 manual content summary:
- Lexmark CX510 | Email Guide - Page 1
guide Page 1 of 4 E-mail guide You can send an e-mail from the printer by typing the e-mail address, using a shortcut number, or using the address book. Sending an e-mail using the printer guides. Note: To avoid a cropped image, make sure that the size of the original document and the copy paper size - Lexmark CX510 | Email Guide - Page 2
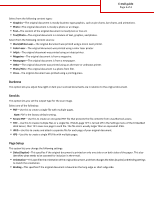
paper sizes (letter‑ and legal‑size pages). Resolution This option lets you adjust the output quality of your e-mail. Increasing the image resolution increases the e-mail file size and the time needed to scan your original document. Decreasing the image resolution reduces the file size. Color This - Lexmark CX510 | Email Guide - Page 3
an image. • Text-The content of the original document is mostly text or line art. • Text/Photo-The original document is a mixture of text, graphics, and photos. Select from the following content sources: • Black/White Laser-The original document was printed using a mono laser printer. • Color Laser - Lexmark CX510 | Email Guide - Page 4
E-mail guide Page 4 of 4 Scan Preview This option lets you view the first page of the image before it is included in the e-mail. When the first page is scanned, the scanning is paused and a preview image appears. Note: This option appears only when a working printer hard disk is installed. Save As
-
 1
1 -
 2
2 -
 3
3 -
 4
4
 |
 |

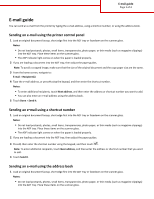
E-mail guide
You can send an e-mail from the printer by typing the e-mail address, using a shortcut number, or using the address book.
Sending an e-mail using the printer control panel
1
Load an original document faceup, short edge first into the ADF tray or facedown on the scanner glass.
Notes:
•
Do not load postcards, photos, small items, transparencies, photo paper, or thin media (such as magazine clippings)
into the ADF tray. Place these items on the scanner glass.
•
The ADF indicator light comes on when the paper is loaded properly.
2
If you are loading a document into the ADF tray, then adjust the paper guides.
Note:
To avoid a cropped image, make sure that the size of the original document and the copy paper size are the same.
3
From the home screen, navigate to:
E-mail
>
Recipient(s)
4
Type the e
‑
mail address, or press
#
using the keypad, and then enter the shortcut number.
Notes:
•
To enter additional recipients, touch
Next address
, and then enter the address or shortcut number you want to add.
•
You can also enter an e
‑
mail address using the address book.
5
Touch
Done
>
Send It
.
Sending an e
‑
mail using a shortcut number
1
Load an original document faceup, short edge first into the ADF tray or facedown on the scanner glass.
Notes:
•
Do not load postcards, photos, small items, transparencies, photo paper, or thin media (such as magazine clippings)
into the ADF tray. Place these items on the scanner glass.
•
The ADF indicator light comes on when the paper is loaded properly.
2
If you are loading a document into the ADF tray, then adjust the paper guides.
3
Press
#
, then enter the shortcut number using the keypad, and then touch
.
Note:
To enter additional recipients, touch
Next address
, and then enter the address or shortcut number that you want
to add.
4
Touch
Send It
.
Sending an e
‑
mail using the address book
1
Load an original document faceup, short edge first into the ADF tray or facedown on the scanner glass.
Notes:
•
Do not load postcards, photos, small items, transparencies, photo paper, or thin media (such as magazine clippings)
into the ADF tray. Place these items on the scanner glass.
E-mail guide
Page 1 of 4