Lexmark Consumer Inkjet Setup Booklet - Page 2
Unpack the printer, Prepare the printer, Load the index card, Install the print cartridge, Print
 |
View all Lexmark Consumer Inkjet manuals
Add to My Manuals
Save this manual to your list of manuals |
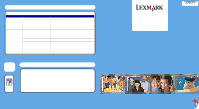
Page 2 highlights
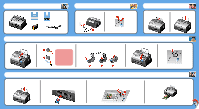
1 Unpack the printer 2 Prepare the printer 1 Connect the power cord. 2 Make sure the Power light is on. 3 Load the index card 1 Lift the paper support. 2 Load the index card. Setup booklet User's Guide Index card Color print cartridge Power cord Press + to scroll to your language and then press Select. 4 Install the print cartridge 1 Open the access cover. 2 Remove the sticker and tape from the bottom of the print cartridge. Warning: Do not touch the gold contact area on the back or the print cartridge nozzles on the bottom. 3 Open the cartridge lid, insert the cartridge, and snap the cartridge lid closed. 4 Close the access cover. 5 Press Select. You may discard the alignment page after it prints. 5 Print your first photo 1 Load a photo card. 2 Insert a memory card with digital photos into the correct slot. The I Want To... menu appears. 3 1 Press + to find the photo you want to print. 2 Press Select to choose the photo. 4 Press Start to print your selected photo. Congratulations! You have successfully completed your first project.
-
 1
1 -
 2
2
 |
 |
