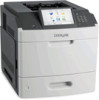
Lexmark MS812de Quick Reference - Page 4
Using the touch-screen buttons, Setting the paper size and type, Configuring Universal paper settings
 |
View all Lexmark MS812de manuals
Add to My Manuals
Save this manual to your list of manuals |
Page 4 highlights
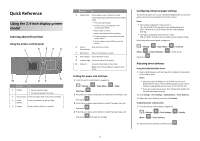
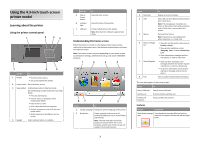
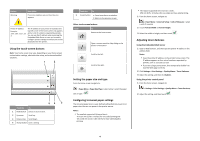
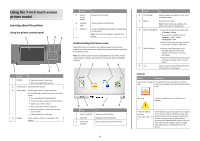
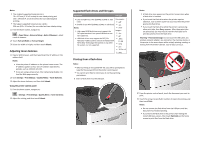
Feature Warning Description If an error condition occurs, then this icon appears. Printer IP address Example: 123.123.123.12 3 The IP address of your printer is located at the top left corner of the home screen and appears as four sets of numbers separated by periods. You can use the IP address when accessing the Embedded Web Server to view and remotely configure printer settings even when you are not physically near the printer. Using the touch-screen buttons Note: Your home screen may vary, depending on your home screen customization settings, administrative setup, and active embedded solutions. 1 2 54 3 Touch the To 1 Radio button Select or clear an item. 2 Up arrow Scroll up. 3 Down arrow Scroll down. 4 Accept button Save a setting. Touch the To 5 Cancel button • Cancel an action or a selection. • Return to the previous screen. Other touch-screen buttons Touch To Return to the home screen. Open a context-sensitive Help dialog on the printer control panel. Scroll to the left. Scroll to the right. Setting the paper size and type From the home screen navigate to: > Paper Menu > Paper Size/Type > select a tray > select the paper size or type > Configuring Universal paper settings The Universal paper size is a user‑defined setting that lets you print on paper sizes that are not preset in the printer menus. Notes: • The smallest supported Universal size is 70 x 127 mm (2.76 x 5 inches) for one‑sided printing and 105 x 148 mm (4.13 x 5.83 inches) for two‑sided (duplex) printing. • The largest supported Universal size is 216 x 356 mm (8.5 x 14 inches) for one‑sided and two‑sided printing. 1 From the home screen, navigate to: > Paper Menu > Universal Setup > Units of Measure > select a unit of measure 2 Touch Portrait Width or Portrait Height. 3 Select the width or height, and then touch . Adjusting toner darkness Using the Embedded Web Server 1 Open a Web browser, and then type the printer IP address in the address field. Notes: • View the printer IP address on the printer home screen. The IP address appears as four sets of numbers separated by periods, such as 123.123.123.123. • If you are using a proxy server, then temporarily disable it to load the Web page correctly. 2 Click Settings > Print Settings > Quality Menu > Toner Darkness. 3 Adjust the setting, and then click Submit. Using the printer control panel 1 From the home screen, navigate to: > Settings > Print Settings > Quality Menu > Toner Darkness 2 Adjust the setting, and then touch . 4
-
 1
1 -
 2
2 -
 3
3 -
 4
4 -
 5
5 -
 6
6 -
 7
7 -
 8
8 -
 9
9 -
 10
10 -
11
-
12
-
13
-
14
-
15
-
16
-
17
-
18
-
19
-
20
-
21
-
22
-
23
-
24
-
25
-
26
-
27
-
28
-
29
-
30
-
31
 |
 |
