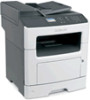
Lexmark MX310 Print Drivers for UNIX and LINUX Systems - Page 18
Creating virtual devices from the command line, Parallel, Serial, Other, Browse, Finish, Search
 |
View all Lexmark MX310 manuals
Add to My Manuals
Save this manual to your list of manuals |
Page 18 highlights
5 If the printer is attached locally: a Select Parallel, Serial, or USB. If you are using a parallel connection, specify if the virtual device is a BPP Device. If you are using a serial connection, specify the exact Serial Port Options. Note: Not all options may be available for your system. b Enter the device name and description. c Select a physical device from the list of known devices, or select Other, and then enter the path to the physical device file. Note: If you do not know the path, click Browse to look for the path in the file system. d Click Finish. 6 If the printer is a attached to a network: a Enter the device name and description. b Enter the IP Address/Host Name, or click Search to locate the IP address. If you entered an IP Address/Host Name, go to step h on page 18. If you clicked "Search to locate an IP address," continue with step c on page 18. c From the Search Network Printer dialog box, search by Subnet or Range. d Enter the appropriate IP Address or Subnet. e Click Search. Note: The Search function searches for printers on an IPv4 network. f Select the device from the list. g Click OK. h Make any necessary changes to the available options. i Click Next. j If you entered an external print server IP Address or Host Name, select the appropriate port for the printer. k Verify the information that appears. l Click Finish. Creating virtual devices from the command line 1 Select a recognizable, but unique, virtual device name. 2 To create a virtual device, type the following from the command line: For physical devices: # /usr/lexprint/bin/mkdevice -d name -f device -t type For network devices: # /usr/lexprint/bin/mkdevice -d name -i host [-c name] [-p port] [-t type] Note: For more details regarding this command, type mkdevice -h from the command line. 18
-
 1
1 -
2
-
3
-
4
-
5
-
6
-
7
-
8
-
9
-
10
-
11
-
12
-
 13
13 -
 14
14 -
 15
15 -
 16
16 -
 17
17 -
 18
18 -
 19
19 -
 20
20 -
 21
21 -
 22
22 -
 23
23 -
24
-
25
-
26
-
27
-
28
-
29
-
30
-
31
-
32
-
33
-
34
-
35
-
36
-
37
-
38
-
39
-
40
-
41
-
42
-
43
-
44
-
45
-
46
-
47
-
48
-
49
 |
 |
