Lexmark MX911 User's Guide - Page 80
Placing separator sheets between copies, Copying multiple s onto a single sheet
 |
View all Lexmark MX911 manuals
Add to My Manuals
Save this manual to your list of manuals |
Page 80 highlights
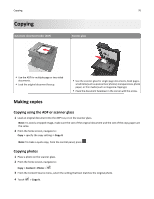
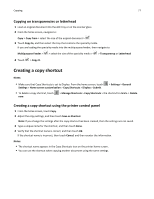
Copying 80 1 Load an original document into the ADF tray or on the scanner glass. 2 From the home screen, navigate to: Copy > enter the number of copies > Collate > select the preferred order of pages > > Copy It Placing separator sheets between copies 1 Load an original document into the ADF tray or on the scanner glass. 2 From the home screen, navigate to: Copy > Advanced Options > Separator Sheets > select where you want to place the separator sheets Note: Set Collate to (1,2,3) (1,2,3) to place separator sheets between copies. If Collate is set to (1,1,1) (2,2,2), then the separator sheets are added to the end of the copy job. For more information, see "Collating copies" on page 79. 3 Touch > Copy It. Copying multiple pages onto a single sheet In order to save paper, you can copy either two or four consecutive pages of a multiple‑page document onto a single sheet of paper. Notes: • Make sure to set the paper size to letter, legal, A4, or JIS B5. • Make sure to set the copy size to 100%. 1 Load an original document into the ADF tray or on the scanner glass. 2 From the home screen, navigate to: Copy > Advanced Options > Paper Saver > select the output you want > > Copy It Note: If Paper Saver is set to Off, then the Print Page Borders option is unavailable. Creating a custom copy job The custom copy job is used to combine one or more sets of original documents into a single copy job. The definition of a set depends on the scan source: • If you scan a document on the scanner glass, then a set consists of one page. • If you scan multiple pages using the ADF, then a set consists of all scanned pages until the ADF tray becomes empty. • If you scan one page using the ADF, then a set consists of one page. 1 Load an original document into the ADF tray or on the scanner glass. 2 From the home screen, navigate to: Copy > Advanced Options > Custom Job > On > > Copy It Note: When the end of a set is reached, the scan screen appears.
-
 1
1 -
2
-
3
-
4
-
5
-
6
-
7
-
8
-
9
-
10
-
11
-
12
-
13
-
14
-
15
-
16
-
17
-
18
-
19
-
20
-
21
-
22
-
23
-
24
-
25
-
26
-
27
-
28
-
29
-
30
-
31
-
32
-
33
-
34
-
35
-
36
-
37
-
38
-
39
-
40
-
41
-
42
-
43
-
44
-
45
-
46
-
47
-
48
-
49
-
50
-
51
-
52
-
53
-
54
-
55
-
56
-
57
-
58
-
59
-
60
-
61
-
62
-
63
-
64
-
65
-
66
-
67
-
68
-
69
-
70
-
71
-
72
-
73
-
74
-
 75
75 -
 76
76 -
 77
77 -
 78
78 -
 79
79 -
 80
80 -
 81
81 -
 82
82 -
 83
83 -
 84
84 -
 85
85 -
86
-
87
-
88
-
89
-
90
-
91
-
92
-
93
-
94
-
95
-
96
-
97
-
98
-
99
-
100
-
101
-
102
-
103
-
104
-
105
-
106
-
107
-
108
-
109
-
110
-
111
-
112
-
113
-
114
-
115
-
116
-
117
-
118
-
119
-
120
-
121
-
122
-
123
-
124
-
125
-
126
-
127
-
128
-
129
-
130
-
131
-
132
-
133
-
134
-
135
-
136
-
137
-
138
-
139
-
140
-
141
-
142
-
143
-
144
-
145
-
146
-
147
-
148
-
149
-
150
-
151
-
152
-
153
-
154
-
155
-
156
-
157
-
158
-
159
-
160
-
161
-
162
-
163
-
164
-
165
-
166
-
167
-
168
-
169
-
170
-
171
-
172
-
173
-
174
-
175
-
176
-
177
-
178
-
179
-
180
-
181
-
182
-
183
-
184
-
185
-
186
-
187
-
188
-
189
-
190
-
191
-
192
-
193
-
194
-
195
-
196
-
197
-
198
-
199
-
200
-
201
-
202
-
203
-
204
-
205
-
206
-
207
-
208
-
209
-
210
-
211
-
212
-
213
-
214
-
215
-
216
-
217
-
218
-
219
-
220
-
221
-
222
-
223
-
224
-
225
-
226
-
227
-
228
-
229
-
230
-
231
-
232
-
233
-
234
-
235
-
236
-
237
-
238
-
239
-
240
-
241
-
242
-
243
-
244
-
245
-
246
-
247
-
248
-
249
-
250
-
251
-
252
-
253
-
254
-
255
-
256
-
257
-
258
-
259
-
260
-
261
-
262
-
263
-
264
-
265
-
266
-
267
-
268
-
269
-
270
-
271
-
272
-
273
-
274
-
275
-
276
-
277
-
278
-
279
-
280
-
281
-
282
-
283
-
284
-
285
-
286
-
287
-
288
-
289
-
290
-
291
-
292
-
293
-
294
-
295
-
296
-
297
-
298
-
299
-
300
-
301
-
302
-
303
-
304
-
305
-
306
-
307
-
308
-
309
-
310
-
311
-
312
-
313
-
314
-
315
-
316
-
317
-
318
-
319
-
320
-
321
-
322
-
323
-
324
-
325
-
326
-
327
-
328
-
329
-
330
-
331
-
332
-
333
-
334
-
335
-
336
-
337
-
338
-
339
-
340
-
341
-
342
-
343
-
344
-
345
-
346
-
347
-
348
-
349
-
350
-
351
-
352
-
353
-
354
-
355
-
356
-
357
-
358
-
359
-
360
-
361
-
362
-
363
-
364
 |
 |
