Lexmark Monochrome Laser Help Menu Pages - Page 4
Installing optional printer software
 |
View all Lexmark Monochrome Laser manuals
Add to My Manuals
Save this manual to your list of manuals |
Page 4 highlights
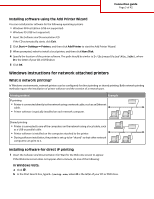
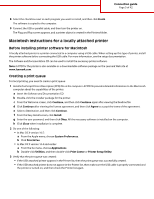
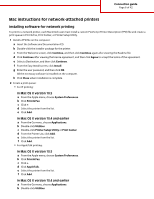
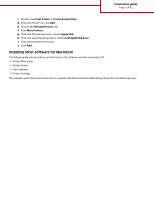
Connection guide Page 4 of 42 In Windows XP and earlier: a Click Start. b Click Run. c Type D:\setup.exe, where D is the letter of your CD or DVD drive. 2 Press Enter. 3 Select Install Printer and Software. 4 Select Suggested, and then click Next. Note: Select Custom instead of Suggested to select the components you want to install. 5 Select Network Attach, and then click Next. 6 Select the printer model you are installing. The printer is automatically discovered on the network, and an IP address is automatically assigned. 7 From the list of discovered printers, select the one you want to print to. Note: If the printer does not appear in the list, click Add Port, and then follow the instructions on the screen. 8 Click Finish to complete the installation. 9 Click Done to exit the installer. Installing optional printer software If you want to use any of the other programs available on the Software and Documentation CD, install them by following the Custom install path: 1 Insert the Software and Documentation CD. Wait for the Welcome screen to appear. If the Welcome screen does not appear after a minute, do one of the following: In Windows Vista: a Click . b In the Start Search box, type D:\setup.exe, where D is the letter of your CD or DVD drive. In Windows XP and earlier: a Click Start. b Click Run. c Type D:\setup.exe, where D is the letter of your CD or DVD drive. 2 Press Enter. 3 Select Install Printer and Software. 4 Select Custom, and then click Next. 5 Select Select Components, and then click Next. 6 Specify whether to install software on the Local computer or on a Remote computer on your network, and then click Next. 7 Click the + boxes under Select Components to view the list of available software.
-
 1
1 -
 2
2 -
 3
3 -
 4
4 -
 5
5 -
 6
6 -
 7
7 -
 8
8 -
 9
9 -
 10
10 -
11
-
12
-
13
-
14
-
15
-
16
-
17
-
18
-
19
-
20
-
21
-
22
-
23
-
24
-
25
-
26
-
27
-
28
-
29
-
30
-
31
-
32
-
33
-
34
-
35
-
36
-
37
-
38
-
39
-
40
-
41
-
42
 |
 |
