Lexmark P700 User's Guide - Page 33
Step 3: Print your poster, Assemble your poster, Print Crop Marks
 |
View all Lexmark P700 manuals
Add to My Manuals
Save this manual to your list of manuals |
Page 33 highlights
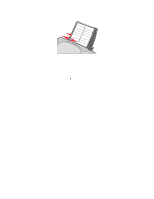
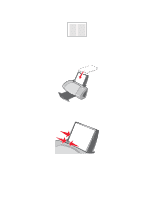
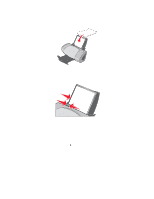
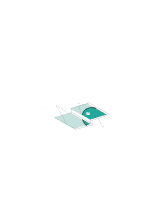
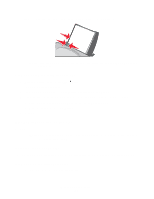
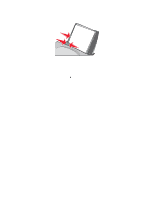
4 Select your poster size: a Select the size of your poster: 2 x 2 (four pages total), 3 x 3 (nine pages total), or 4 x 4 (16 pages total). b Select Print Crop Marks if you want help cutting the edges of your pages. 5 If you need to reprint a selection of pages: a Click Select Pages To Print... The pages that are not going to print have a circle and a bar symbol over the number and are shaded. Select or clear each page by clicking it. b Click OK. 6 Click OK. Step 3: Print your poster Click OK. Assemble your poster 1 On each printed page, trim the white edges from two adjacent sides. For example, trim the white edge from the top and left sides of each page. Printed pages with the white edge trimmed from two adjacent sides Trimmed edges Untrimmed edges 2 Arrange the pages so that every trimmed edge overlaps an untrimmed edge (the white edge). 3 Tape the backs of the pages together. 4 To complete your poster, trim any remaining white edges. Printing a poster 33
-
 1
1 -
2
-
3
-
4
-
5
-
6
-
7
-
8
-
9
-
10
-
11
-
12
-
13
-
14
-
15
-
16
-
17
-
18
-
19
-
20
-
21
-
22
-
23
-
24
-
25
-
26
-
27
-
 28
28 -
 29
29 -
 30
30 -
 31
31 -
 32
32 -
 33
33 -
 34
34 -
 35
35 -
 36
36 -
 37
37 -
 38
38 -
39
-
40
-
41
-
42
-
43
-
44
-
45
-
46
-
47
-
48
-
49
-
50
-
51
-
52
-
53
-
54
-
55
-
56
-
57
-
58
-
59
-
60
-
61
-
62
-
63
-
64
-
65
-
66
-
67
-
68
-
69
-
70
-
71
-
72
-
73
 |
 |