Lexmark P700 User's Guide for Mac OS 9 - Page 27
Step 2: Customize the print settings, Step 3: Print your envelopes
 |
View all Lexmark P700 manuals
Add to My Manuals
Save this manual to your list of manuals |
Page 27 highlights
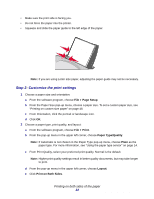
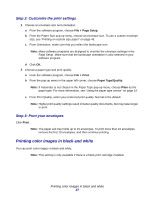
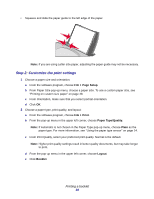
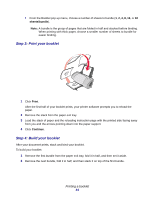
Step 2: Customize the print settings 1 Choose an envelope size and orientation: a From the software program, choose File Page Setup. b From the Paper Size pop-up menu, choose an envelope size. To use a custom envelope size, see "Printing on custom size paper" on page 48. c From Orientation, make sure that you select the landscape icon. Note: Many software programs are designed to override the envelope settings in the Page Setup. Make sure that the landscape orientation is also selected in your software program. d Click OK. 2 Choose a paper type and print quality: a From the software program, choose File Print. b From the pop-up menu in the upper left corner, choose Paper Type/Quality. Note: If Automatic is not chosen in the Paper Type pop-up menu, choose Plain as the paper type. For more information, see "Using the paper type sensor" on page 14. c From Print Quality, select your preferred print quality. Normal is the default. Note: Higher print quality settings result in better quality documents, but may take longer to print. Step 3: Print your envelopes Click Print. Note: The paper exit tray holds up to 10 envelopes. To print more than 10 envelopes, remove the first 10 envelopes, and then continue printing. Printing color images in black and white You can print color images in black and white. Note: This setting is only available if there is a black print cartridge installed. Printing color images in black and white 27
-
 1
1 -
2
-
3
-
4
-
5
-
6
-
7
-
8
-
9
-
10
-
11
-
12
-
13
-
14
-
15
-
16
-
17
-
18
-
19
-
20
-
21
-
 22
22 -
 23
23 -
 24
24 -
 25
25 -
 26
26 -
 27
27 -
 28
28 -
 29
29 -
 30
30 -
 31
31 -
 32
32 -
33
-
34
-
35
-
36
-
37
-
38
-
39
-
40
-
41
-
42
-
43
-
44
-
45
-
46
-
47
-
48
-
49
-
50
-
51
-
52
-
53
-
54
-
55
-
56
-
57
-
58
-
59
-
60
-
61
-
62
-
63
-
64
-
65
-
66
-
67
-
68
-
69
-
70
-
71
-
72
-
73
-
74
-
75
-
76
-
77
-
78
-
79
-
80
-
81
 |
 |
