Lexmark Pinnacle Pro901 Quick Reference - Page 23
Print job does not print or is missing s, Printer is printing blank s, Print, Add Printer - not printing color
 |
View all Lexmark Pinnacle Pro901 manuals
Add to My Manuals
Save this manual to your list of manuals |
Page 23 highlights
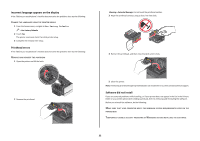
CHECK THE USB CONNECTION 1 Check the USB cable for any obvious damage. If the cable is damaged, then use a new one. 2 Firmly plug the square end of the USB cable into the back of the printer. 3 Firmly plug the rectangular end of the USB cable into the USB port of the computer. The USB port is marked with a USB symbol. Note: If you continue to have problems, then try another USB port on the computer. You may have connected to a defective port. RECONNECT THE PRINTER POWER SUPPLY 1 Turn off the printer, and then unplug the power cord from the wall outlet. 2 Gently remove the power supply from the printer, and then reinsert it. 3 Plug the power cord into the wall outlet, and then turn on the printer. Print job does not print or is missing pages If the "Before you troubleshoot" checklist does not solve the problem, then try one or more of the following: MAKE SURE THE INK CARTRIDGES ARE INSERTED CORRECTLY 1 Turn on the printer, and then open the printer. 2 Make sure the cartridges are inserted correctly. The cartridges should click firmly into the matching color slot of the printhead. 3 Close the printer. SELECT YOUR PRINTER FROM THE PRINT DIALOG BEFORE SENDING THE PRINT JOB (MAC ONLY) 1 With a document open, choose File > Print. 2 From the printer pop-up menu, choose your printer, and then click Print. If your printer does not appear on the Printer list, then choose Add Printer. From the list of printers in the Default tab, select your printer, and then click Add. If your printer does not appear on the list, then try either of the following: • For a USB-connected printer, remove and then reconnect the USB cable. • For a printer that is wirelessly connected, see the Wireless troubleshooting section. MAKE SURE THE PRINT JOB IS NOT PAUSED MAKE SURE YOUR PRINTER IS SET AS THE DEFAULT PRINTER RECONNECT THE PRINTER POWER SUPPLY 1 Turn off the printer. Note: Make sure the printer is not in Power Saver mode. Press and hold off the printer. 2 Pull out the power cord from the power supply. 3 After one minute, reconnect the power cord into the power supply. 4 Turn on the printer. for three seconds to turn REMOVE AND RECONNECT THE USB CABLE CONNECTED TO YOUR PRINTER CHECK THE USB CONNECTION 1 Check the USB cable for any obvious damage. If the cable is damaged, then use a new one. 2 Firmly plug the square end of the USB cable into the back of the printer. 3 Firmly plug the rectangular end of the USB cable into the USB port of the computer. The USB port is marked with . Note: If you continue to have problems, then try another USB port on the computer. You may have connected to a defective port. REMOVE AND REINSTALL THE PRINTER SOFTWARE Printer is printing blank pages Blank pages may be caused by improperly installed ink cartridges. REINSTALL THE INK CARTRIDGES AND DEEP CLEAN AND ALIGN THE PRINTHEAD 1 Reinstall the ink cartridges, see "Replacing ink cartridges" on page 10 for more information. If the cartridges do not seem to fit, make sure the printhead is properly seated, and then try installing the cartridges again. 2 Load plain paper. 3 From the home screen of the printer control panel, navigate to Deep Clean Printhead: > More Options > Deep Clean Printhead A cleaning page prints. 4 Navigate to Align Printer: > More Options > Align Printer. 23
-
 1
1 -
2
-
3
-
4
-
5
-
6
-
7
-
8
-
9
-
10
-
11
-
12
-
13
-
14
-
15
-
16
-
17
-
 18
18 -
 19
19 -
 20
20 -
 21
21 -
 22
22 -
 23
23 -
 24
24 -
 25
25 -
 26
26 -
 27
27
 |
 |
