Lexmark T520 Setup Guide - Page 15
Installing an optional, firmware card - instructions
 |
UPC - 734646620000
View all Lexmark T520 manuals
Add to My Manuals
Save this manual to your list of manuals |
Page 15 highlights
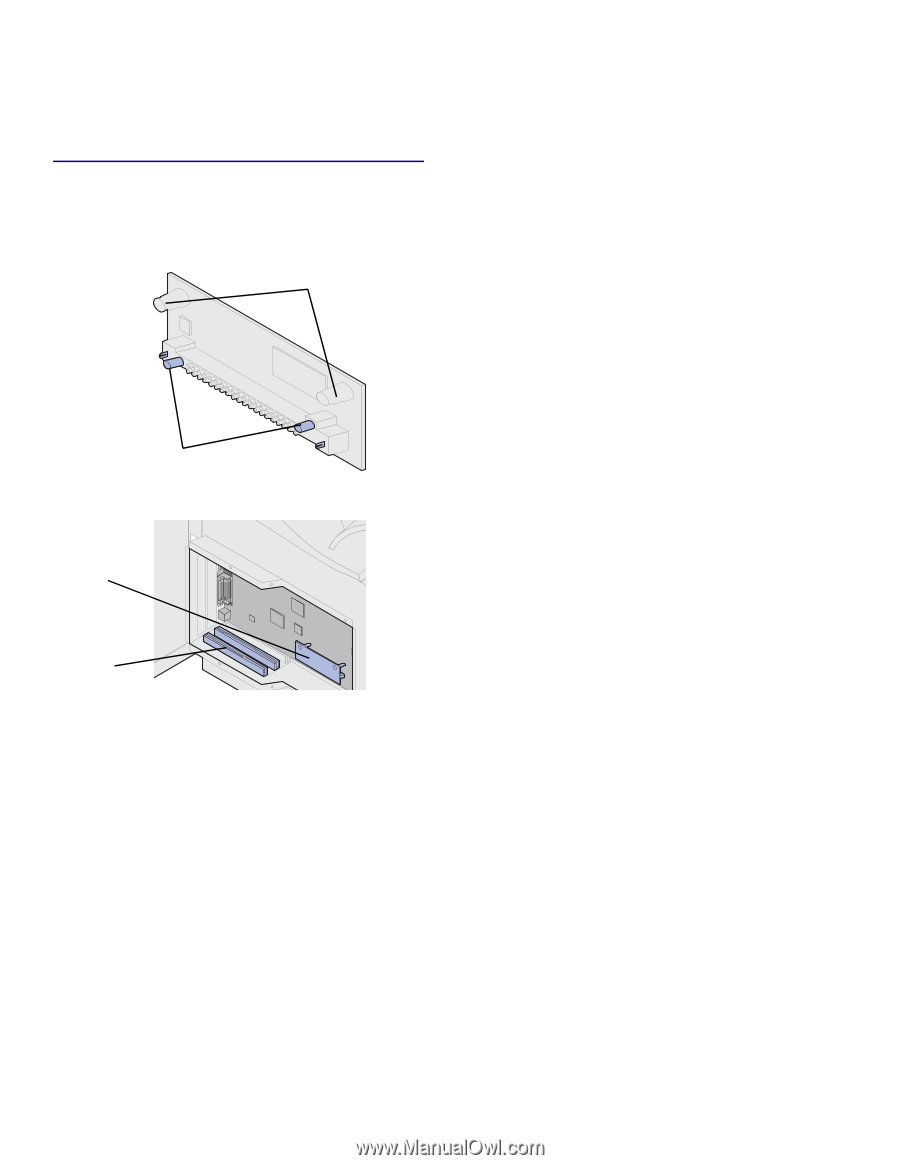
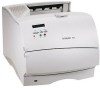
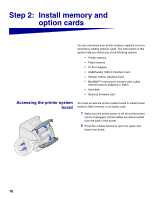
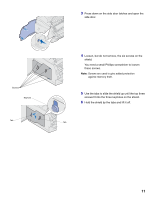
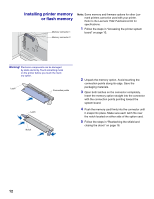
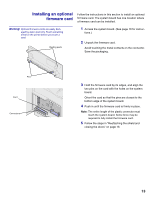
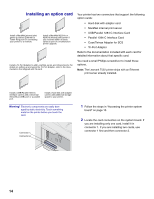
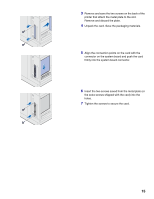
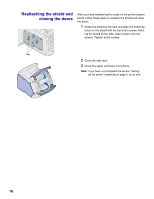
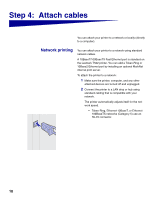
Installing an optional firmware card Follow the instructions in this section to install an optional firmware card. The system board has one location where a firmware card can be installed. Warning! Optional firmware cards are easily damaged by static electricity. Touch something metal on the printer before you touch a card. Resting posts 1 Access the system board. (See page 10 for instruc- tions.) 2 Unpack the firmware card. Avoid touching the metal contacts on the connector. Save the packaging. Pins Card Connectors 3 Hold the firmware card by its edges, and align the two pins on the card with the holes on the system board. Orient the card so that the pins are closest to the bottom edge of the system board. 4 Push in until the firmware card is firmly in place. Note: The entire length of the plastic connector must touch the system board. Some force may be required to fully install the firmware card. 5 Follow the steps in "Reattaching the shield and closing the doors" on page 16. 13
-
 1
1 -
2
-
3
-
4
-
5
-
6
-
7
-
8
-
9
-
 10
10 -
 11
11 -
 12
12 -
 13
13 -
 14
14 -
 15
15 -
 16
16 -
 17
17 -
 18
18 -
 19
19 -
 20
20 -
21
-
22
-
23
-
24
-
25
-
26
-
27
-
28
-
29
-
30
-
31
-
32
 |
 |