Lexmark T632 Quick Reference - Page 8
Accessing jam areas - paper jam
 |
View all Lexmark T632 manuals
Add to My Manuals
Save this manual to your list of manuals |
Page 8 highlights
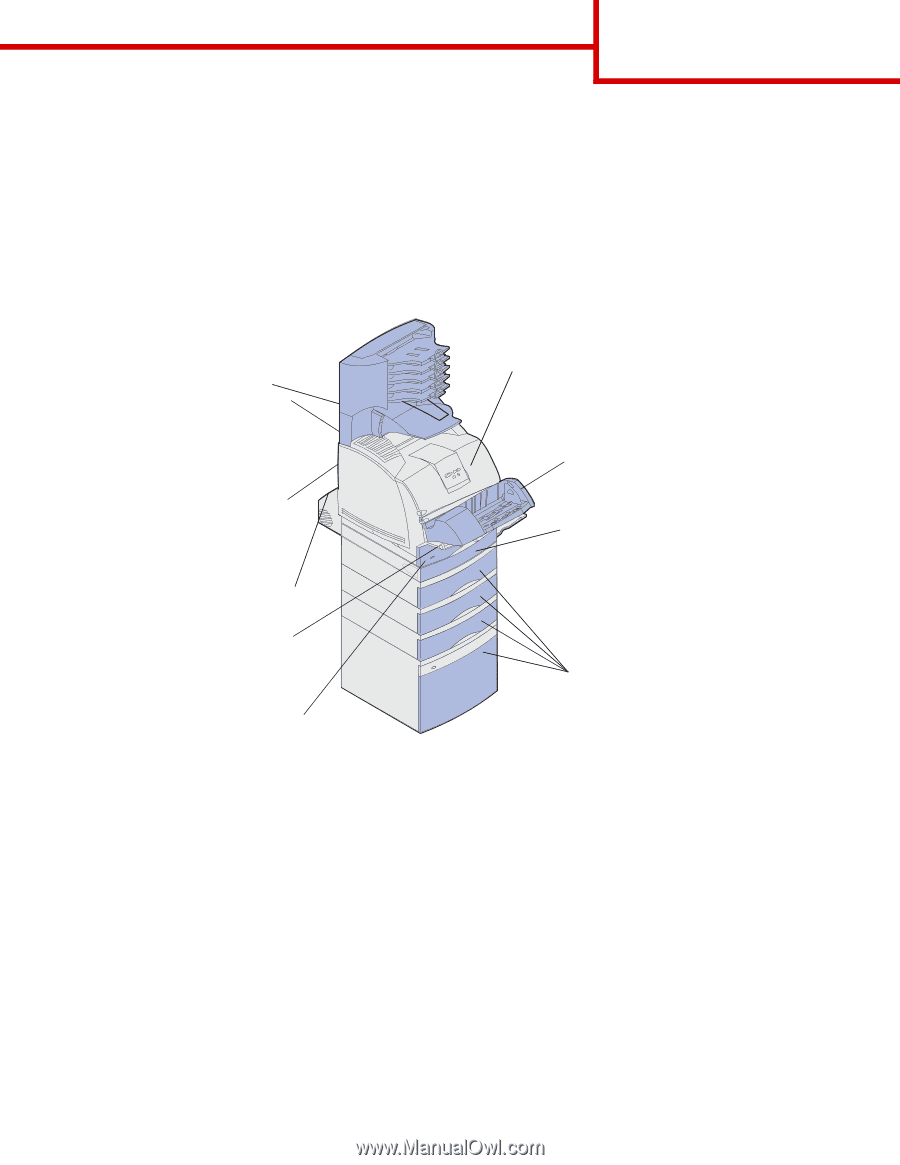
Page 8 of 8 Accessing jam areas You open doors and covers, remove trays, and remove options to access jam areas. The illustration shows the location of sources and possible jam areas. Be sure to remove any print jobs from the standard bin before opening the upper front door. CAUTION: Floor-mounted configurations require additional furniture. You must use either a printer stand or printer base if you are using a 2000-sheet drawer, a duplex unit and an input option, or more than one input option. If you purchased a multifunction printer (MFP) that scans, copies, and faxes, you may need additional furniture. 27x Paper Jam 28x Paper Jam Rear door of: 5-bin mailbox Output expander (high-capacity output stacker and finisher not shown) 202 Paper Jam Printer rear door 23x Paper Jam Duplex rear door 250 Paper Jam Lower front door (down when envelope feeder is installed) 24x Paper Jam Standard input tray 200 Paper Jam 201 Paper Jam Upper front door 260 Paper Jam Envelope feeder 23x Paper Jam Duplex front access cover (remove standard input tray) 24x Paper Jam Paper trays Warning: Do not attempt to clear any jam using tools or instruments. This may permanently damage the printer.
-
 1
1 -
2
-
 3
3 -
 4
4 -
 5
5 -
 6
6 -
 7
7 -
 8
8
 |
 |