Lexmark T642 Help Menu Pages - Page 2
Installing printer and software for network printing using Windows - driver windows 10
 |
UPC - 734646722001
View all Lexmark T642 manuals
Add to My Manuals
Save this manual to your list of manuals |
Page 2 highlights
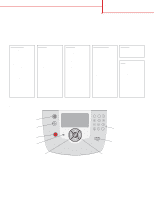
Connection guide Page 2 of 2 Installing printer and software for network printing using Windows 1 Make sure the printer is turned off and unplugged from the wall outlet. 2 Connect the printer to a LAN drop or hub using an Ethernet cable that is compatible with your network. 3 Plug one end of the printer power cord into the socket at the back of the printer and the other end into a properly grounded outlet. 4 Turn on the printer. Note: After the printer completes its internal tests, the Ready message indicates that the printer is ready to receive jobs. If you see a message other than Ready on the display, see the publications CD for instructions on clearing the message. 5 Go to a computer on the same network, and launch the drivers CD that shipped with the printer. 6 Click Install Printer and Software. 7 Click Agree to accept the license agreement. 8 Select Suggested, and then click Next. 9 Select Network Attach, and then click Next. 10 Select your printer model from the list, and then click Next. 11 Select your printer port from the list, and then click Finish to complete the installation. A printer object is created in the Printers folder on the computer. If your printer port is not listed, click Add Port. Enter the information requested to create a new printer port. Select the option to create an Enhanced TCP/IP Network Port. Other port options will not give you full functionality. 12 Send a test page to print. Other network cabling options The following may also be available as network options for the printer. More information is available in the User's Guide on the publications CD that shipped with the printer. • Fiber optic internal print servers • Ethernet internal print servers • Wireless internal print servers • Ethernet external print servers • Wireless external print servers Detailed instructions for installation are shipped with the product. Network printing using Mac, UNIX/Linux, or NetWare For information about this support, see the User's Guide on the publications CD that shipped with the printer. You can find some additional information on the drivers CD that shipped with the printer. Launch the drivers CD, and click View Documentation.
-
 1
1 -
 2
2 -
 3
3 -
 4
4 -
 5
5 -
 6
6 -
 7
7 -
 8
8 -
9
-
10
-
11
-
12
-
13
-
14
-
15
-
16
-
17
-
18
-
19
-
20
-
21
-
22
 |
 |
