Lexmark T650 Quick Reference - Page 3
Loading the multipurpose, feeder
 |
View all Lexmark T650 manuals
Add to My Manuals
Save this manual to your list of manuals |
Page 3 highlights
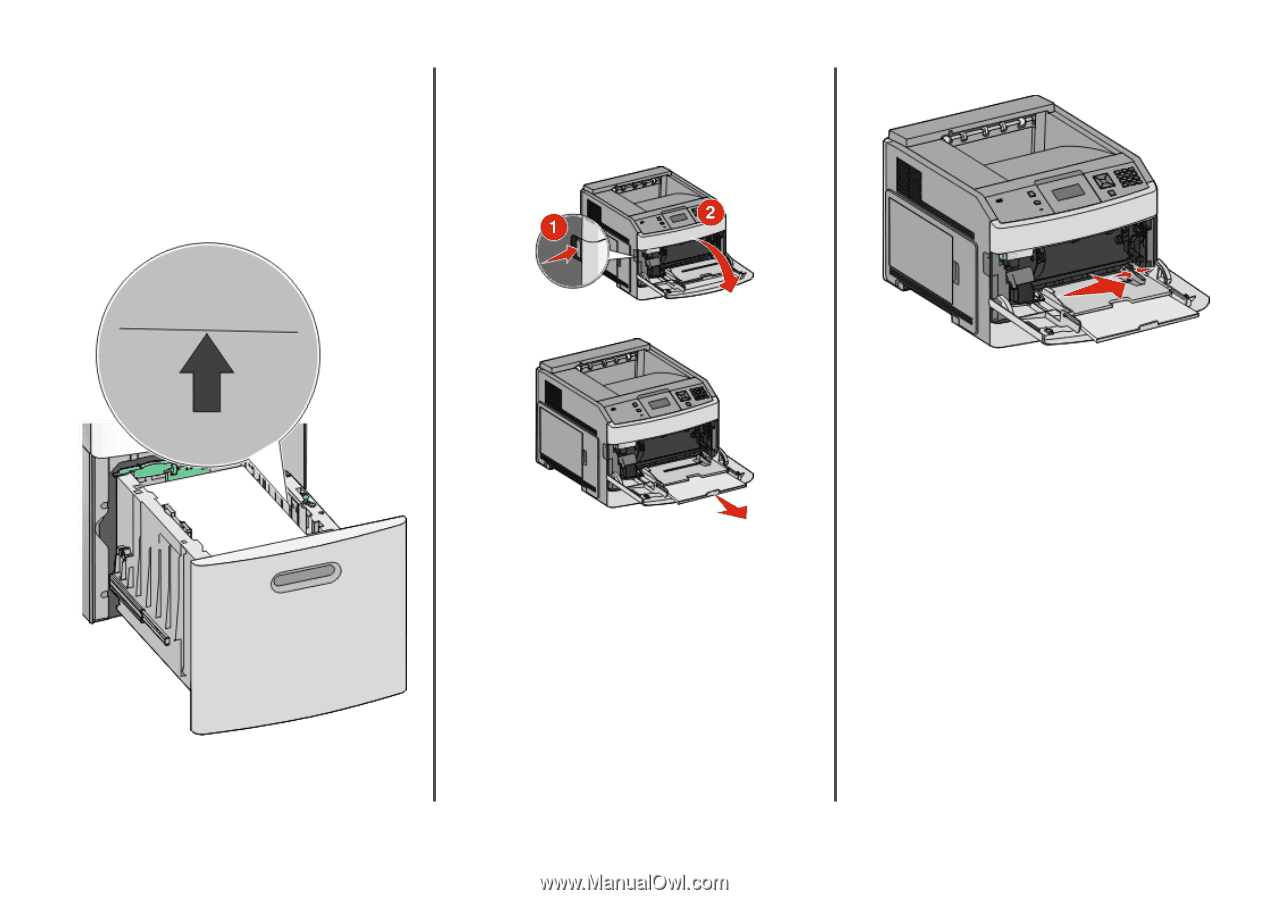
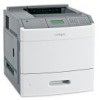
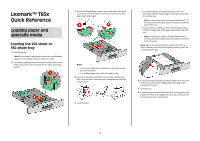
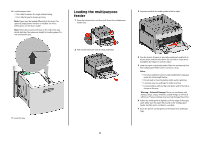
6 Load the paper stack: • Print side facedown for single-sided printing • Print side faceup for duplex printing Note: Paper must be loaded differently in the trays if an optional StapleSmart II Finisher is installed. For more information, see the User's Guide/ Note: Notice the maximum fill line on the side of the tray which indicates the maximum height for loading paper. Do not overload the tray. Loading the multipurpose feeder 1 Press the release latch, and then pull down the multipurpose feeder door. 3 Squeeze and slide the width guide to the far right. 7 Insert the tray. 2 Pull out the extension until it is fully extended. 4 Flex the sheets of paper or specialty media back and forth to loosen them, and then fan them. Do not fold or crease them. Straighten the edges on a level surface. 5 Load the paper or specialty media. Slide the stack gently into the multipurpose feeder until it comes to a stop. Notes: • Do not exceed the maximum stack height by forcing paper under the stack height limiter. • Do not load or close the printer while a job is printing. • Load only one size and type of media at a time. • Load envelopes with the flap side down and to the left as shown on the tray. Warning-Potential Damage: Never use envelopes with stamps, clasps, snaps, windows, coated linings, or self-stick adhesives. These envelopes may severely damage the printer. 6 Adjust the width guide to lightly touch the edge of the paper stack. Make sure the paper fits loosely in the multipurpose feeder, lies flat, and is not bent or wrinkled. 7 From the printer control panel, set the Paper Size and Paper Type. 3
-
 1
1 -
 2
2 -
 3
3 -
 4
4 -
 5
5 -
 6
6
 |
 |