Lexmark X2310 User's Guide - Page 19
Using Lexmark Fast Pics to print photos, Open Lexmark Fast Pics. For more information, see Using
 |
View all Lexmark X2310 manuals
Add to My Manuals
Save this manual to your list of manuals |
Page 19 highlights
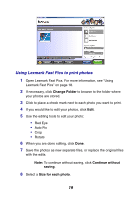
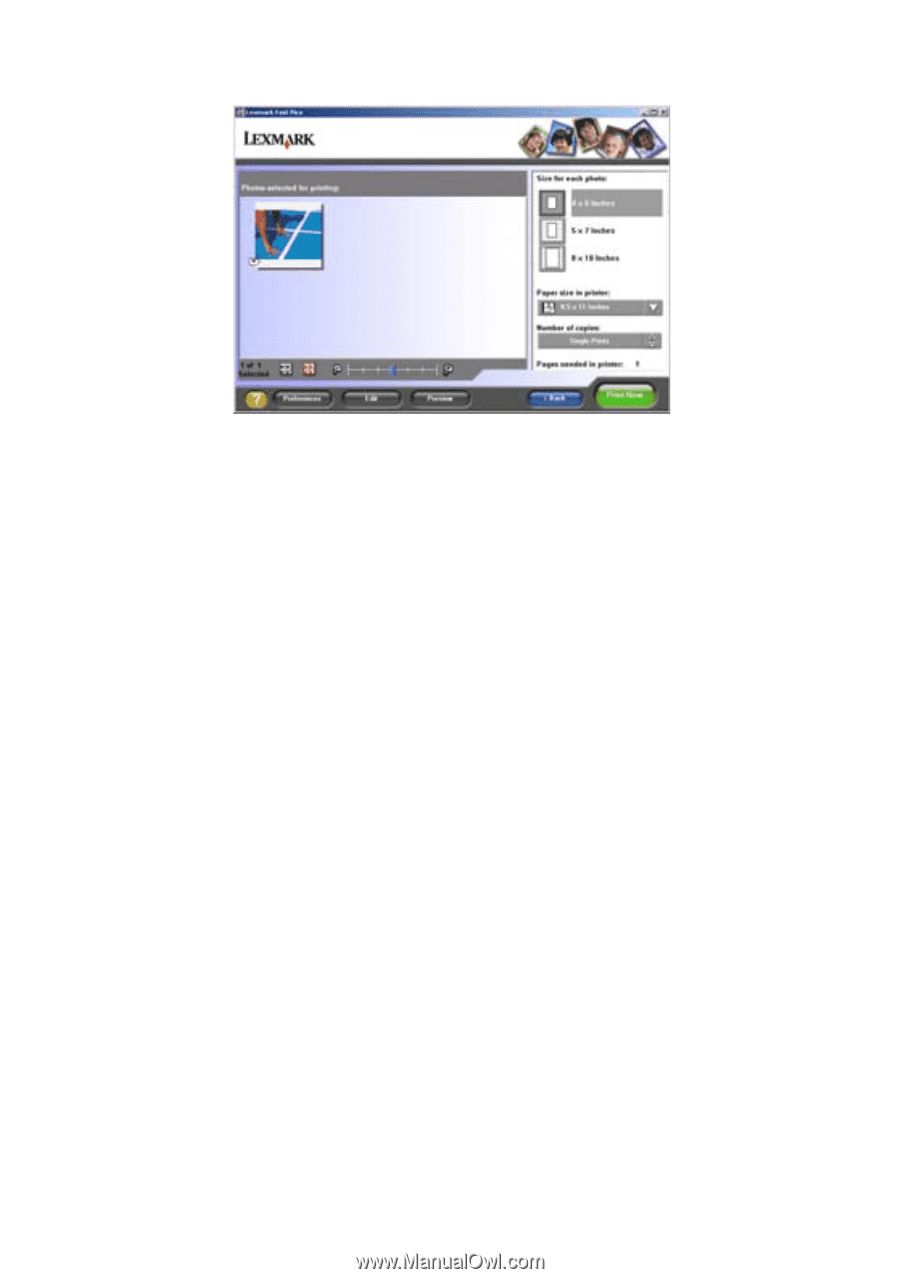
Using Lexmark Fast Pics to print photos 1 Open Lexmark Fast Pics. For more information, see "Using Lexmark Fast Pics" on page 18. 2 If necessary, click Change Folder to browse to the folder where your photos are stored. 3 Click to place a check mark next to each photo you want to print. 4 If you would like to edit your photos, click Edit. 5 Use the editing tools to edit your photo: • Red Eye • Auto Fix • Crop • Rotate 6 When you are done editing, click Done. 7 Save the photos as new separate files, or replace the original files with the edits. Note: To continue without saving, click Continue without saving. 8 Select a Size for each photo. 19
-
 1
1 -
2
-
3
-
4
-
5
-
6
-
7
-
8
-
9
-
10
-
11
-
12
-
13
-
 14
14 -
 15
15 -
 16
16 -
 17
17 -
 18
18 -
 19
19 -
 20
20 -
 21
21 -
 22
22 -
 23
23 -
 24
24 -
25
-
26
-
27
-
28
-
29
-
30
-
31
-
32
-
33
-
34
-
35
-
36
-
37
-
38
-
39
-
40
-
41
-
42
-
43
-
44
-
45
-
46
-
47
-
48
-
49
-
50
-
51
-
52
-
53
-
54
-
55
-
56
-
57
-
58
-
59
-
60
-
61
-
62
-
63
-
64
-
65
-
66
-
67
-
68
-
69
-
70
-
71
-
72
-
73
-
74
-
75
-
76
-
77
 |
 |
19
Using Lexmark Fast Pics to print photos
1
Open Lexmark Fast Pics. For more information, see “Using
Lexmark Fast Pics” on page 18.
2
If necessary, click
Change Folder
to browse to the folder where
your photos are stored.
3
Click to place a check mark next to each photo you want to print.
4
If you would like to edit your photos, click
Edit
.
5
Use the editing tools to edit your photo:
•
Red Eye
•
Auto Fix
•
Crop
•
Rotate
6
When you are done editing, click
Done
.
7
Save the photos as new separate files, or replace the original files
with the edits.
Note:
To continue without saving, click
Continue without
saving
.
8
Select a
Size for each photo
.