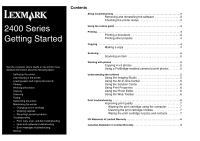
Lexmark X2480dsg Getting Started - Page 5
Scanning, Working with photos, Understanding the, software
 |
View all Lexmark X2480dsg manuals
Add to My Manuals
Save this manual to your list of manuals |
Page 5 highlights
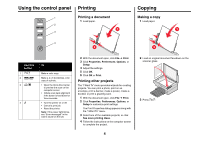
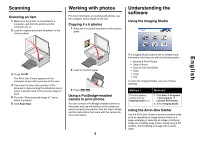
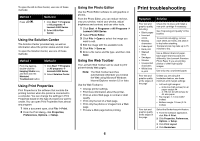
Scanning Scanning an item 1 Make sure the printer is connected to a computer, and both the printer and the computer are on. 2 Load an original document facedown on the scanner glass. Working with photos For more information on working with photos, see the complete User's Guide on the CD. Copying 4 x 6 photos 1 Place the 4 x 6 photo facedown on the scanner glass. Understanding the software Using the Imaging Studio English 3 Press . The All-In-One Center appears on the computer screen with a preview of the scan. 4 If you want to scan only a portion of the document, click and drag the dotted line box to select a specific area of the preview image to scan. 5 From the "Send scanned image to:" menu, select a program. 6 Click Scan Now. 2 Load 4 x 6 photo paper. 3 Press . Using a PictBridge-enabled camera to print photos You can connect a PictBridge-enabled camera to the printer and use the buttons on the camera to select and print your photos. See the User's Guide and the instructions that came with the camera for more information. 5 The Imaging Studio buttons link to software and information that help you with the following tasks: • Browse & Print Photos • Share Photos • Scan & Edit Text (OCR) • Scan • Copy • Fax To open the Imaging Studio, use one of these methods: Method 1 From the desktop, double-click the Imaging Studio icon. Method 2 1 Click Start Æ Programs or All programs Æ Lexmark 2400 Series. 2 Select Imaging Studio. Using the All-In-One Center Use the All-In-One Center to perform creative tasks such as repeating an image several times on a page, enlarging or reducing an image, printing an image as a multiple-page poster, faxing using a PC modem, and modifying an image with a photo editor.
-
 1
1 -
 2
2 -
 3
3 -
 4
4 -
 5
5 -
 6
6 -
 7
7 -
 8
8 -
 9
9
 |
 |
