Lexmark X363 Network Scan Drivers - Page 6
Lexmark X363 Manual
 |
View all Lexmark X363 manuals
Add to My Manuals
Save this manual to your list of manuals |
Page 6 highlights
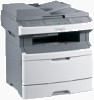
2 Double-click the package file or open a terminal window, and then type rpm -ivh network-scan-linux-glibc2-x86.rpm. Installing on Debian GNU/Linux or Ubuntu Linux 1 Download the driver: a Go to www.lexmark.com. b Select Driver Finder from the Drivers & Downloads drop-down list. c Select the Linux distribution running on your computer. d Select network-scan-linux-glibc2-x86.deb, and then download it to your computer. 2 Double-click the package file or open a terminal window, and then type dpkg -i network-scan-linux-glibc2-x86.deb. Checking if the network scan driver is installed Make sure the network scan driver is installed and added to the dll.conf file and the device file is present. To list the currently available devices, open a terminal window, and then type scanimage -L. Press Enter. Once the device is found, a message indicating that your device is found is displayed on your computer. Scanning using a network printer 1 To use the network scan driver, open a SANE-compliant application such as XSane or scanadf. 2 Select the network printer and settings for the scan. 3 Place your document in the Automatic Document Feeder (ADF) or on the scanner glass. 4 From the printer control panel, select your profile. For more information, see the printer User's Guide. Removing the network scan driver 1 Do the following, depending on your operating system: In Fedora, Linpus Linux, SUSE Linux, Linux openSUSE, Red Hat Enterprise Linux, or Red Flag Linux Open a terminal window, and then type rpm -e lexmark-network-scan. Press Enter. In Debian GNU/Linux or Linspire Linux Open a terminal window, and then type dpkg -r lexmark-network-scan. Press Enter. 2 Remove the lexmark_nscan entry from the /etc/sane.d/dll.conf file. Introduction to the network scan driver 6
-
 1
1 -
 2
2 -
 3
3 -
 4
4 -
 5
5 -
 6
6 -
 7
7 -
 8
8 -
 9
9 -
 10
10 -
 11
11 -
 12
12 -
13
-
14
-
15
-
16
-
17
-
18
-
19
-
20
-
21
 |
 |