Lexmark X546 Maintenance Manual - Page 11
Warning-Potential Damage, Gently shake the black developer unit side to side.
 |
View all Lexmark X546 manuals
Add to My Manuals
Save this manual to your list of manuals |
Page 11 highlights
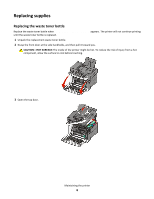
6 Lift the blue levers on the imaging kit, and then pull it toward you. 7 Press down on the blue levers, grasp the green handles on the sides, and then pull the imaging kit out. Warning-Potential Damage: Do not touch the underside of the imaging kit. This could damage the imaging kit. 8 Remove the yellow, cyan, and magenta developer units. 9 Unpack the replacement black imaging kit. Leave the packaging on the black developer unit. 10 Gently shake the black developer unit side to side. Maintaining the printer 11
-
 1
1 -
2
-
3
-
4
-
5
-
 6
6 -
 7
7 -
 8
8 -
 9
9 -
 10
10 -
 11
11 -
 12
12 -
 13
13 -
 14
14 -
 15
15 -
 16
16 -
17
-
18
-
19
-
20
-
21
-
22
-
23
-
24
-
25
-
26
-
27
-
28
-
29
-
30
 |
 |

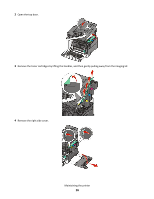
6
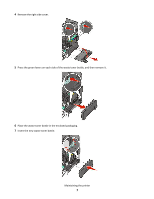
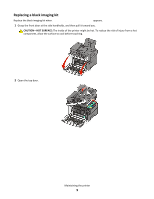
Lift the blue levers on the imaging kit, and then pull it toward you.
7
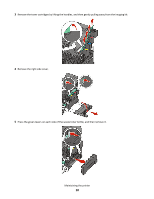
Press down on the blue levers, grasp the green handles on the sides, and then pull the imaging kit out.
Warning—Potential Damage:
Do not touch the underside of the imaging kit. This could damage the imaging kit.
8
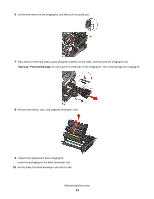
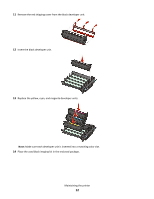
Remove the yellow, cyan, and magenta developer units.
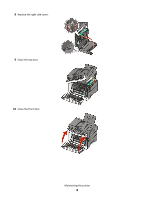
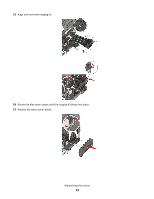
9
Unpack the replacement black imaging kit.
Leave the packaging on the black developer unit.
10
Gently shake the black developer unit side to side.
Maintaining the printer
11