Lexmark X5470 Setup Solutions - Page 24
Cannot print from digital camera using PictBridge, Resetting to factory default settings - driver download
 |
View all Lexmark X5470 manuals
Add to My Manuals
Save this manual to your list of manuals |
Page 24 highlights
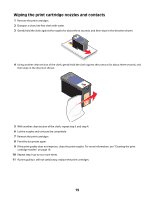
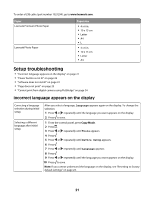
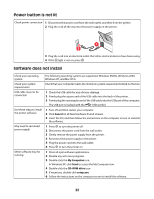
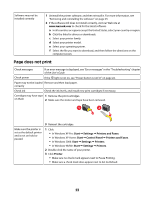
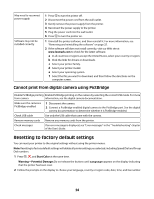
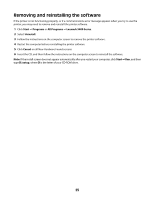
May need to reconnect power supply Software may not be installed correctly 1 Press to turn the printer off. 2 Disconnect the power cord from the wall outlet. 3 Gently remove the power supply from the printer. 4 Reconnect the power supply to the printer. 5 Plug the power cord into the wall outlet. 6 Press to turn the printer on. 1 Uninstall the printer software, and then reinstall it. For more information, see "Removing and reinstalling the software" on page 25. 2 If the software still does not install correctly, visit our Web site at www.lexmark.com to check for the latest software. a In all countries or regions except the United States, select your country or region. b Click the links for drivers or downloads. c Select your printer family. d Select your printer model. e Select your operating system. f Select the file you want to download, and then follow the directions on the computer screen. Cannot print from digital camera using PictBridge Enable PictBridge printing Enable PictBridge printing on the camera by selecting the correct USB mode. For more from camera information, see the digital camera documentation. Make sure the camera is PictBridge-enabled 1 Disconnect the camera. 2 Connect a PictBridge-enabled digital camera to the PictBridge port. See the digital camera documentation to determine whether it is PictBridge-enabled. Check USB cable Use only the USB cable that came with the camera. Remove memory cards Remove any memory cards from the printer. Check messages If an error message is displayed, see "Error messages" in the "Troubleshooting" chapter of the User's Guide. Resetting to factory default settings You can reset your printer to the original settings without using the printer menus. Note: Resetting to factory default settings will delete all printer settings you selected, including Speed Dial and Group Dial numbers. 1 Press , , and Start Color at the same time. Warning-Potential Damage: Do not release the buttons until Language appears on the display indicating that the printer has been reset. 2 Follow the prompts on the display to choose your language, country or region code, date, time, and fax number. 24
-
 1
1 -
2
-
3
-
4
-
5
-
6
-
7
-
8
-
9
-
10
-
11
-
12
-
13
-
14
-
15
-
16
-
17
-
18
-
 19
19 -
 20
20 -
 21
21 -
 22
22 -
 23
23 -
 24
24 -
 25
25
 |
 |
